How To Fix a Massage Gun Battery Release Latch Breaking?
Your massage gun stops working, and you find the battery release latch snapped in half. It’s frustrating, right? You rely on this tool for muscle recovery, and now it feels useless.
Don’t worry. This problem happens more often than you think. Many massage gun owners face this exact issue after months of regular use.
The good news is that you don’t need to throw away your device. In most cases, you can fix this yourself at home. All it takes is some patience and the right steps.
In a Nutshell
- Check for loose screws first. Sometimes the latch looks broken, but a loose screw is the real problem. This simple check can save you time.
- Look for hidden plugs. Most massage guns hide their screws under small oval or soft plastic plugs. You need to pry these out gently to find the fasteners underneath.
- Opening the housing is required. There’s no way around this step. You must remove the hidden screws to get inside the device and reach the battery.
- You have two main repair paths. You can either replace the battery pack entirely or rewire the existing battery to connect directly to an adapter.
- Li-ion batteries need proper chargers. If your device won’t charge after repair, check your connections first. Then make sure you’re using a dedicated charger made for lithium ion cells.
- Full latch repair is rare. In most cases, fixing the latch alone isn’t possible. You’ll likely need to replace the battery or housing instead.
Why Massage Gun Battery Release Latches Break
Massage gun battery release latches break for several clear reasons. Understanding these causes helps you prevent future damage and decide on the best repair approach.
Repeated stress from constant use is the primary culprit. Every time you press the latch to remove the battery, you apply force to a small plastic component. Over months of regular use, this plastic fatigues and eventually cracks or snaps completely.
Manufacturing defects play a role too. Some devices leave the factory with weak latches. The plastic may be too thin, poorly molded, or made from lower quality material. This means your latch could fail much sooner than expected.
Improper removal technique accelerates latch failure. If you yank the battery out with excessive force or at awkward angles, you put uneven pressure on the latch. This causes it to break faster than normal use would.
Temperature changes weaken plastic components. When your massage gun sits in hot cars or cold storage, the plastic expands and contracts. This constant shifting makes the latch brittle and prone to breaking.
Battery swelling can also damage the latch. Lithium ion batteries sometimes expand slightly as they age. This internal pressure pushes against the housing and puts strain on the release mechanism.
Accidental drops or impacts cause immediate latch failure. If your massage gun hits a hard surface, the battery compartment absorbs that shock. The latch takes the brunt of this force and snaps.
The good news is that most latches don’t need standalone repair. Instead, you’ll access the internal battery and either replace it or rewire it to an external adapter. This approach bypasses the broken latch entirely and restores your device to working order.
Tools and Materials You’ll Need Before Starting
Before you start taking apart your massage gun, gather the right tools and materials. Having everything ready prevents frustration and keeps you organized throughout the repair process.
You’ll need a screwdriver set with multiple head sizes. Massage guns use different screw types, so having Phillips, flathead, and sometimes hex options ensures you can open the housing. A small plastic pry tool helps you remove those hidden oval plugs without scratching your device. Metal tools can damage the plastic exterior.
Grab a clean workspace with good lighting. A small container or tray holds screws so you don’t lose them during disassembly. This sounds simple, but lost screws create major headaches when reassembling.
If you’re replacing the battery, you need a replacement battery pack compatible with your device model. Check your manual first to identify the exact specifications. Tweezers or needle nose pliers help you disconnect delicate wiring inside the housing without damaging connectors.
Have electrical tape on hand for securing wires during reassembly. A multimeter is helpful if you plan to test connections and verify power flow after repairs. This tool catches wiring issues before you fully close everything back up.
Keep a cloth or paper towels nearby for cleaning dust and debris inside the housing. Dust buildup sometimes causes charging problems, so a quick clean helps.
Finally, grab your device manual if you still have it. The manual shows screw locations and internal layout, which saves time and reduces mistakes. If you don’t have the physical manual, most manufacturers post digital versions online.
Step-by-Step: Accessing the Hidden Screws and Housing
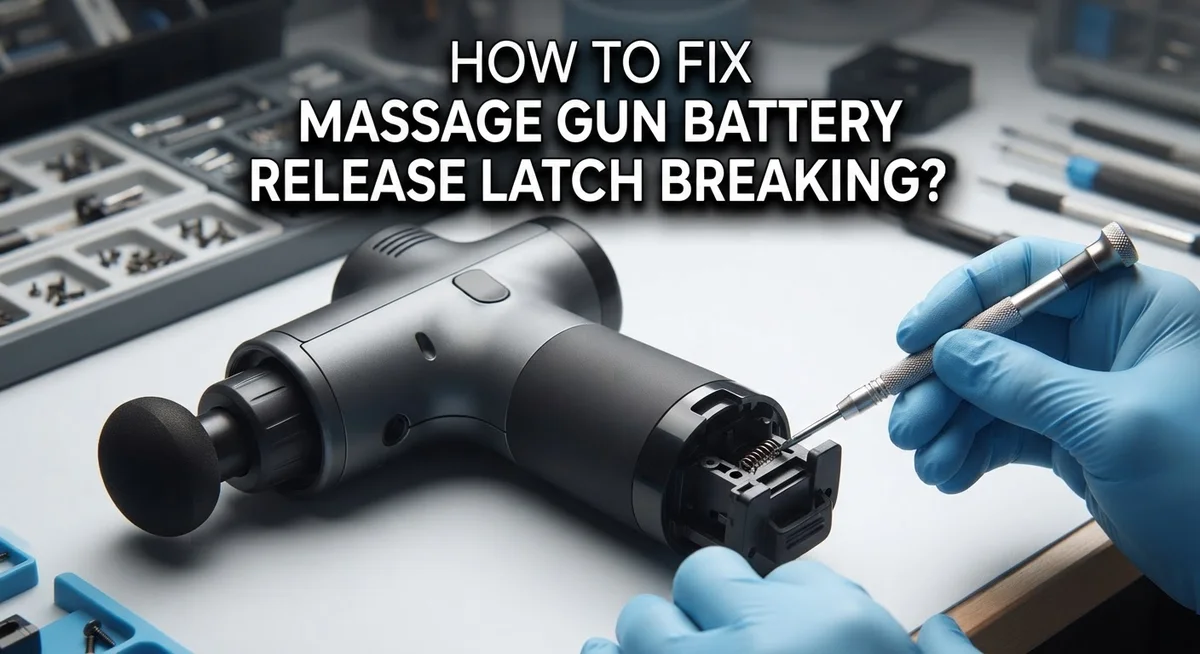
Finding the hidden screws is your first real challenge. Most massage guns deliberately conceal their fasteners under soft plastic plugs or oval covers. These plugs sit flush against the device exterior, making them easy to miss if you don’t know where to look.
Start by examining the entire outer surface of your massage gun. Run your fingers along seams and edges. You’re looking for small, slightly raised areas that feel different from the smooth casing around them. These soft plugs often match the device color, so they blend in completely.
Once you spot a plug, use a flat tool like a plastic spoon or old credit card to gently pry it outward. Don’t use sharp metal objects, as these can scratch or damage the casing. Work slowly and let the plug come free naturally. You’ll usually find one to three hidden screws underneath each plug.
Document everything as you go. Take photos of screw locations and sizes before removal. This prevents confusion during reassembly.
Remove the screws using the correct screwdriver head. Stripped screw heads make reassembly difficult, so apply steady pressure without forcing. Place each screw in a small container so nothing gets lost.
With screws removed, the housing halves should separate. You may need to gently wiggle or apply light pressure along the seams. Avoid prying hard at corners, as this can crack the plastic.
Inside, you’ll see the battery pack and internal wiring. The battery release latch connects directly to the housing or battery compartment. This is where your actual repair work begins. Take another photo showing the internal layout before proceeding further.
Step-by-Step: Repairing or Replacing the Battery Connection
Once you’ve accessed the internal housing, you’re ready to work with the battery connection. This is where most repairs actually happen, since the latch itself rarely survives intact.
Start by examining the current battery pack. Look at how the wires connect to the terminals. Take a clear photo before disconnecting anything. This photo becomes your reassembly guide. Gently disconnect the wires from the battery terminals by unsoldering or unclipping them, depending on your device design.
You now have two main options. Option one is battery replacement. Install a new battery pack that matches your device specifications. Reconnect the wires to the new pack’s terminals in the exact same configuration. Make sure connections are secure and insulated with electrical tape to prevent short circuits.
Option two is external adapter connection. Instead of relying on the internal battery and broken latch, you can rewire the device to accept power from an external adapter. This eliminates the battery release latch problem entirely. Route the adapter cable through the housing carefully to avoid pinching wires during reassembly.
Before closing everything up, test your work. Power on the device and confirm the massage head operates smoothly. Check that vibration intensity feels normal.
Pay close attention to wire routing. Wires should never touch moving parts or sharp edges inside the housing. Use small clips or tape to secure them in place.
Once testing passes, reassemble the housing carefully. Reinstall all screws in their original locations. Replace the soft plugs over the screw access points. Your massage gun should now work without latch interference.
Reassembling Your Massage Gun and Testing the Fix
Now that you’ve repaired or replaced your battery connection, it’s time to put everything back together. Start by carefully positioning the battery pack back into its original location inside the housing. Make sure all wires are tucked away and not pinched between moving parts.
Align the two housing halves slowly and deliberately. Check that the internal components sit flush before pressing the halves together. This prevents wires from getting caught during reassembly.
Reinsert all screws in their original locations. Use the correct screwdriver head to avoid stripping the screw heads. Tighten each screw firmly but don’t over-tighten, as this can crack the plastic housing.
Once the housing is sealed, press the soft plugs back into their oval slots. They should sit flush with the exterior surface when properly installed.
Now comes the critical testing phase. Plug your massage gun into a charger and wait to see if it charges properly. The indicator light should show charging activity within a few seconds.
Let the device charge for at least 30 minutes before testing. Then power it on and check that the motor runs smoothly without stuttering or unusual sounds.
Press the power button several times to ensure consistent operation. The vibration pattern should feel normal and steady throughout the device.
If everything works correctly, congratulations! Your repair is successful. If the device still won’t charge or power on, you may need to revisit the internal wiring connections. Double-check that all wire terminals make solid contact with the battery terminals. Sometimes a simple reseating of connections solves remaining issues.
Helpful Tips for a Smooth Repair Process
Before you start any repair work, gather the right tools and materials. You’ll need a small screwdriver set with multiple head types, a plastic prying tool, and a flashlight or headlamp. Having good lighting makes a huge difference when working inside tight spaces.
Check your charger type before beginning. Lithium ion batteries need specific chargers to work safely. Using the wrong charger can damage your battery or create safety hazards. Look at your current charger’s specifications and match them to what your device requires.
Clear a clean, well lit workspace. Lay out a soft cloth or towel to protect your massage gun from scratches. This also prevents small screws from rolling away. Keep a small container nearby to organize screws by size and location.
Take photos at each step of your disassembly process. Your phone camera becomes invaluable when reassembling later. Photos help you remember wire positions and screw locations exactly.
Read your device manual if available. Manuals often show internal layouts and identify hidden screw locations. This saves you time searching for access points.
Prepare for two possible outcomes. You might replace the battery pack entirely, or you might rewire to an external adapter. Have both options mentally ready before opening your device. This prevents frustration if your first choice doesn’t work out.
Never rush the process. Take breaks between steps. Working slowly reduces mistakes and prevents accidentally damaging internal components. Patience during repair work means fewer problems later.
Finally, ensure you have adequate workspace to keep parts organized. A small tray works great for holding screws and small components separately.
Common Mistakes to Avoid When Fixing the Latch
Many people damage their massage gun further while attempting latch repairs. Understanding these common mistakes helps you avoid costly errors.
Forcing the housing open without locating hidden screws is the biggest mistake. Most massage guns have soft oval plugs covering fasteners. These plugs blend into the device exterior. You must pry them out gently before attempting to separate the housing. Rushing this step can crack the plastic or strip screw heads.
Using the wrong screwdriver type damages internal components. Massage guns typically use Phillips or flathead screws. Mismatched screwdrivers slip inside the screw head and strip the grooves. Once stripped, you cannot remove the screw without drilling. Always test your screwdriver fit before applying pressure.
Ignoring battery polarity during reassembly creates serious problems. Li-ion batteries have positive and negative terminals. Reversing these connections can cause electrical failure or battery damage. Take clear photos before disconnecting any wires. Label each connection with tape if needed.
Attempting repair without a clean workspace leads to lost screws and components. Small parts disappear easily on cluttered surfaces. Work on a flat, well-lit table. Use small containers to organize screws and parts.
Skipping the testing phase before reassembly wastes your time. Always test battery connections before closing the housing. Power on the device and check for normal operation. Listen for unusual sounds or vibrations.
Applying excessive force to delicate internal wiring breaks connections permanently. Handle all wires gently. Never pull or twist wires at sharp angles. Support wires with your other hand while making connections.
These mistakes are preventable with patience and attention to detail.
Troubleshooting Charging and Power Issues After Repair
After you repair or replace your massage gun’s battery system, charging and power issues can still occur. The most common problem is a device that won’t hold a charge. This usually means internal connections need checking.
Start by inspecting all wire connections inside the housing. Look for loose terminals where the battery connects to the circuit board. A wire that slipped during reassembly will prevent power from flowing correctly. Gently reseat any loose connections by pressing them firmly into place.
Next, test your charger itself. Connect it to the device and listen for a charging indicator sound or light. If nothing happens, your charger may be incompatible with the battery type you installed. Li-ion batteries require specific charger types that match their voltage output.
If the device charges but loses power quickly, the battery itself may be defective. New batteries sometimes arrive with manufacturing issues. Try charging for a full cycle of at least two hours before concluding the battery is bad.
Check the power button responsiveness too. Press it multiple times in quick succession. A button that feels stuck or unresponsive suggests internal debris or misalignment during reassembly.
If charging works but the motor won’t start, the issue lies in your power delivery system. Verify that all screws holding internal components are tight. Vibration from the motor can loosen connections over time.
Document everything you observe. Take notes about when problems occur and under what conditions. This information helps you identify whether the issue stems from your repair work or from a defective replacement part. Patience during testing prevents unnecessary repeat disassembly.
Final Thoughts
Fixing a broken battery release latch is not as scary as it looks. Most massage guns hide their screws under small plugs. Once you find them, the rest of the repair becomes simple.
Patience matters more than skill in this process. Take your time to locate hidden screws before you force anything open. Rushing causes more damage than the original latch problem.
Remember that battery replacement often solves the issue better than trying to fix the latch alone. Many devices allow you to rewire the battery directly to an adapter. This gives you a working massage gun even without a functioning latch.
Always use the correct charger for your Li-ion battery. The wrong charger damages the battery and creates new problems. This small detail makes a big difference in your repair outcome.
Testing your device after every step helps you catch mistakes early. Don’t wait until full reassembly to check your work. Small checks save you from bigger headaches later.
If you feel unsure at any point, stop and review your device manual. Manuals often show where hidden screws sit. They also explain your specific battery type and wiring layout.
Some repairs succeed on the first attempt. Others need a second try. Both outcomes are normal parts of DIY electronics repair.
Massage gun repairs teach you patience and problem solving. You gain confidence with each successful fix. You also save money by avoiding a full replacement purchase.
With the right approach, you can restore your massage gun to working condition. A broken latch does not mean a broken device. With careful steps, you bring your massage gun back to life.
Frequently Asked Questions
Why is my massage gun battery latch stuck or broken?
Battery latches break from repeated use, accidental drops, or forcing the battery in the wrong way. The latch is a small plastic or metal piece that holds your battery in place. Over time, it wears down. Sometimes the latch breaks because you inserted the battery at an angle instead of straight in. Moisture inside the device can also cause corrosion that weakens the latch mechanism.
Can I still use my massage gun if the latch is broken?
Yes, but with caution. A broken latch means your battery may slide out during use. This is dangerous because the motor could stop suddenly during your massage. The battery could also fall and damage itself. Do not use the device if the battery feels loose or unstable. Your best option is to fix the latch or replace the battery system before using it again.
What’s the difference between replacing the battery and rewiring it?
Replacing the battery means removing the old pack and installing a new one. Rewiring means connecting your existing battery to an external adapter instead. Rewiring is cheaper but less convenient because you need to keep the adapter plugged in. Battery replacement gives you back the original cordless experience. Both options work, but replacement is cleaner if you want full portability.
Do I need special tools to access the battery compartment?
You need basic tools like a screwdriver and plastic pry tool. The tricky part is finding the hidden screws. Most massage guns hide screws under soft oval plugs on the exterior. You pry out these plugs gently to reveal the fasteners underneath. A flashlight helps you see inside the housing once you open it.
What charger should I use for a replacement battery?
Always use a charger designed for Li-ion batteries. Your original charger often works if the battery pack is the same voltage. Check the voltage rating on your old battery first. Using the wrong charger damages new batteries or creates safety hazards. When in doubt, contact the device manufacturer for the correct charger specifications.

Welcome to The File Fix. I’m Millie, and I review tech so you don’t have to suffer buyer’s remorse.
Navigating the endless sea of Amazon devices and gadget releases can feel like a full-time job. That’s why I do the heavy lifting. I dig past the unreliable 5-star reviews and shiny spec sheets to test how these devices actually hold up in the real world. Whether you’re looking for the best budget earbuds, a reliable power bank, or the latest smart home gear, you’ll find honest, no-nonsense breakdowns here.