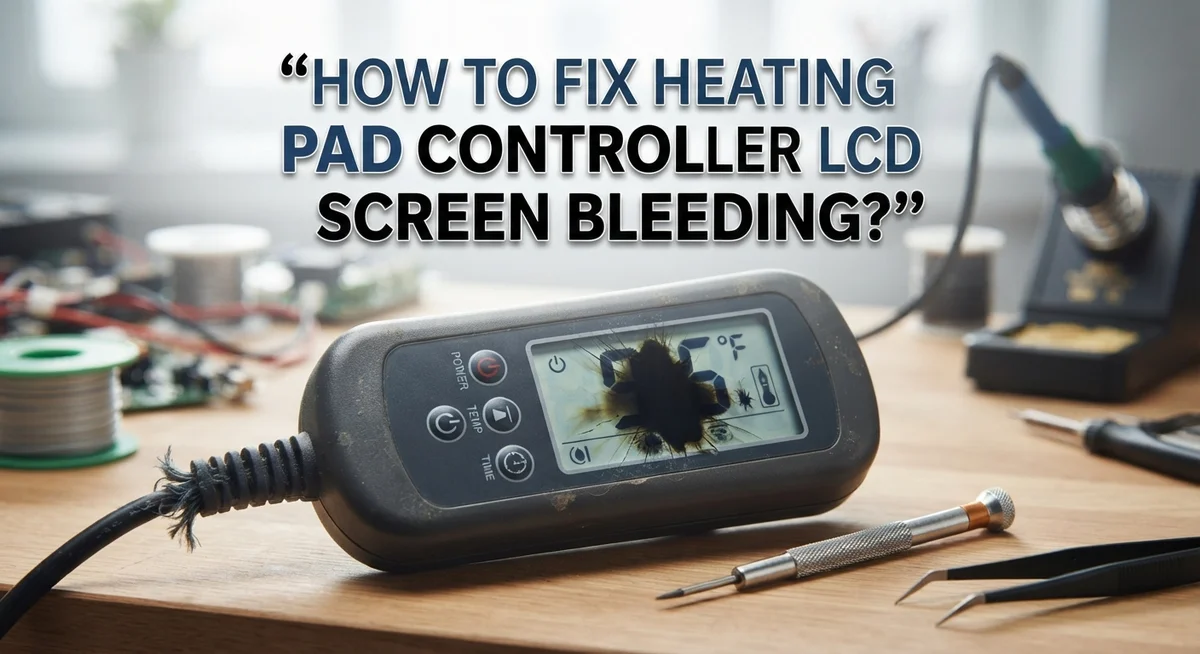
How To Fix Heating Pad Controller LCD Screen Bleeding?
Have you ever pressed the power button on your heating pad and noticed the LCD screen looking blurry or streaked? This is called screen bleeding, and it can be confusing and a bit worrying.
The good news is that this problem is usually fixable at home. In most cases, screen bleeding points to a small glitch in the controller rather than a broken heating pad.
This often happens alongside blinking lights or a screen that refuses to respond. These signs usually mean the controller has entered an error state. It may also be linked to the auto-shutoff feature, which most pads use after about two hours of use.
In a Nutshell
- Unplug the pad first. Always turn off and unplug the heating pad before touching the controller. This keeps you safe and protects the device.
- Detach the controller. Most models let you remove the controller from the pad. This makes resetting much easier.
- Reset the controller. Hold the reset button for the time your manual suggests. This step fixes most blinking light and screen issues.
- Check the connections. Loose plugs or a faulty heating element often cause display problems. A quick check can save you a lot of trouble.
- Test the outlet. Sometimes the issue is not the pad at all. Plug another device into the same outlet to rule this out.
- Watch for error states. Blinking lights usually mean the controller detected a problem. A reset often clears this instantly.
- Auto-shutoff is normal. Most pads switch off after two hours. This is a safety feature, not damage.
What Causes LCD Screen Bleeding on Heating Pad Controllers
LCD screen bleeding on heating pad controllers happens for several reasons. Understanding the cause helps you fix the problem faster.
Liquid damage is one of the most common causes. Water or sweat can seep into the controller casing. This moisture reaches the LCD display and causes the pixels to blur or streak. Even small amounts of liquid damage the delicate circuits inside.
Loose internal connections frequently trigger display bleeding. The LCD panel connects to the main circuit board with tiny wires or connectors. Vibration or regular use can loosen these connections over time. A loose connection sends incorrect signals to the display, making it appear faulty.
Power supply issues also cause bleeding effects. When the controller receives unstable electrical power, the LCD struggles to display images properly. The screen may show blurry lines, faded text, or streaked colors. A faulty power outlet or damaged cord creates this unstable power flow.
Manufacturing defects occasionally appear in new controllers. The LCD panel itself might have a flaw from the factory. Defective pixels or poor panel sealing allow display problems to emerge quickly.
Overheating damages LCD components. If your heating pad runs continuously without breaks, internal temperatures rise. Excess heat degrades the LCD panel and its connections. This is why most pads include an auto-shutoff feature after two hours.
Age and wear naturally break down electronic components. Older controllers experience pixel degradation and connection corrosion. The LCD panel becomes more prone to bleeding as it ages.
Error states sometimes display as screen bleeding. When the controller detects a heating element problem, it may show distorted visuals instead of error codes. The blinking lights accompanying this usually signal the controller needs a reset.
Safety First: Preparing Your Controller for Troubleshooting
Before you start fixing your heating pad controller, safety must come first. Taking a few simple steps protects you from electrical hazards and prevents further damage to your device.
Start by turning off the heating pad completely. Press the power button and wait a few seconds. This stops the heating element from running while you work. Never attempt any troubleshooting while the pad is still on.
Next, unplug the controller from the wall outlet. This is the most important step. Do not skip this part, even if you think you will only be looking at the device. Unplugging removes all electrical power and keeps you safe from shocks.
Wait at least thirty seconds after unplugging. This allows any remaining electrical charge to drain from the internal circuits. You want the controller completely de-energized before touching it.
Check the controller for any visible damage. Look for cracks, moisture, or burn marks on the surface. If you see liquid inside or around the LCD screen, do not attempt repairs yourself. Water damage requires professional service.
If the controller looks dry and intact, gently detach it from the heating pad. Most models have a simple connection that pulls apart easily. Handle the controller carefully to avoid dropping it or causing additional damage.
Let the controller sit unplugged for a few minutes. This waiting period helps ensure all power has fully discharged. You are now ready to begin the troubleshooting process safely.
Always keep the manual nearby during this process. Your specific model may have unique safety requirements or connection points. Following the manufacturer’s instructions protects both you and your device.
Step-by-Step Guide to Resetting Your Heating Pad Controller
A reset procedure can often fix LCD screen bleeding issues on your heating pad controller. This process clears error states and restores normal display function. Follow these steps carefully to reset your device.
First, locate the reset button on your controller. Most models have a small button on the back or bottom panel. The button is typically recessed to prevent accidental activation. You may need a paperclip or pen to press it.
Press and hold the reset button for the recommended duration. Check your manual for the exact time required. Most controllers need between 5 to 15 seconds of continuous pressure. Hold steady without releasing early.
Listen for a beep or watch for LED changes. Many controllers emit a sound when reset completes. The display may flash or go dark briefly. This indicates the reset is working properly.
Release the button once you see or hear confirmation. Wait a full minute before plugging the controller back in. This allows the internal circuits to fully discharge.
Plug the controller into a working outlet. Reattach it to your heating pad if you removed it. Turn on the power and observe the display carefully.
Check if the screen bleeding has stopped. The display should show normal numbers or icons. No unusual discoloration or distortion should appear.
If screen bleeding persists after reset, the issue may involve hardware damage. Liquid exposure or internal component failure could require professional repair. Document what you observe and consult your manual for additional troubleshooting steps specific to your model number.
Checking the Heating Element Connection for Faults
The heating element connection is where your controller communicates with the pad itself. When this connection has faults, your LCD screen often displays bleeding or error signals. Let’s check this connection step by step.
First, make sure your controller remains unplugged from the wall. This prevents electrical shock while you inspect the wiring. Look at where the cord connects to your controller. You’ll see either a plug connector or a soldered connection point.
Gently examine the connector for any visible damage. Check for bent pins, corrosion, or discoloration around the metal contacts. If pins look bent, they may not send proper signals to your screen. Corrosion appears as green or white crusty buildup on metal surfaces.
Next, inspect the actual cord itself. Run your fingers along the entire length from controller to heating pad. Feel for cuts, kinks, or areas where the insulation looks damaged. A compromised cord sends faulty signals that trigger LCD bleeding.
If the connector looks loose, gently wiggle it back and forth. It should fit snugly without excessive movement. A loose connection interrupts the signal flow between your heating element and controller display.
Check the heating pad’s connection point as well. Sometimes the problem exists where the cord enters the pad itself rather than at the controller. Look for the same signs: damage, corrosion, or looseness.
After inspecting everything, plug your controller back in and test it. If the LCD screen still shows bleeding, the fault likely exists within the internal circuitry. At that point, you may need professional repair or controller replacement. Document what you observed during inspection. This information helps technicians diagnose the exact problem.
Understanding Blinking Lights and Error Codes
Blinking lights on your heating pad controller tell you something is wrong. These flashing patterns are error codes your device uses to communicate problems. Understanding what they mean helps you fix the issue faster.
Most controllers blink when they detect a heating element fault. This happens when the pad and controller lose proper communication. The blinking pattern usually repeats in a specific sequence. Some models blink once, pause, then blink again. Others use double or triple flashes. Your manual explains what each pattern means for your specific model.
Error codes serve as your device’s warning system. When you see blinking lights, the controller has entered a protective mode. This stops the pad from heating to prevent damage. The auto shutoff feature also activates during error states, typically after two hours of use.
Pay attention to where the blinking occurs. Does it happen on the power button only? Is the temperature display flashing too? Different locations indicate different problems. A blinking power light often means a heating element issue. A flashing temperature display might signal a sensor malfunction.
Don’t ignore these warning signs. Continuing to use a controller with error codes can cause permanent damage. The blinking tells you to stop and investigate.
Reset your controller first when you see blinking lights. This clears temporary error states and often solves the problem. If blinking continues after a reset, check your heating element connection next. Loose connections frequently trigger these error codes.
Keep your manual handy. It contains the specific blinking patterns for your model and what each one means. This reference guide is your best tool for quick troubleshooting.
Model-Specific Fixes: Pure Enrichment, SoftHeat, and Others
Different heating pad brands use different controller designs, so the fix that works for one model might not work for another. Understanding your specific brand helps you troubleshoot more effectively.
Pure Enrichment controllers typically have their reset button on the back panel. Hold it for 10 to 15 seconds until you hear a beep. After the beep sounds, wait a full minute before plugging the controller back into the wall outlet. If the LCD screen still shows bleeding after this reset, check whether the controller cable connects firmly to the heating pad itself.
SoftHeat models often feature a slightly different reset process. Their reset button may be recessed, so you might need a pen or small tool to press it. Hold it for about 8 seconds. Listen for two quick beeps that signal the reset completed successfully. This brand sometimes requires you to detach the controller completely before resetting.
Other common brands vary in their approach. Some controllers reset by unplugging the device and waiting 30 seconds before plugging back in. Others have a dedicated power button you must hold down. Always check your manual first because pressing the wrong button can trigger different functions.
The key difference across brands involves reset duration and button location. Some controllers respond to shorter presses, while others need longer holds. If your LCD screen bleeding persists after following your brand’s specific reset steps, the issue likely involves the heating element connection rather than the controller itself.
Keep your manual nearby during troubleshooting. It contains the exact specifications your model needs to function properly.
Common Mistakes to Avoid When Fixing Screen Bleeding
When fixing screen bleeding on your heating pad controller, avoiding common mistakes makes all the difference. These errors can worsen the problem or damage your device further.
Never attempt repairs while your device is plugged in. Many people think they can safely troubleshoot with power connected. This creates a serious shock hazard. Always unplug your heating pad from the wall outlet first. Wait a few seconds before touching any internal components.
Don’t skip the unplugging step when detaching your controller. Some users partially disconnect the controller while the pad remains plugged in. This can cause electrical damage to the circuit board. Complete disconnection protects both you and your device.
Avoid skipping the reset procedure entirely. Many people jump straight to replacing parts or opening the controller. A proper reset solves most LCD screen bleeding issues. Hold the reset button for the full duration specified in your manual. Rushing this step means you miss the solution.
Don’t ignore error codes or blinking lights on your display. These warnings tell you something specific is wrong. Continuing to use your heating pad with active error codes can cause permanent damage to internal components.
Never force connectors back into place if they feel stuck. Gentle pressure works best when reattaching your controller. Forcing connections can bend pins or damage sockets permanently.
Avoid using your device immediately after troubleshooting. Wait at least one full minute after plugging everything back in. This allows the controller to stabilize and initialize properly.
Finally, don’t assume your manual is unnecessary. Each brand and model has specific requirements. Your manual contains critical information about reset duration and button location for your particular device.
When to Stop Troubleshooting and Replace the Controller
Knowing when to stop troubleshooting saves you time and frustration. If you’ve completed a full reset and the LCD screen still shows bleeding or distorted display, it’s time to consider replacement. Most controllers that don’t respond to a reset have internal circuit board damage that you cannot fix at home.
Pay attention to how your controller behaves after troubleshooting. If the screen remains blank, shows permanent discoloration, or displays won’t turn on after reset, the controller likely has a hardware failure. These signs indicate the LCD panel or its connection has failed beyond simple fixes.
Test your heating pad one more time after reset. Plug it in and wait 30 seconds to see if the display clears. If blinking lights return immediately or the screen remains unresponsive, further troubleshooting won’t help.
Check if your heating pad is still under warranty before deciding to replace the controller. Many manufacturers cover controller defects during the warranty period. Contact the manufacturer with your model number and purchase date to explore your options.
Consider replacement if you notice these issues: the display shows permanent dark spots, the screen flickers constantly even after reset, or the controller stops responding to button presses entirely. These problems indicate internal damage to the LCD panel or circuit board.
Don’t waste time attempting to open or repair the controller yourself. Most controllers are sealed units, and opening them can cause electrical hazards. A replacement controller is safer and more reliable than a repaired one.
Once you decide replacement is necessary, order a new controller designed for your specific heating pad model. Installation typically takes just a few minutes since most controllers simply plug into the pad’s heating element connection.
Final Thoughts
Fixing a heating pad controller with LCD screen bleeding often comes down to patience and a few simple steps. Start by unplugging the pad. Then reset the controller properly.
Most screen bleeding issues connect to controller errors rather than permanent hardware damage. This means many fixes work without replacing anything. A proper reset solves the problem in most cases.
Always check your connections before assuming the worst. A loose heating element wire or faulty outlet can mimic screen bleeding symptoms. These small checks save you time and money.
Remember that safety comes first in every troubleshooting step. Never handle a plugged in device. Never force parts that feel stuck or misaligned.
If your controller still shows bleeding after trying these fixes, don’t panic. Some issues need professional attention or a replacement part. This is completely normal for older heating pads.
Your heating pad manual remains your best friend during this process. Different brands handle resets differently. Keeping that manual handy prevents confusion and wasted effort.
Testing your pad after each fix attempt matters too. This helps you catch problems early before they get worse. It also confirms whether your reset actually worked.
Screen bleeding might feel frustrating at first glance. But most fixes are quick and require no special tools. A calm, step by step approach gets you results faster than guessing.
Take your time with each step. Rushing through resets or connection checks often leads to repeated problems. Slow and steady troubleshooting works best here.
With the right approach, your heating pad controller can work like new again. Follow these steps, stay safe, and enjoy reliable warmth once your fix is complete.
Frequently Asked Questions
What causes LCD screen bleeding on a heating pad controller?
LCD screen bleeding happens when your display malfunctions. This usually occurs because the controller detects an error with the heating element or internal circuitry. Sometimes the issue stems from a loose connection between the controller and the heating pad itself.
Power surges or electrical faults can also trigger bleeding. When your controller senses these problems, it may display unusual colors, dark spots, or flickering patterns on the screen.
How do I know if my controller needs a reset?
Your controller likely needs a reset if you see blinking or flashing lights on the display. These lights signal that your device entered an error state. A blinking screen usually means your controller detected a heating element issue.
If your pad won’t heat or the display looks strange, try resetting before assuming the worst. Most controllers have a dedicated reset button you can hold for several seconds.
Can I fix screen bleeding myself?
You can attempt basic fixes like resetting the controller and checking connections. Start by unplugging your heating pad completely from the wall outlet. Then detach the controller if your model allows it.
Hold the reset button according to your manual’s instructions. Reattach everything and test your pad. If the screen still shows bleeding after this process, the controller likely needs replacement rather than repair.
Why does my display keep blinking after I reset it?
Persistent blinking after a reset suggests a deeper controller problem. Your device may be stuck in an error loop due to a faulty heating element connection or internal damage.
Check that all cables connecting to your heating pad are firmly seated. If blinking continues, your controller probably needs professional replacement.

Welcome to The File Fix. I’m Millie, and I review tech so you don’t have to suffer buyer’s remorse.
Navigating the endless sea of Amazon devices and gadget releases can feel like a full-time job. That’s why I do the heavy lifting. I dig past the unreliable 5-star reviews and shiny spec sheets to test how these devices actually hold up in the real world. Whether you’re looking for the best budget earbuds, a reliable power bank, or the latest smart home gear, you’ll find honest, no-nonsense breakdowns here.