How to Replace a Cracked Lens Cover on a Smartphone Camera Module?
A cracked camera lens cover can ruin your photos and let dust reach the sensor inside your phone. The good news is you can fix it at home with the right tools and a steady hand.
This guide walks you through every step in simple language. You will learn how to spot the damage, gather supplies, remove the broken glass, and install a new lens cover safely.
Whether you own an iPhone, Samsung Galaxy, Google Pixel, or another brand, the basic process stays the same. Read on to save money and bring your camera back to life.
Key Takeaways
- The lens cover is not the camera itself. It is just the protective glass sitting on top of the camera module. Replacing it does not require deep disassembly in most cases.
- DIY repair costs between 5 and 30 dollars, while a professional shop charges 80 to 250 dollars. Apple or Samsung service centers may charge 200 to 500 dollars for the same fix.
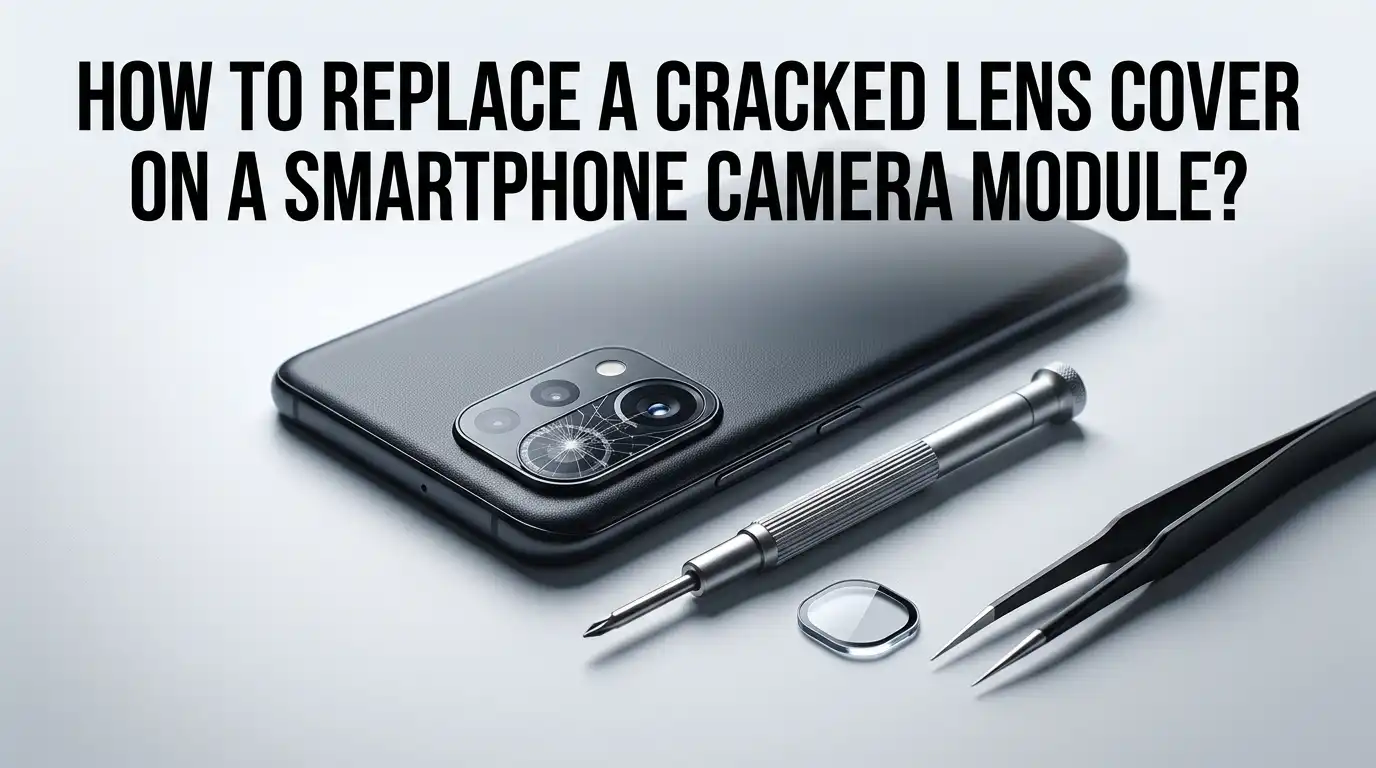
- You will need basic tools like tweezers, a heat gun or hair dryer, isopropyl alcohol, a suction cup, and a replacement lens cover with adhesive.
- Safety comes first. Always power off your phone, wear safety glasses, and work on a clean flat surface to avoid further damage.
- Skill level matters. Surface level lens cover swaps are easy. Full back glass replacements need intermediate repair skills and patience.
- Warranty may void once you open your phone. Check your coverage before you begin any repair work.
Understanding the Smartphone Camera Lens Cover
The lens cover is a thin piece of glass or sapphire crystal that sits over your camera module. It protects the actual camera lens and sensor from scratches, dust, and impacts. Many people confuse it with the main camera lens itself.
The cover is not the camera. It is only a shield. When it cracks, your photos may show blurry spots, glare, or strange light patterns. The camera underneath usually still works fine.
Most flagship phones use sapphire glass for the cover because it resists scratches. Mid range and budget phones use tempered glass. Knowing your phone model helps you order the correct part for replacement.
Signs That Your Lens Cover Needs Replacement
You can tell the lens cover is damaged by a few clear signs. Look carefully at your camera area in good lighting before deciding to repair it.
The most obvious sign is a visible crack or shattered pattern across the glass. You may also notice hazy or foggy photos, light flares in your shots, or rainbow streaks. Sometimes dust gets behind the cover, causing dark spots in images.
If the camera itself was hit hard, the sensor may also be damaged. In that case, photos will be black, distorted, or show error messages. Test your camera in the camera app first. If photos look almost normal but with glare or fuzz, the lens cover is likely the only problem.
Tools and Materials You Will Need
Gathering the right tools before you start makes the job much smoother. You can find most of these at local hardware stores or general online retailers without buying any branded kits.
You will need a replacement lens cover that matches your exact phone model, precision tweezers, a suction cup or strong tape, a heat gun or hair dryer, and isopropyl alcohol (90 percent or higher). Also grab cotton swabs, microfiber cloth, a small razor blade, and double sided adhesive if not included.
Optional but helpful items include a magnifying glass, safety glasses, nitrile gloves, and a plastic pry tool. A clean organized workspace with bright light is just as important as the tools themselves.
Preparing Your Phone Before the Repair
Preparation prevents accidents. Skipping this step often leads to scratched bodies, lost screws, or even worse damage to internal parts.
First, back up your data to a cloud service or computer. Then power off the phone completely. Remove the SIM card tray, the case, and any screen protector that might interfere.
Clean the area around the camera with a microfiber cloth. Lay down a soft towel or anti static mat on your work surface. Put on safety glasses because broken glass shards can fly when you remove the old cover. Keep small containers nearby to hold tiny parts so nothing rolls away during the repair.
Method 1: Surface Level Lens Cover Replacement
This is the easiest method and works on many phones where the lens cover sits on top of the back glass with adhesive.
Pros: No need to open the phone. Quick to finish, often within 20 minutes. Very low risk of damaging internal parts. Affordable, with parts costing under 15 dollars in most cases.
Cons: Does not work for all phone models. The new cover may not fit perfectly if your phone uses a one piece back design. Adhesive may not last as long as factory sealing.
To do this, warm the lens area with a hair dryer for one minute. Use tweezers to lift a corner of the cracked glass. Pull slowly until the whole cover comes off. Clean the surface with alcohol, then press the new cover in place.
Method 2: Full Back Glass Replacement
Some phones, like certain Samsung Galaxy and LG models, have the lens cover built into the back glass panel. In this case, you must replace the entire back.
Pros: Restores the phone to a factory like finish. Fixes both the cracked lens and any back glass damage at the same time. Provides a stronger seal.
Cons: Takes more time, often one to two hours. Requires removing the screen or heating the back glass with high temperatures. Higher risk of breaking other parts like the wireless charging coil or fingerprint sensor.
You will need to soften the adhesive with a heat gun, slide a thin pry tool around the edges, and carefully separate the back. Once removed, transfer internal components to the new back, then reseal it with fresh adhesive.
Method 3: Camera Module Replacement
If the camera itself was damaged along with the cover, replacing the whole module may be the only option. This is the most advanced repair.
Pros: Fixes everything at once, including the lens, sensor, and any internal damage. Restores full camera performance. Often comes with the lens cover already attached.
Cons: Expensive parts, often 50 to 200 dollars. Requires deep disassembly of the phone. Calibration may be needed for features like optical image stabilization. Voids most warranties.
This method needs you to open the phone, disconnect the battery, unscrew the camera bracket, and unplug the ribbon cable. Slot in the new module, reconnect everything, and reassemble. Beginners should avoid this method unless they have experience with phone repairs.
Step by Step: Removing the Cracked Lens Cover
Removing the broken glass is the most delicate part. Take your time and do not rush this stage.
Start by heating the area for 60 to 90 seconds with a hair dryer set to medium. This softens the adhesive. Apply a suction cup or strong tape to a flat section of the cracked glass.
Pull gently upward while sliding tweezers under one edge. If the glass is shattered into many pieces, pick them out one by one with the tweezers. Work from the outer edge toward the center. Keep your face protected and place each shard in a small container right away to avoid losing them on your desk.
Step by Step: Installing the New Lens Cover
Now comes the satisfying part. Installing the new cover takes precision but is straightforward.
Clean the camera frame thoroughly with isopropyl alcohol on a cotton swab. Make sure no dust, glue residue, or moisture remains. Even a tiny speck under the new cover will show up in your photos.
Peel the adhesive backing off the new lens cover. Use tweezers to align it carefully over the camera opening. Lower it straight down rather than sliding it into place. Press firmly with your finger or a soft cloth for 30 seconds. Let the adhesive cure for at least 10 minutes before testing your phone or putting the case back on.
Testing Your Camera After the Repair
Once installed, you must test the camera fully before declaring the job done. Skipping tests can leave you with hidden problems.
Power on the phone and open the camera app. Take photos in bright light, low light, and with the flash on. Check for blurry spots, light leaks, or dust shadows. Switch between the main, wide, and zoom lenses if your phone has multiple cameras.
Also test video recording, slow motion, and portrait mode. Look at the photos on a larger screen if possible. If you spot issues, you may need to reopen and reseat the lens cover. Sometimes a tiny air bubble or piece of lint is the cause, and a quick redo solves it.
When to Skip DIY and Visit a Professional
DIY is great for many cases, but some situations call for expert help. Knowing when to step back saves you from making things worse.
Go to a professional if your phone is under warranty, if water has reached the camera area, or if the camera sensor itself is broken. Also seek help if your phone has a complex sealed design like the latest iPhone Pro models or folding phones.
Authorized service centers use original parts and special tools. Independent repair shops often charge less and can do the job in a few hours. Get a quote first and compare it to the cost of a new phone before deciding.
Tips to Prevent Future Lens Cover Damage
Once your phone is fixed, take steps to avoid the same problem again. A little care goes a long way.
Use a phone case with a raised camera bezel. This keeps the lens cover off flat surfaces when you place the phone down. Apply a camera lens protector, which is a small sticker like glass shield that absorbs impacts.
Avoid putting your phone in pockets with keys, coins, or rough items. Never set it face down on rough surfaces like concrete or asphalt. Clean the lens area gently with a microfiber cloth instead of your shirt. These small habits can extend the life of your camera by years.
Frequently Asked Questions
How long does it take to replace a cracked lens cover?
For a surface level swap, the job takes about 20 to 30 minutes including cleanup. Full back glass replacements may take one to two hours. Camera module swaps can take two to three hours for someone with experience.
Can I still use my phone with a cracked lens cover?
Yes, you can use it, but photos will likely look blurry or have light flares. Dust and moisture can also slip inside and damage the camera sensor over time. Fixing it soon is the best choice.
Will replacing the lens cover void my warranty?
In most cases, yes. Opening your phone or doing third party repairs usually voids manufacturer warranties. Check your terms first and consider authorized service if your phone is still covered.
How much does professional lens cover replacement cost?
Authorized service centers charge between 150 and 500 dollars depending on the phone model. Local repair shops usually charge 80 to 200 dollars. DIY kits cost 5 to 30 dollars for the parts only.
Is sapphire glass better than tempered glass for lens covers?
Yes, sapphire glass is far more scratch resistant than tempered glass. However, it can still crack under hard impacts. Many replacement covers are tempered glass, which still works well for daily use.
Can I use clear nail polish or super glue as a temporary fix?
This is not recommended. Both can fog the camera view, leak under the cover, and damage the sensor. Use proper lens cover adhesive or visit a repair shop for a safe fix.
What if dust gets trapped under the new lens cover?
You will need to remove the cover and clean the area again. Work in a dust free room if possible, and use compressed air or a soft brush to remove any particles before installing the new cover.