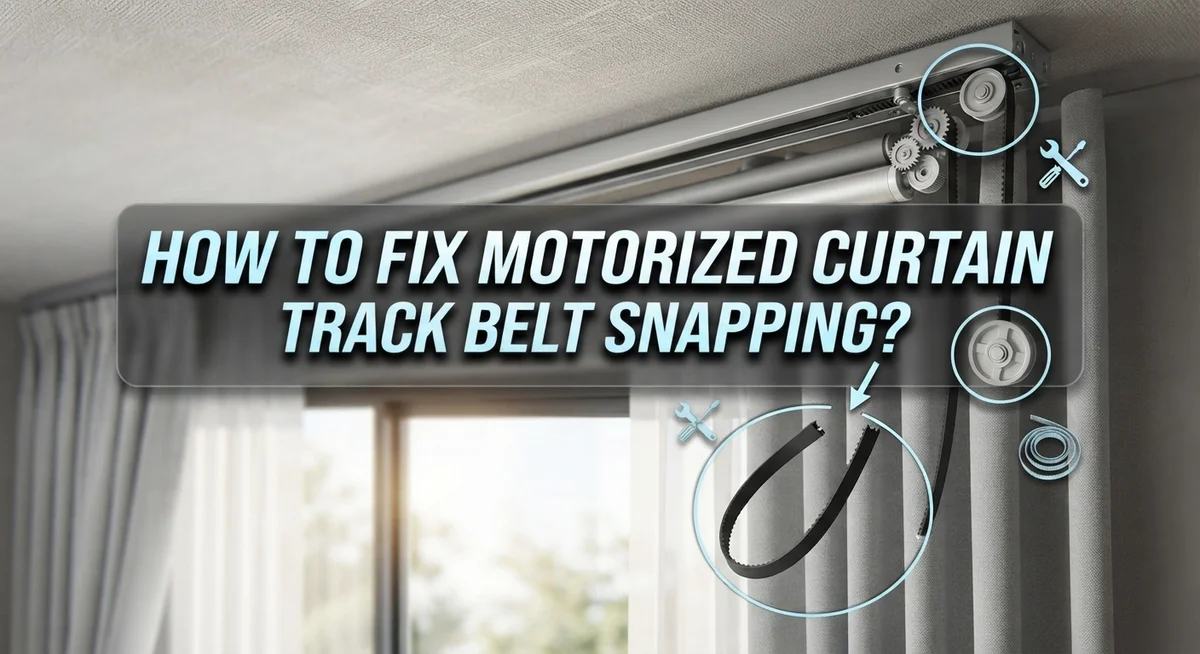
How To Fix Motorized Curtain Track Belt Snapping?
Your motorized curtains glide smoothly one day. The next day, you hear a sharp snap. Now your curtains stop moving at all.
This is a common problem with motorized curtain track systems. Brands like Havells Crabtree, EaseEase, and Quoya all face this issue.
The belt inside your track can snap due to wrong tension settings. Sometimes loose wall brackets cause extra strain too. Grinding noises often warn you before the snap happens.
The good news? You can fix this problem yourself. You do not need to call a technician right away.
This guide walks you through the entire process. You will learn how to check your wall brackets first. Then we cover proper belt tension adjustment steps.
In a Nutshell
- Belt tension is the main culprit. Too tight or too loose settings cause the belt to snap. Always check tension first before assuming a bigger problem.
- Wall bracket installation matters. A loose or crooked bracket puts extra stress on the belt. Mark your holes carefully and drill them straight.
- Grinding noises are warning signs. Don’t ignore them. They often point to worn gears or sensor issues that lead to belt failure.
- Return hooks need proper placement. Install them correctly on the track so the belt moves smoothly without catching.
- Ripple fold curtains need careful handling. Snap panels onto runners starting from the side hook to avoid uneven pressure on the belt.
- Brand specific guides help most. Systems like Havells Crabtree, EaseEase, and Quoya each have their own tension adjustment steps. Check manufacturer resources for exact instructions.
Why Motorized Curtain Track Belts Snap
Motorized curtain track belts snap for several clear reasons. Understanding these causes helps you prevent future damage and keep your system working smoothly.
Incorrect belt tension is the main reason belts fail. When you set the tension too tight, the belt experiences constant stress. It wears faster and eventually breaks. When tension is too loose, the belt slips and creates friction. This friction generates heat, which weakens the belt material over time.
Poor wall bracket installation causes many belt problems. If your brackets are loose or crooked, the entire track system becomes unstable. This instability forces the belt to work harder than it should. Extra pressure builds up, and the belt snaps unexpectedly.
Worn gears and pulleys inside the motor unit damage the belt. When gears wear down, they don’t grip the belt evenly. The belt gets pinched or twisted, leading to tears and snaps.
Sensor malfunctions create serious belt stress. A bad sensor sends wrong signals to the motor. The motor then pulls the belt in the wrong direction or with too much force. This sudden pressure causes immediate snapping.
Grinding noises are warning signs. These sounds indicate internal wear. Gears, pulleys, or sensors are failing. Ignoring these noises means the belt will snap soon.
Improper ripple fold panel installation also damages belts. When panels snap unevenly onto runners, the load becomes unbalanced. One side of the belt carries more weight than the other. This uneven stress causes weak points that eventually snap.
Return hooks placed incorrectly catch the belt during movement. The belt gets snagged, twisted, or pinched. Repeated snagging weakens the belt material until it breaks.
Tools and Preparation Before You Begin
Before you start fixing your motorized curtain track belt, gather the right tools and prepare your workspace. This step prevents frustration and keeps you safe while working.
Essential tools you will need: A screwdriver set (both Phillips and flathead) handles most fasteners on motorized systems. You need an adjustable wrench to loosen and tighten belt tension bolts. A measuring tape helps you verify bracket alignment before installation. Keep a flashlight handy to see inside the track and motor housing clearly.
Safety items matter too. Wear safety glasses to protect your eyes from small parts and debris. Use work gloves to prevent cuts from sharp track edges. Have a sturdy step ladder ready if your curtain track sits high on the wall.
Prepare your workspace properly. Clear the area below your curtains so nothing falls on you during repairs. Lay out all tools on a clean surface before you begin. Take photos of your current setup with your phone. These images help you remember how components fit together when reassembling.
Gather documentation. Find your system’s user manual or look up manufacturer guides online. Different brands have specific adjustment points and procedures. Write down the model number of your motorized system. This information speeds up troubleshooting if you encounter problems.
Check your belt condition. Inspect the belt visually before making repairs. Look for cracks, fraying, or uneven wear patterns. Note any grinding sounds or resistance when you manually move the curtains. Document these observations carefully. They tell you whether you need simple tension adjustment or full belt replacement.
Step-by-Step: Installing and Securing the Wall Bracket
Wall brackets hold your entire motorized curtain system in place. A secure installation prevents belt stress and snapping problems. Let’s walk through the process step by step.
Start by locating the wall studs using a stud finder. Brackets must attach to studs for maximum stability. Mark the stud locations with a pencil before drilling any holes.
Hold the wall bracket against the wall at your desired height. Make sure it sits level using a spirit level tool. Mark the drill holes on the wall with a pencil. Check that the bracket aligns with the marked stud locations.
Drill pilot holes into the wall at your marked points. Use a drill bit slightly smaller than your fasteners. Pilot holes prevent the wall from cracking and help fasteners grip better.
Insert wall anchors into the holes if you’re drilling between studs. These anchors provide extra holding power in drywall. Push them in until they sit flush with the wall surface.
Slide the bracket onto the wall anchors or studs. Align the bracket holes with the anchor holes. Insert screws into each hole and tighten them firmly with a screwdriver.
Check that the bracket doesn’t wobble or move side to side. A loose bracket creates uneven tension on the belt. Tighten any loose screws until the bracket feels rock solid.
Repeat this process for every wall bracket your system requires. Most systems need brackets at each end and sometimes in the middle for longer tracks. Proper bracket installation eliminates a major cause of belt snapping and ensures your motorized curtains operate smoothly for years.
Step-by-Step: Attaching Return Hooks and Adjusting Belt Tension
Return hooks guide your curtain panels along the track and prevent them from sliding off the ends. Install them carefully to avoid pinching the belt during operation.
Start by locating the return hook mounting points on your track. These points sit at both ends of the track where the curtain panels need support. Check your system’s manual to find the exact positions for your specific model.
Slide each return hook onto the track from the open end. Push it firmly until it sits flush against the track surface. The hook should point downward at a 90 degree angle to catch your curtain panel properly. Test the hook by gently tugging it to confirm it won’t slip during use.
Adjusting belt tension is critical for preventing snaps. Most motorized systems have a tension adjustment bolt or screw located near the motor unit. Turn this bolt clockwise to increase tension and counterclockwise to decrease it. The belt should feel firm but not tight enough to resist manual movement.
Check the belt tension by pressing on it midway between two pulleys. It should deflect about half an inch under moderate finger pressure. If it moves too much, tighten the adjustment bolt slightly. If it feels rock hard, loosen it a bit.
Run your curtains through a full open and close cycle while listening carefully. You should hear smooth, quiet operation. Grinding or squeaking sounds mean the tension needs adjustment.
Never overtighten the belt. Excessive tension damages the motor and wears out gears faster. Proper tension balances smooth operation with motor longevity. Take time to get this adjustment right before operating your system regularly.
Fitting Ripple Fold Curtain Panels Onto Runners
Ripple fold curtain panels snap onto runners using a simple mechanical process. The runners are the sliding components that move along your motorized track. Each panel has a series of small hooks or snap points on its top edge that connect to these runners.
Start by positioning your first panel at one end of the track. Align the snap points on the panel’s top edge with the runner slots. Push the panel upward gently until you hear or feel a click. This click indicates the panel has locked onto the runner securely.
Work methodically from one side to the other. Never force a panel onto a runner. If you meet resistance, stop and check the alignment. The snap points should slide into the runner grooves smoothly. Forcing them can damage both the panel and the runner permanently.
For ripple fold systems, maintain consistent spacing between panels as you install them. Uneven gaps will look unprofessional and may cause operational issues later. Each panel should sit at the same height along the entire track length.
Once all panels snap onto the runners, test the system by opening and closing the curtains manually. The panels should move smoothly without catching or bunching. Listen for any grinding noises during this test run. Grinding sounds suggest improper installation or belt tension problems.
If a panel refuses to snap onto its runner, remove it completely and inspect both the panel hooks and the runner grooves for debris or damage. Clean any dust or obstruction with a soft cloth. Reposition and try again carefully.
Proper panel installation ensures your motorized system operates quietly and reliably for years.
Common Mistakes That Lead to Belt Snapping
Motorized curtain belts snap when you make specific installation or maintenance mistakes. Understanding these errors helps you avoid expensive repairs and system failures.
Incorrect belt tension is the leading cause of snapping. When you tighten the belt too much, you force the motor to work harder than necessary. This extra strain damages internal gears and weakens the belt material over time. The belt eventually breaks under normal operation. Conversely, loose belts slip on pulleys and create friction that also leads to snapping. You need to find the right middle ground for your specific system.
Ignoring warning signs accelerates belt failure. Grinding noises tell you something is wrong inside your system. These sounds indicate worn gears or motor problems that stress your belt. Many people ignore these warnings until the belt suddenly snaps during use. Pay attention to any unusual sounds and address them quickly.
Poor wall bracket installation creates instability throughout your entire system. When brackets wobble or move, the track shifts position during operation. This misalignment puts uneven pressure on the belt and causes premature snapping. Secure brackets prevent this problem completely.
Forcing curtain panels onto runners damages the mechanical components. If a panel resists snapping into place, something is misaligned. Forcing it anyway can bend the runners and stress the belt system. Remove the panel and inspect both the hooks and grooves for debris or damage.
Overloading your track with heavy curtain fabric also contributes to belt snapping. Heavier panels require more motor power and belt tension. Check your system’s weight capacity before installing curtains. Following manufacturer guidelines for your specific model prevents most belt snapping issues.
Troubleshooting Grinding Noises and Closing Issues
Grinding noises from your motorized curtain system signal that problems exist inside the motor or track assembly. These sounds happen before the belt snaps, so pay attention to them. Worn gears create grinding sounds as they lose their smooth edges and teeth become damaged over time.
A bad or disconnected sensor also produces grinding. Your system’s sensor tells the motor when to stop. When it fails, the motor keeps running and forces the belt against pulleys. This friction creates noise and weakens the belt rapidly.
Motor issues cause grinding too. The motor bearings can wear out, or internal gears can misalign. Both situations force the belt to work harder than it should. Listen carefully during a full open and close cycle to identify exactly when the noise occurs.
Check your wall brackets first. Loose brackets let the entire track shift slightly during operation. This misalignment forces the belt to run at odd angles, creating grinding sounds. Tighten all bracket bolts securely to eliminate movement.
Inspect the belt itself for visible damage. Look for fraying edges, cracks, or worn spots. A damaged belt grinds against the pulleys even with proper tension. Replace it if you spot these signs.
Test your belt tension by pressing midway between two pulleys. The belt should move slightly but resist pressure. Too much tension overloads the motor and causes grinding. Too little tension lets the belt slip on the pulleys, also creating noise.
If grinding continues after you adjust tension and tighten brackets, contact the manufacturer. Internal motor damage requires professional service. Ignoring these warning signs leads directly to belt snapping.
Maintenance Tips to Prevent Future Belt Damage
Regular maintenance keeps your motorized curtain system running smoothly. Check your belt tension every three months to catch problems early. Press the belt midway between two pulleys. It should flex slightly under gentle pressure. Too much resistance means the belt is too tight. No flex at all means it needs tightening.
Inspect the belt visually for cracks or fraying. Look along the entire length while the system is off. Small damage now prevents complete failure later. Replace the belt if you spot any worn spots or discoloration.
Keep the track clean and dust free. Dust buildup forces your motor to work harder. Use a soft brush or cloth to wipe the track monthly. Pay special attention to the areas where the belt runs. Remove any debris you find inside the track channels.
Tighten all wall brackets quarterly. Use the correct tool for your bracket type. Loose brackets create vibration that stresses the belt. This vibration leads to premature snapping. Check brackets before and after heavy use seasons.
Listen for unusual sounds during operation. Grinding, squeaking, or clicking tells you something needs attention. Address these sounds immediately. They indicate wear that will worsen without intervention.
Test your system monthly by opening and closing the curtains fully. This exercise keeps the belt moving smoothly and identifies tension problems early. If the curtains move slowly or hesitate, check the belt tension right away.
Store your motorized curtain documentation in an accessible place. Keep the manufacturer’s maintenance guide handy. Follow their specific guidance for your system model. Different systems have slightly different maintenance schedules and procedures.
Final Thoughts
Belt snapping does not have to ruin your motorized curtain system. Most problems come down to two things: tension and installation.
Fix these two areas, and your curtains will glide smoothly for years.
Start by checking your belt tension every few months. A belt that feels too tight or too loose puts stress on the motor and pulleys.
Small adjustments now prevent big repairs later. This simple habit saves you time and money.
Wall brackets deserve equal attention. Loose brackets shift your entire track out of alignment.
This misalignment forces the belt to work harder than it should. Check these brackets regularly, especially after a few months of daily use.
Grinding noises are your system’s way of asking for help. Never ignore this warning sign.
Worn gears, faulty sensors, and motor problems all produce this sound. Address it early before the belt snaps completely.
When you install curtain panels, take your time. Forcing panels onto runners damages the mechanical parts that keep your belt running smoothly.
Each panel should snap into place without resistance. If it does not, stop and check the runner grooves first.
Manufacturer guides exist for a reason. Havells Crabtree, EaseEase, and Quoya systems each have specific instructions for tension adjustment and assembly.
Following these steps reduces your risk of belt failure significantly.
If your belt still snaps after proper maintenance, contact the manufacturer directly. They understand their system’s specific parts and can guide you through replacement options.
A well maintained motorized curtain system runs quietly and reliably. Regular checks on tension, brackets, and installation keep snapping problems away for good.
Frequently Asked Questions
Why does my motorized curtain belt keep snapping?
Belt snapping happens when tension becomes too tight or too loose. An overly tight belt strains the motor and pulleys. A loose belt slips and creates friction that damages the fibers.
Heavy curtain fabric also contributes to belt failure. The extra weight forces the motor to work harder than designed. Wall brackets that aren’t secure cause misalignment, which forces the belt to bend at wrong angles.
Worn gears inside the motor can damage the belt over time. Replace the belt if you see visible cracks or fraying along its length.
How do I adjust belt tension correctly?
Press the belt midway between two pulleys with your finger. The belt should move about half an inch when you apply gentle pressure. This indicates proper tension.
If the belt feels rock hard, it’s too tight. Loosen the motor mounting bolts slightly and slide the motor away from the track. If the belt sags more than an inch, it’s too loose. Slide the motor closer to the track.
Always check your system’s specific manual. Different brands use different adjustment methods. Quoya, Havells Crabtree, and EaseEase systems each have unique procedures.
What should I do before replacing the belt?
First, inspect your wall brackets for loose bolts or misalignment. Tighten them with the correct tool. Next, clean the entire track of dust and debris.
Check that all curtain panels snap onto runners without resistance. If panels stick, the runner grooves may need cleaning or inspection.
Test the motor by running the curtains open and close several times. Listen for grinding noises. If everything sounds normal and tension is correct, the belt may simply need replacement.
When should I call the manufacturer?
Contact manufacturer support if grinding noises continue after you adjust tension and tighten brackets. This signals internal motor damage or sensor problems.
If the belt breaks repeatedly within weeks of replacement, the root cause isn’t tension. A faulty motor or misaligned track requires professional diagnosis.