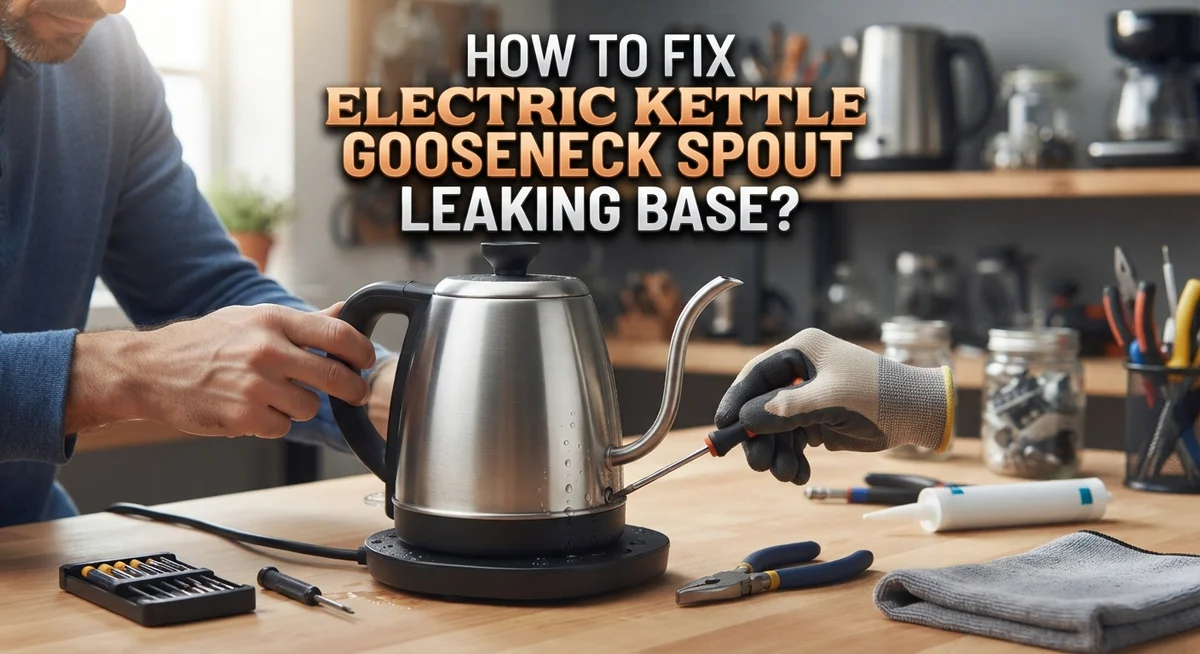
How To Fix Electric Kettle Gooseneck Spout Leaking Base?
Does your gooseneck kettle leave a puddle at its base every time you pour? You are not alone.
This is one of the most common problems with gooseneck electric kettles. The good news is that you can often fix it yourself.
Most leaks happen because of a worn O-ring or a damaged gasket. These small parts sit where the spout meets the kettle body. Over time, heat and constant use wear them down.
This guide walks you through the entire fixing process. You will learn how to safely unplug and cool your kettle first. Then we show you how to remove the spout without causing damage.
We also cover how to inspect the O-ring and other parts for wear. You will discover both short term and long term repair options. This includes using high temperature epoxy or replacing worn components entirely.
By the end, you will know exactly why your kettle leaks. More importantly, you will have clear steps to stop it. Let’s get your kettle working like new again.
In a Nutshell
Here’s a quick summary if you are short on time.
-
Unplug the kettle first. Always cut power before you touch any part of the spout or base.
-
Find the real cause. Most base leaks come from a worn O-ring, loose gasket, or corroded valve seat near the gooseneck joint.
-
Twist gently, never force it. Pull the spout upward with light pressure. Rough handling can crack the seal or damage the base further.
-
Check the O-ring closely. Look for cracks, flat spots, or stretching. A damaged ring almost always causes dripping.
-
Pick your fix based on the damage. A high-temperature epoxy works for small, temporary patches. Swapping out the O-ring or gasket fixes the problem for longer.
-
Know when to stop repairing. If the metal body is cracked or badly corroded, soldering or replacing the kettle makes more sense than another patch job.
-
Expect a quick job. Most repairs take under two hours, even for beginners with basic tools.
Follow these steps in order, and you will stop the leak without much guesswork.
Why Your Gooseneck Kettle Leaks at the Base
Your gooseneck kettle leaks at the base for one clear reason: something is broken between the spout and the kettle body. Water finds its way out through this weak point every time you fill or heat the kettle.
The most common culprit is a worn O-ring. This rubber seal sits where the gooseneck connects to the main kettle. Over time, heat and repeated use flatten it out or crack it. When the seal fails, water drips straight down to the base.
A loose or damaged gasket causes similar problems. This flat rubber piece also prevents water from escaping. If it shifts out of place or tears, leaks start immediately.
The valve seat can corrode too. This metal part controls water flow inside the kettle. Corrosion creates tiny gaps that let water escape sideways toward the base instead of flowing out through the spout.
Hard water buildup speeds up these failures. Mineral deposits collect around the connection points and push components out of alignment. The pressure builds up, and suddenly your kettle drips.
Temperature stress plays a role as well. Your kettle heats water to boiling, then cools down. This constant expansion and contraction weakens rubber seals faster than you might expect.
The good news? These are all fixable problems. Most of them involve inexpensive rubber components or simple cleaning. You do not need special tools or advanced skills. Identifying which part failed is your first step toward a dry kettle again.
Tools and Materials You’ll Need
Before you start fixing your leaking gooseneck kettle, gather the right tools and materials. Having everything ready makes the job faster and prevents frustration midway through.
You will need a flathead screwdriver to pry open the base or remove small screws holding the spout assembly together. A Phillips screwdriver works well if your kettle uses Phillips head fasteners. Keep both types handy just in case.
Get a wrench or adjustable spanner to loosen any nuts connecting the spout to the kettle body. This tool gives you better grip and control than using your hands alone.
Grab some clean towels or rags to dry parts as you work and catch any water that spills out. You will also need a small bowl or container to hold loose screws and O-rings so nothing gets lost.
For inspection work, a flashlight or headlamp helps you see inside the base clearly. Shadows make it hard to spot cracks or corrosion.
Most importantly, keep high-temperature epoxy sealant on hand for temporary repairs. This material bonds well to metal and handles heat from boiling water.
Have replacement O-rings and gaskets available if you plan a permanent fix. These come in standard sizes and fit most kettle models.
Wear safety glasses to protect your eyes from any debris or water spray. Work gloves keep your hands dry and provide better grip on metal parts.
Finally, keep a container of distilled water nearby to rinse away mineral buildup before reassembly. This prevents future leaks from hard water deposits.
Safety Precautions Before You Begin
Safety comes first when you repair a leaking gooseneck kettle. Your hands and home depend on following these steps carefully.
Unplug the kettle immediately. Electric kettles heat water to dangerous temperatures. Even after you turn it off, the heating element stays hot. Always remove the plug from the wall outlet before you touch any part of the spout or base.
Let the kettle cool completely. Wait at least 30 minutes after unplugging. The metal body, water inside, and steam can cause severe burns. Touch the outside gently. If it still feels warm, wait longer.
Empty all water from the kettle. Pour out any remaining water into a sink. Tilt the kettle slowly to avoid spills. Leftover water can splash on you or create electrical hazards when you open the base.
Work on a dry, flat surface. Place the kettle on a clean towel or cloth. This prevents it from rolling and gives you better control. A stable workspace reduces accidents.
Wear protective gloves if possible. Even cooled metal edges can be sharp. Gloves protect your hands from cuts when you handle the spout assembly or remove small parts.
Keep children and pets away. Repair work involves small components that are choking hazards. Epoxy sealants and cleaning liquids can be toxic. Create a safe zone around your work area.
Never rush the cooling process. Some people use ice or cold water to speed things up. This damages the kettle and creates thermal shock. Patience prevents injuries and protects your appliance.
Step-by-Step: Disassembling the Spout Base
Start by placing your kettle on a clean, dry surface with good lighting. You need to see what you’re doing, so position a flashlight nearby if the base area feels dark.
Locate the spout assembly where it connects to the kettle body. Most gooseneck spouts twist or pull upward rather than push down. Look for any visible seams or connection points around the base of the spout.
Grip the spout gently but firmly near where it meets the kettle. Use your other hand to stabilize the kettle body so it doesn’t tip. Apply steady upward pressure while twisting the spout slowly in a counterclockwise direction. Do not use excessive force, as this breaks plastic threads or damages the connection point.
If the spout resists, wait a moment. Sometimes mineral deposits from hard water make spouts stick. Gently rock the spout back and forth while pulling upward. This breaks the seal without forcing damage.
Once the spout lifts free, examine the base of the connection. You’ll see an O-ring, gasket, or rubber seal where the spout attached. This component usually appears as a thin rubber ring or disc. Inspect it carefully for cracks, flattening, or discoloration.
Set the removed spout aside on a clean towel. Keep the O-ring or gasket in a safe spot so you don’t lose it. Take photos with your phone if this helps you remember how everything fits back together.
Look inside the kettle opening where the spout was attached. Check for mineral buildup, corrosion, or debris around the connection point. Clean this area gently with a dry cloth before reassembling.
Inspecting and Replacing Worn O-Rings, Gaskets, and Washers
When you remove the gooseneck spout, you’ll find several small rubber or silicone components inside the connection point. These parts work together to prevent water from leaking out. O-rings are circular rubber seals that sit in grooves around the spout stem. Gaskets are flat rubber pieces that create watertight seals between metal surfaces. Washers are thin rings that help distribute pressure evenly.
Start your inspection by looking at the O-ring first. Hold it up to light and check for cracks, flattening, or discoloration. A healthy O-ring looks smooth and springy. If it feels dry or brittle, it has likely failed and needs replacement.
Next, examine the gasket carefully. Look for tears, permanent creasing, or hardened spots where it no longer bends. Run your finger across its surface to feel for rough patches or deterioration. Gaskets often shrink or harden over time from repeated heating cycles.
Check the washers for corrosion or warping. Even small dents can prevent them from sealing properly. If you see white mineral deposits, soak the washer in white vinegar for 15 minutes to dissolve buildup.
Inspect the valve seat where these components sit. This metal surface should be smooth and free of pits or debris. Use a clean cloth to wipe away any mineral deposits or residue.
If components show visible damage, they need replacement. If they look relatively clean but the kettle still leaks, the problem might be improper installation. Take photos of how components are positioned before removal. This helps you reassemble everything correctly and ensures a proper seal when you reinstall the spout.
Applying High-Temperature Epoxy for a Temporary Fix
High-temperature epoxy works well for temporary fixes on leaking gooseneck kettles. This method seals small gaps and cracks at the base connection quickly.
Start by preparing the area. Make sure the kettle is completely cool and dry. Wipe away any moisture or mineral deposits around the leak point with a clean cloth. Use fine-grit sandpaper to gently roughen the surface where you’ll apply the epoxy. This helps the sealant stick better.
Read the epoxy instructions carefully. Different products have different mixing ratios and application methods. Some require equal parts of two components mixed together. Others come premixed and ready to use.
Apply the epoxy directly into the gap between the spout base and kettle body. Use a small stick or applicator to work it into the crack. Smooth it out with your finger if the instructions allow. Make sure the epoxy fills the entire leak area.
Let it cure fully. Most high-temperature epoxies need 24 hours before you use the kettle again. Some cure faster, so check your product’s timeline. Don’t rush this step or the seal will fail.
Important limitation: This fix is temporary only. Epoxy eventually breaks down from repeated heating and cooling cycles. It typically lasts a few weeks to a few months depending on how often you use the kettle.
Test the repair carefully. Fill the kettle with a small amount of water first. Let it sit for a few minutes to check if leaks appear. If the leak stops, you can use it normally. If water still drips, the epoxy didn’t reach the source of the leak and you’ll need a different repair approach.
Reassembling and Testing for Leaks
After you’ve applied epoxy or replaced worn components, you need to test your kettle carefully before regular use. This step confirms whether your repair actually works.
Start with a visual inspection first. Look at the connection point where the spout meets the kettle body. Check that epoxy has filled all gaps evenly. If you replaced O-rings or gaskets, verify they sit properly in their grooves. Make sure everything feels secure and aligned.
Fill the kettle with a small amount of water. Use about one quarter full for your initial test. This prevents large spills if leaking occurs. Place the kettle on a flat surface over a sink or basin.
Turn on the heating element. Let water warm up slowly. Heat helps reveal leaks that cold water might not show. Watch the connection point closely during heating. Look for water dripping from the base or spout.
Leave it running for five minutes. Don’t walk away. Stay nearby to catch problems immediately. Check underneath the kettle base for moisture. Examine the spout connection from different angles.
If no leaks appear, let the kettle cool completely. This usually takes 30 to 45 minutes. Cool water can seep through gaps that hot water cannot. Repeat the filling and heating process with the cooled kettle.
If leaks still occur, your repair didn’t work. You may need to reapply epoxy or replace components again. Some leaks require multiple attempts before success.
Once testing passes completely, your kettle is ready for normal use. Monitor it during the first week for any new leaks.
Common Mistakes to Avoid During Repair
When fixing a leaking gooseneck kettle, people often make mistakes that make the problem worse. Understanding what to avoid saves time and money.
The biggest mistake is using too much force when removing the spout. Many people pull hard or twist aggressively, thinking this speeds up the process. This actually damages the connection point and creates new leaks. The spout should come off with gentle, steady pressure. If it feels stuck, wait a few minutes and try again.
Another common error is skipping the power and water shutdown step. Always unplug the kettle before starting any repair work. Let it cool completely. A hot kettle can burn your hands and damage rubber components during removal.
People often try temporary fixes without addressing the root cause. They apply sealant over a leak but never check the O-ring or gasket underneath. The leak returns quickly because the underlying problem remains. Always inspect components first, even if you plan a quick fix.
Rushing the drying process is another frequent mistake. High temperature epoxy needs full curing time. Using the kettle too soon causes the seal to fail and water leaks back out. Read the instructions on your specific product and follow the timing exactly.
Ignoring small leaks is also problematic. Many people think a tiny drip will go away on its own. It won’t. Small leaks get worse over time as corrosion spreads. Address leaks immediately when you first notice them.
Finally, avoid reusing old O-rings and gaskets after removal. These components degrade over time and rarely seal properly a second time. Always use fresh replacements for lasting results.
Final Thoughts
Fixing a leaking gooseneck spout is a task most people can handle at home. You do not need special tools or advanced skills. Patience and careful attention matter more than experience.
The root cause almost always comes down to a worn O-ring, gasket, or valve seat. Once you identify the real problem, the fix becomes simple. Skipping this step often leads to repeated leaks.
Epoxy patches work well as a quick solution, but they do not last forever. Think of them as a bridge until you can replace the damaged part or the whole kettle. Relying on epoxy alone for months will likely disappoint you.
If your kettle is old or the leak keeps returning, replacing the unit may save you time and frustration. Some leaks point to bigger issues inside the base that are not worth chasing with small repairs.
Always test your kettle after any repair. Run a small amount of water through it and watch closely for drips. This simple step confirms whether your fix actually worked before you trust the kettle with daily use.
Safety should stay a top priority throughout this process. Turn off power and let the kettle cool before touching any part of it. Rushing this step can lead to burns or shocks.
In the end, a leaking gooseneck spout is fixable for most kettle owners. Take your time, follow each step carefully, and do not ignore small drips. A little effort now can extend your kettle’s life and save you money on a full replacement later.
Frequently Asked Questions
Why is water leaking from the base of my gooseneck kettle?
Water leaks from the base when the O-ring or gasket at the spout connection fails. These rubber seals wear out over time from heat and repeated use. Corrosion can also damage the valve seat, allowing water to escape. The connection point between the spout and kettle body is the most common leak location.
Check if water drips from the spout area or pools underneath the kettle. This tells you whether the leak comes from the connection or elsewhere on the base.
Can I fix a gooseneck kettle leak myself?
Yes, most people can repair this issue at home. The repair is beginner friendly and takes under two hours. You need basic tools like a wrench or pliers to access the spout connection.
Start by turning off power and letting the kettle cool completely. Then gently twist and pull the spout upward to remove it. Inspect the O-ring for cracks or flattening. Replace it if damaged, or apply epoxy sealant for a temporary fix.
What’s the difference between temporary and permanent repairs?
Temporary fixes use high temperature epoxy sealant to patch the leak. These solutions work for a few months but eventually fail again. Epoxy is best for buying time before a full replacement.
Permanent repairs involve replacing the O-ring, washer, or gasket. Soldering or welding the kettle body also works for serious corrosion. These methods last much longer if done correctly.
Should I replace my kettle or repair it?
Replace your kettle if it’s old or leaks keep returning after repair attempts. New kettles cost less than multiple repair tries and offer better reliability. If your kettle is relatively new, repair makes more sense financially.