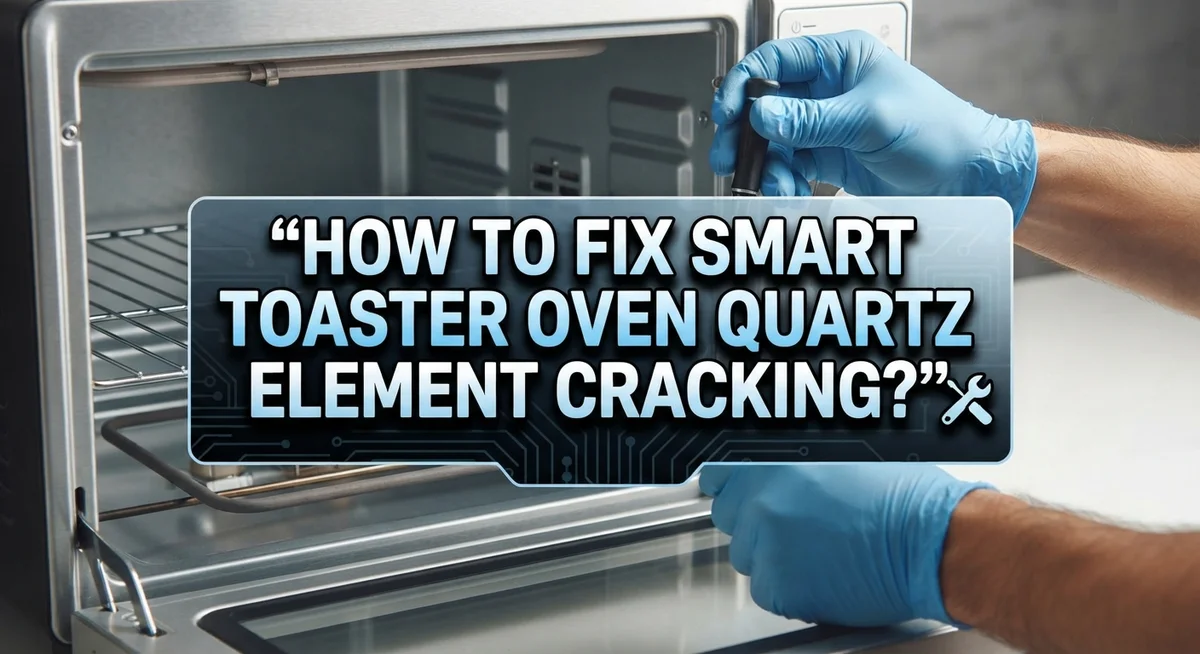
How To Fix Smart Toaster Oven Quartz Heating Element Cracking?
Have you noticed strange glass looking bits in your toaster oven? Or maybe your heating element looks cloudy instead of clear? This is a common issue with smart toaster ovens like the Breville Smart Oven Pro.
A cracked quartz heating element is not just annoying. It can be dangerous.
Glass shards can fall into your food. The oven may heat unevenly. Sometimes it stops working altogether.
The good news is that you can fix this problem yourself. You do not need to call a repair technician or buy a whole new oven.
This guide walks you through everything step by step. We will show you how to spot the damage first. Then you will learn why quartz elements crack in the first place.
After that, we cover the safe removal process. You will see how to install a replacement element correctly. We also share tips for reconnecting wires properly.
By the end, you will know exactly what to do. Your toaster oven will be safe and working again soon.
In a Nutshell
Here is a quick summary to help you understand this repair at a glance.
-
Stop using the oven the moment you spot a crack. This keeps glass shards out of your food and stops further damage.
-
Inspect the element closely. Look for cloudy spots, broken sections, or visible cracks along the quartz tube.
-
Full replacement is the only fix. You cannot patch or repair a cracked quartz element. It must come out completely.
-
Removal involves unscrewing brackets or taking out rivets that hold the element in place. Take your time here.
-
Choose a compatible replacement element that matches your oven model. This step matters for safety and performance.
-
Reconnect all wires carefully using a crimper or pliers. Clean connections help prevent future issues.
-
Double check that every wire is secure before you plug the oven back in. Loose wires can cause new problems.
Following these steps in order gets your toaster oven back to safe, working condition. Each stage builds on the last, so skipping steps can cause trouble later.
Understanding Quartz Heating Elements and Why They Crack
Quartz heating elements work by converting electrical energy into intense heat. The quartz tube itself is made from silica glass that can withstand very high temperatures. When electricity flows through the element, it glows red or orange and radiates heat throughout your oven cavity.
These elements crack for specific reasons. Physical impact is the most common cause. This happens when you accidentally bump the element while cleaning or adjusting racks inside the oven. Temperature shock can also damage quartz tubes. Rapid temperature changes between hot and cold environments create stress on the glass material.
Manufacturing defects occasionally play a role too. Some elements have weak spots in the quartz that fail over time. Poor installation or loose mounting brackets can cause vibration damage as well.
Understanding why cracks happen helps you prevent future damage. Never touch heating elements with wet hands or wet cloths. The temperature difference between the hot element and cold water causes immediate cracking. Avoid placing objects directly against the quartz tube during oven use.
Quartz elements are fragile despite their heat resistance. They excel at generating high temperatures but struggle with sudden physical stress or temperature fluctuations. This is why even small cracks become serious problems quickly.
When a crack forms, the element begins to fail. The structural integrity of the tube breaks down. Glass particles can separate and fall into your food or onto oven surfaces. The heating performance also decreases as the crack spreads.
Recognizing these facts helps you understand why replacement is necessary rather than repair. The quartz material cannot be welded or sealed safely. A cracked element poses food safety risks and oven damage risks that make continued use unsafe.
Signs and Symptoms of a Cracked Quartz Heating Element
A cracked quartz heating element shows clear warning signs that demand your immediate attention. Visible cracks or breaks are the most obvious indicator. Look directly at the quartz tube during daylight or with a flashlight. You may see actual fracture lines running along the surface.
Cloudy or opaque sections appear when internal damage occurs. The quartz tube should look clear and transparent when working properly. If certain areas turn white, gray, or milky, the element is deteriorating from the inside out.
Glass particles in your oven cavity signal a serious problem. Check the bottom of your oven for tiny glass shards or powder. These fragments come from the quartz tube breaking down. Never ignore this sign because glass can contaminate your food.
Uneven heating patterns develop when the element cracks. Your toaster oven may heat some areas but leave others cold. The broken element cannot distribute heat consistently across the cooking chamber.
Unusual sounds during operation sometimes occur with cracked elements. You might hear crackling, popping, or clicking noises. These sounds happen as the damaged quartz shifts or deteriorates further.
Burning smells that seem to come from the heating element itself warrant investigation. A cracked quartz tube may emit odors as internal materials break down.
Reduced heating performance happens gradually as cracks spread. Your oven takes longer to reach target temperatures or fails to get hot enough for cooking.
The moment you notice any of these signs, stop using your oven immediately. Continuing operation risks releasing more glass into your food and spreading damage to other components. Inspect the element carefully to confirm your suspicions before proceeding with removal and replacement.
Safety Precautions Before You Begin Repairs
Before you start fixing your smart toaster oven, safety must come first. A cracked quartz heating element poses real dangers that you need to understand and prepare for.
Electrical hazards are your biggest concern. Quartz heating elements operate at high voltages and temperatures. Never touch the element or any internal wires while the oven is plugged in. Always unplug your oven completely before beginning any repair work. Wait at least 30 minutes after unplugging to let the element cool down fully. Hot quartz can cause serious burns even after the oven is turned off.
Glass particles create another major risk. When quartz cracks, tiny glass shards scatter inside your oven cavity. These fragments can mix with your food if you continue using the oven. Inhaling glass dust during repair work can damage your lungs. Wear safety glasses and a dust mask while handling the damaged element.
Prepare your workspace properly. Work in a well lit area so you can see all components clearly. Gather your tools before starting. Keep a small container nearby to hold screws and brackets so nothing gets lost. Have a clean cloth ready to wipe away any glass particles.
Check your oven model first. Different toaster oven models have different element designs. Know your specific model number before you begin. This prevents you from installing an incompatible replacement element.
Protect yourself from sharp edges. Cracked quartz has sharp, jagged edges. Wear work gloves to protect your hands. Move slowly and carefully around the damaged element. These simple precautions keep you safe throughout the entire repair process.
Tools and Replacement Parts You’ll Need
Before you start your repair, gather the right tools and parts. Having everything ready prevents delays and keeps you safe throughout the process.
Basic hand tools make the job easier. You’ll need a screwdriver set with both Phillips and flathead options. Most toaster ovens use standard screws to hold the heating element in place. A pair of needle nose pliers helps you disconnect wire connectors safely. Some models use crimped connections that require careful handling.
Specialized tools help with certain models. A wire crimper tool reconnects electrical wires after you remove the old element. This ensures secure connections that won’t loosen during operation. Pliers work as a backup if you don’t have a crimper. A flashlight or headlamp illuminates the oven cavity so you see all connections clearly.
Safety equipment protects you during removal. Wear work gloves to handle cracked quartz safely. The sharp edges cut skin easily. Safety glasses protect your eyes from glass particles and dust. A dust mask prevents you from breathing in any fine particles released during removal.
The replacement heating element is your most important part. You need a quartz heating element that matches your specific oven model exactly. Different models use different wattages and connection types. Check your oven’s manual or model number to identify the correct replacement. Some elements attach with screws and brackets. Others use rivets that require careful removal.
Additional supplies round out your toolkit. Have wire connectors available in case existing ones are damaged. Electrical tape secures any loose connections temporarily. A container holds small screws and hardware so nothing gets lost during disassembly.
Step-by-Step Guide to Removing the Damaged Element
Start by unplugging your smart toaster oven completely. This step prevents electrical shocks while you work on the heating element. Wait at least 30 minutes for the oven to cool down fully. Never touch a heating element that’s still warm.
Locate where your quartz element connects to the oven. Most models have the element secured at both ends with brackets, screws, or rivets. Check your oven’s manual to find the exact attachment points. Take a photo before you start so you remember how everything fits together.
Remove the fasteners holding the element in place. If your model uses screws, use the appropriate screwdriver to unscrew them carefully. For riveted elements, you’ll need to drill out the rivets gently. Work slowly to avoid damaging the surrounding oven cavity.
Gently pull the damaged element away from its mounting position. Be careful not to force it, as you might break other components. If the element feels stuck, check for any additional fasteners you might have missed.
Disconnect the electrical wires attached to the element. Most models use crimp connectors that slide off easily. Note which wire connects to which terminal before removal. Take another photo for reference during reinstallation.
Clean the connection points where the wires attach. Use a dry cloth to remove any dust or debris. Inspect the wires themselves for damage or corrosion. If wires look damaged, they’ll need replacement too.
Set the removed element aside safely. The cracked quartz is fragile and can cause cuts. Dispose of it properly according to your local guidelines. Now you’re ready to install your replacement heating element.
Step-by-Step Guide to Installing the New Heating Element
Installing your new heating element requires careful attention to detail. Start by positioning the replacement quartz element into the mounting brackets where your old one sat. Make sure the element slides smoothly into place without forcing it.
Once the element is positioned correctly, secure it using the same fastening method your oven uses. Some models require screws at both ends. Others use rivets that you’ll need to install carefully. Check your oven’s manual to confirm the correct fastening approach for your specific model.
Connect the electrical wires next. This step is critical for safe operation. Match each wire to its corresponding terminal on the new element. Use a wire crimper to attach connectors firmly to the terminals. If your model uses push on connectors, ensure they click into place completely.
Tighten all fasteners securely but avoid over tightening. Over tightening can crack the quartz element or strip the fastener holes. Hand tighten first, then use your tool to make a final quarter turn for a snug fit.
Inspect all connections before closing your oven. Pull gently on each wire to verify it won’t slip off. Look at the element itself to ensure it sits evenly in its mounting position without tilting or gaps.
Double check that no wires touch the quartz element directly. Wires should route away from hot surfaces. Test the oven at a low temperature setting first to ensure everything works properly. Listen for any unusual sounds or smells during this test run. Proper installation prevents future problems and keeps your smart toaster oven functioning safely for years to come.
Common Mistakes to Avoid During Replacement
Making mistakes during replacement can damage your new element or create safety hazards. Here are the most common errors to avoid.
Continuing to use your oven with a cracked element is dangerous. Glass particles fall into your food and oven cavity. Stop operating it immediately once you spot damage. Using a broken element can also damage your replacement parts when you finally install them.
Mismatching your replacement element is a costly mistake. Different toaster oven models require different heating elements. Check your oven’s model number before ordering anything. An incompatible element won’t fit properly and may not heat correctly. It could also fail quickly or pose fire risks.
Poor wire connector attachment causes most operational failures. Don’t rush this step. Make sure each wire sits fully inside its connector. Loose connections create heat buildup and electrical problems. Test each connection by pulling gently on the wire. It should not slide out easily.
Forgetting to clean connection points leads to poor performance. Old residue on wire terminals prevents good electrical contact. Wipe each connection point clean before attaching new wires. Use a dry cloth to remove dust and corrosion.
Over tightening fasteners damages the quartz element. Quartz is fragile. Tighten fasteners firmly but stop when you feel resistance. Don’t force them. If a fastener won’t tighten easily, check that your element is positioned correctly.
Touching the quartz element with bare hands leaves oils. These oils create weak spots that crack under heat. Wear clean gloves during installation. Avoid unnecessary contact with the heating surface.
These preventive steps keep your replacement safe and functional for years.
Troubleshooting After Installation
After you install your new heating element, your smart toaster oven needs proper testing. This step confirms everything works safely before you use it for food.
Start by plugging in your oven and setting it to a low temperature. Let it run for 2 to 3 minutes without any food inside. Watch the element carefully during this time. The quartz should glow evenly with a consistent orange or red color.
Listen for any unusual sounds while the oven operates. Strange buzzing, crackling, or popping noises mean something is wrong with your wiring. Stop immediately and unplug the unit if you hear these sounds.
Feel the exterior of your oven after 5 minutes of operation. The outside should be warm but not hot enough to burn your hand. If it gets extremely hot, your element may be touching the metal casing incorrectly.
Check that your heating element glows uniformly across its entire length. Dark spots or areas that don’t glow indicate poor electrical connection. Turn off the oven and recheck your wire attachments if this happens.
Allow the oven to cool completely before touching anything inside. Wait at least 30 minutes after unplugging it. Never rush this cooling period.
Once cooled, inspect the element one more time visually. Look for any new cracks or damage that may have appeared during testing. The element should look exactly as it did when you installed it.
If everything passed these checks, your installation was successful. Your smart toaster oven is now ready for regular use with food. Start with simple baking tasks to build confidence in your repair work.
Final Thoughts
Fixing a cracked quartz heating element is a task you can handle at home. You don’t need special training to complete this repair safely.
The key is patience. Take your time with each step, especially when connecting wires.
Safety always comes first in this process. Never plug in your oven while working inside it.
Unplug your smart toaster oven before you start. Keep it unplugged until every connection is secure and checked twice.
A cracked element means glass shards near your food. This makes replacement necessary rather than optional.
You can’t repair a cracked quartz tube. The glass is sealed and fragile by nature.
Full replacement is the only real fix. Trying to patch or glue the element won’t work.
Buying the right replacement part matters just as much as the installation itself. Match your model number carefully before ordering anything.
Once you have the correct part, the process becomes straightforward. Remove the old element, install the new one, and reconnect your wires.
Testing after installation confirms your repair worked. A properly glowing element means you did the job right.
If something still seems wrong after testing, stop and recheck your work. It’s better to pause than to risk damage or injury.
Most people finish this repair in under an hour. With basic tools and careful attention, you’ll have your oven working safely again.
Remember that regular care helps prevent future cracks. Avoid banging pans against the element and handle your oven gently.
Your smart toaster oven can serve you well for years. A little maintenance and quick action when problems arise go a long way toward that goal.
Frequently Asked Questions
Why does my quartz heating element crack?
Quartz heating elements crack from physical impact or thermal stress. When you bump the element during cleaning or accidentally drop something inside the oven, the impact causes cracks. Rapid temperature changes can also stress the glass material. The fragile nature of quartz makes it vulnerable to sudden pressure or heat shock.
Can I repair a cracked quartz element or must I replace it?
You cannot repair a cracked quartz element. Full replacement is your only option. Even small cracks spread quickly and release glass particles into your oven cavity and food. Attempting to seal or patch a cracked element creates safety hazards and won’t restore proper heating function.
How do I know if my heating element is actually cracked?
Look for visible cracks, breaks, or dark opaque sections on the quartz tube. A healthy element appears clear or slightly cloudy. If you see any discoloration, white spots, or obvious breaks, the element is damaged. Stop using your oven immediately if you spot these signs.
What happens if I keep using my oven with a cracked element?
Glass shards fall into your oven cavity and contaminate your food. The element won’t heat evenly, leaving cold spots in your cooking. The electrical connection may fail, causing the oven to shut down. Most importantly, you risk ingesting glass fragments, which poses a serious health hazard.
How long does the replacement process take?
The entire replacement typically takes 30 to 45 minutes. Removal takes 5 to 10 minutes. Installation and wire reconnection take 15 to 20 minutes. Testing and cooling time add another 10 to 15 minutes. The actual difficulty level is low if you work carefully.

Welcome to The File Fix. I’m Millie, and I review tech so you don’t have to suffer buyer’s remorse.
Navigating the endless sea of Amazon devices and gadget releases can feel like a full-time job. That’s why I do the heavy lifting. I dig past the unreliable 5-star reviews and shiny spec sheets to test how these devices actually hold up in the real world. Whether you’re looking for the best budget earbuds, a reliable power bank, or the latest smart home gear, you’ll find honest, no-nonsense breakdowns here.