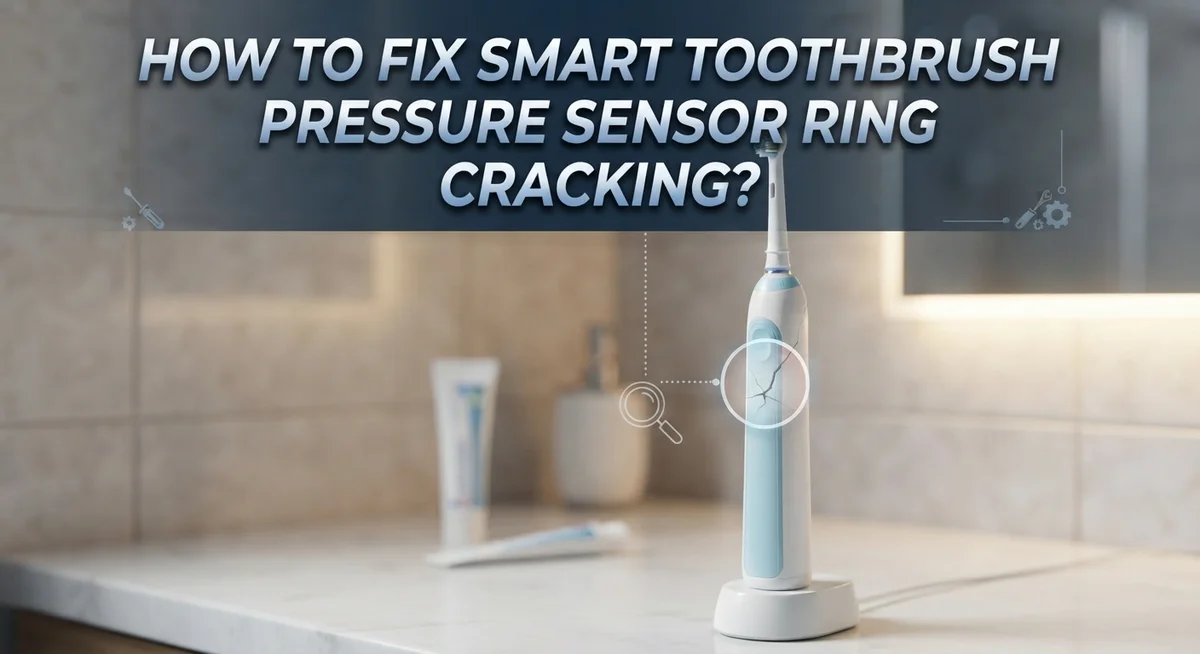
How To Fix Smart Toothbrush Pressure Sensor Ring Cracking?
Your smart toothbrush should make brushing easier, not stressful. But if you spot a crack in the pressure sensor ring, panic can set in fast.
Don’t worry. This problem is more common than you think.
Pressure sensor rings often crack due to rough handling or brushing too hard. Sometimes the brush head gets attached the wrong way. Other times, physical damage just happens over time.
The good news? Many cracks don’t mean your toothbrush is done for.
In a Nutshell
- Check the brush head first. Remove it and inspect the metal shaft for looseness. A loose shaft often points to a handle fault.
- Try a reset. Hold the mode or intensity button, then press the power button twice while the toothbrush sits on its charger.
- Reattach the brush head correctly. Line it up with the metal shaft so it sits snug and secure.
- Watch your brushing habits. Pressing too hard or using the wrong angle puts stress on the sensor ring and causes cracks over time.
- Look out for warning signs. A constant red light usually means the sensor is broken. A cracked base means water can get inside the handle.
- Know when to call for help. If the reset doesn’t work or the shaft feels loose, reach out to the manufacturer for support.
What Is the Pressure Sensor Ring and Why It Cracks
The pressure sensor ring is a small but important part inside your smart toothbrush handle. It sits near the brush head and detects how hard you’re pressing down while you brush. This ring sends information to your toothbrush’s computer, which then decides whether to alert you or slow down the vibrations.
Why does this ring crack? The most common reason is brushing too hard. When you apply excessive force, the sensor ring experiences stress that it wasn’t designed to handle. Over time, this pressure causes tiny fractures that grow larger. Physical drops or impacts to the handle also damage the ring quickly.
Another reason involves improper brush head attachment. If you don’t align the brush head correctly with the metal shaft, it can sit unevenly. This misalignment creates extra stress on the sensor ring during brushing, leading to cracks that spread.
How does cracking affect your toothbrush? A cracked pressure sensor ring compromises the waterproofing seal around your handle. Water can seep into internal components, causing electrical problems. The sensor itself may stop working, which means your toothbrush can’t detect pressure anymore. You’ll lose the safety feature that prevents gum damage.
The sensor ring also holds the brush head firmly in place. When it cracks, the connection becomes loose. Your brush head might wobble or fall off during use. The device may also display error signals like constant red lights or unusual vibration patterns.
Understanding the structure matters because it helps you prevent future damage. The ring is typically made from rubber or silicone that’s durable but not indestructible. It’s designed for normal brushing pressure, not aggressive scrubbing. Knowing this helps you take better care of your device and catch problems early before they become expensive repairs.
Signs Your Pressure Sensor Ring Is Cracked or Failing
Your smart toothbrush sends you signals when something goes wrong. Learning to spot these warning signs helps you catch problems early.
A constant red light is the most obvious indicator. This light typically means your pressure sensor ring has failed or cracked. The sensor can no longer detect how much force you’re applying. When this happens, your toothbrush stops protecting your gums from damage.
Listen for unusual sounds during brushing. A grinding or rattling noise suggests the brush head is loose. This looseness often happens when the pressure sensor ring cracks. The metal shaft underneath loses its grip on the brush head attachment.
Check if the brush head wobbles. Remove your toothbrush from the charger and gently wiggle the brush head side to side. It should feel completely solid and secure. If it moves or shifts, the sensor ring may be compromised.
Watch for water leakage around the handle. A cracked pressure sensor ring breaks the waterproof seal. You might notice moisture collecting inside the handle or around the charging contacts. This is a serious sign that water is getting where it shouldn’t.
Notice if the pressure sensor stops working. Some smart toothbrushes vibrate or beep when you brush too hard. If these alerts disappear completely, the sensor may be damaged. Your toothbrush should still vibrate normally during regular brushing, just without the pressure warnings.
Look for visible cracks on the brush head base. Remove the brush head and examine where it connects to the handle. Tiny cracks or splits in the plastic or rubber seal indicate sensor ring damage.
Pay attention to charging problems. If your toothbrush suddenly won’t charge or loses charge quickly, a cracked sensor ring might be affecting the electrical connection. The damage can disrupt power flow between the handle and charger.
These signs tell you it’s time to investigate further or seek manufacturer support.
Step-by-Step: Inspecting and Resetting the Pressure Sensor
Start by removing the brush head from your toothbrush handle. This gives you a clear view of the metal shaft underneath where the pressure sensor ring sits.
Examine the metal shaft closely for any visible cracks or damage. Look at the base where the brush head connects. Shine a light on this area to spot hairline fractures you might otherwise miss. Check if the shaft feels loose when you gently wiggle it by hand.
Next, inspect the rubber or silicone ring around the sensor area. A cracked ring often shows visible splits or discoloration. Run your finger around the entire circumference to feel for rough spots or gaps. Pay special attention to the seams where different materials meet.
Now perform a sensor reset. Hold down your mode or intensity button. While holding it, press the power button twice while your toothbrush sits on the charger. This action tells the device to recalibrate its pressure detection system. Wait about 10 seconds after the second power button press.
Reattach your brush head carefully. Align the connector properly with the metal shaft so it slides in smoothly without forcing. You should hear or feel a gentle click when it seats correctly. This proper alignment ensures the sensor ring maintains its seal.
Test your toothbrush on the charger. Look for any warning lights or error signals. Power it on briefly to see if the sensor responds normally. Some models show a green light when the sensor works correctly.
If you see a constant red light after this reset, the sensor likely has a permanent fault. A loose metal shaft indicates a deeper handle problem. Contact the manufacturer’s support team in these situations. They can assess whether repair or replacement makes sense for your specific model. Don’t attempt to disassemble the handle further, as this can cause additional water damage.
How To Properly Reattach the Brush Head to Prevent Further Damage
Reattaching your brush head correctly is one of the simplest ways to prevent pressure sensor ring damage. Most people don’t realize that improper attachment causes loose connections, which stress the sensor ring over time.
Start by holding your toothbrush handle steady. Look at the metal shaft where the brush head connects. Make sure this shaft is completely dry before you attach anything. Moisture can cause slipping and misalignment during use.
Align the brush head straight onto the metal shaft. Push it down slowly and deliberately until you hear or feel a click. The click means the brush head is seated properly. Don’t force it or twist it during attachment, as this can crack the sensor ring inside.
Check that the brush head sits flush against the handle. There should be no gaps between the base of the brush head and the top of the handle. If you see space, remove the head and reattach it more carefully.
Once attached, gently wiggle the brush head side to side. It should feel solid and not move around. A wobbly head indicates improper attachment and signals future problems.
Test your toothbrush before using it. Place it on the charger and check that the lights respond normally. This quick test catches attachment issues before they damage the sensor ring.
When you brush, use a 45 degree angle and let the brush do the work. Gentle, controlled movements protect both the sensor ring and your gums. Avoid pressing hard into your teeth, as excessive force transfers stress to the connection point.
Make reattachment part of your daily routine. Check the brush head connection each morning and evening. This habit takes seconds but prevents costly damage. Replace your brush head every three months to maintain a secure fit. Worn heads don’t attach as tightly, which strains the sensor ring over time.
Correct Brushing Technique to Protect the Sensor Ring
Proper brushing technique prevents pressure sensor ring damage before it starts. Your smart toothbrush works best when you use it the right way.
Hold your toothbrush at a 45 degree angle toward your gums. For upper teeth, angle the brush upward. For lower teeth, angle it downward. This position lets the sensor ring avoid excess stress during brushing.
Let the brush do the work for you. Many people press too hard, thinking more pressure means cleaner teeth. Hard brushing triggers the pressure sensor and causes internal stress on the ring. The sensor detects this force and may crack over time from repeated strain.
Glide the brush gently from tooth to tooth. Use smooth, controlled motions instead of scrubbing back and forth. Gentle movements reduce impact on the sensor ring and protect the waterproof seal underneath.
Brush consistently every day. Regular, gentle brushing is better than occasional aggressive sessions. Your teeth stay clean without damaging the sensor mechanism.
Pay attention to what your toothbrush tells you. If the brush vibrates or beeps during use, you are applying too much pressure. Stop pushing and reduce your force immediately. These alerts protect your device from damage.
Clean your toothbrush regularly. Remove the brush head after each use and rinse the metal shaft. Debris buildup can cause loose connections, which puts extra stress on the pressure sensor ring.
Enable pressure sensor feedback if your toothbrush offers this feature. Many smart toothbrushes let you activate alerts through charger settings. These reminders help you maintain the right brushing pressure throughout your routine.
Start with these technique changes today. You will notice your toothbrush performs better and lasts longer. Gentle, consistent brushing protects the sensor ring and keeps your device working properly for years.
Common Mistakes That Cause Sensor Ring Cracking
Brushing too hard is the leading cause of pressure sensor ring cracking. Your smart toothbrush has a built in limit for a reason. When you apply excessive force, the sensor ring bears all that pressure and eventually fails.
Many people think harder brushing means cleaner teeth. This is false. Electric toothbrushes already vibrate thousands of times per minute. Adding extra pressure actually reduces effectiveness and damages your device.
The sensor detects when you press down too firmly. If you ignore the vibration alerts or beeping sounds, you’re pushing the ring past its safe limits. Over time, tiny cracks form inside the seal.
Improper brush head attachment creates another major problem. When you twist or force the brush head onto the handle, you misalign the sensor ring. This misalignment puts stress on one side of the ring. The ring cracks unevenly under normal brushing pressure.
Many users don’t realize how gently they should reattach their brush heads. Snap it on straight, not at an angle. Avoid twisting motions when attaching or removing the head.
Using the wrong brush angle also contributes to sensor damage. If you brush straight across your teeth instead of at 45 degrees, you’re applying sideways pressure on the ring. This lateral force weakens the seal faster than vertical pressure.
Neglecting regular cleaning is another mistake. Plaque and toothpaste buildup around the base creates friction. This friction stresses the sensor ring during each brushing session.
Finally, some users don’t activate pressure sensor feedback. Your toothbrush gives you alerts when you’re brushing too hard. Ignoring these warnings means you keep damaging the ring without knowing it.
The solution is simple: brush gently, attach heads carefully, and listen to your device’s feedback. These three habits prevent most sensor ring cracks before they start.
Troubleshooting Persistent Sensor Issues and When To Contact the Manufacturer
When your smart toothbrush shows persistent sensor issues, you need to know whether you can fix it yourself or need help from the manufacturer.
Start with basic troubleshooting steps. Remove your brush head and inspect the metal shaft carefully. Look for any looseness or visible damage. A loose shaft often means the handle has a fault that requires professional repair. Next, try resetting your pressure sensor. Hold down your mode or intensity button. Press the power button twice while the toothbrush sits on its charger. Wait a few seconds and see if the sensor responds normally.
Check your toothbrush display for error codes or warning lights. A constant red light typically signals a broken pressure sensor. This usually means internal damage that you cannot repair at home. If the sensor ring itself shows visible cracks at the base of the handle, the waterproofing is compromised. Water can now enter the device and damage internal components.
Know when DIY fixes won’t work. If resetting the sensor doesn’t help, the problem lies deeper inside the handle. Manufacturer support becomes necessary at this point. Contact the company’s customer service with photos of the damage and a description of what happened. Most manufacturers ask about your purchase date and warranty coverage.
Provide clear details about when the cracking started and what you were doing when you noticed it. Be honest if the damage came from dropping the toothbrush or brushing too hard. Manufacturers often replace defective units under warranty, even if the damage seems user caused.
Document everything before contacting support. Take photos of the cracked sensor ring from multiple angles. Write down the exact model number and serial number. Keep your purchase receipt handy. This information helps the manufacturer process your claim faster and determine whether replacement or repair is the best option.
Final Thoughts
A cracked pressure sensor ring feels like a big problem. But most of the time, it’s fixable.
Start with the simple stuff first. Check your brush angle. Reduce your pressure. Reattach your brush head properly.
These small changes prevent future cracks. They also protect the sensor ring you already have.
If the crack already happened, don’t panic. Inspect the metal shaft for looseness. Try resetting the pressure sensor through your charger settings.
Many toothbrushes recover fully after a proper reset. This works especially well when the crack is minor.
Sometimes the damage runs deeper than a simple fix. A loose shaft or constant red light points to a handle fault.
In these cases, contact the manufacturer. Trying to force a repair yourself can make things worse.
Waterproofing matters too. A cracked base lets water reach internal parts. This can damage your toothbrush permanently.
If you feel confident fixing small cracks yourself, go ahead. Just make sure you understand the risks first.
Your toothbrush works best when every part functions correctly. The pressure sensor protects your gums from damage.
It also protects your enamel from wearing down too fast. Ignoring a cracked ring only makes the problem worse over time.
Good brushing habits prevent most sensor problems. Gentle pressure, correct angles, and proper brush head attachment go a long way.
These habits protect your toothbrush and your teeth at the same time. They cost nothing extra to practice daily.
Smart toothbrushes work hard to protect your oral health. Taking care of them keeps that protection strong.
A little attention now saves you money and stress later. Your smile deserves that consistent care.
Fix small issues early. Contact support when needed. Keep brushing gently, and your toothbrush will keep working well for you.
Frequently Asked Questions
Why does my pressure sensor ring keep cracking?
Pressure sensor rings crack from two main causes: brushing too hard and physical damage to the handle. When you apply excessive force, the sensor detects the pressure and can eventually fail. Dropping your toothbrush or squeezing the handle too tightly also damages the ring. The sensor sits in a delicate spot near the brush head attachment point.
Most cracks happen gradually over time. You might not notice until the sensor stops working completely. That’s why gentle brushing matters so much. Let the brush do the work instead of pushing down hard.
How do I know if my pressure sensor ring is actually cracked?
Your toothbrush will show clear warning signs. A constant red light on your display means the sensor is broken. The brush might vibrate differently or stop responding to pressure adjustments.
You can also inspect it visually. Remove the brush head and look at the metal shaft where it connects to the handle. Look for visible cracks, chips, or discoloration in that area. A loose metal shaft also indicates sensor damage.
Can I fix a cracked sensor ring myself?
It depends on the crack severity. Small surface cracks on the base might be fixable with waterproof epoxy if you feel comfortable with repairs. However, internal sensor damage requires manufacturer support.
Don’t attempt internal repairs unless you have experience with electronics. You could make the problem worse or damage the waterproofing further. Most people should contact the manufacturer instead.
What should I tell the manufacturer when reporting sensor damage?
Provide specific details about when the cracking started. Explain what you were doing when you noticed it. Take photos of the cracked area from different angles before contacting support.
Mention whether the toothbrush still charges and powers on. Tell them if you’ve already tried resetting the sensor. This information helps them determine if you need a replacement or repair.

Welcome to The File Fix. I’m Millie, and I review tech so you don’t have to suffer buyer’s remorse.
Navigating the endless sea of Amazon devices and gadget releases can feel like a full-time job. That’s why I do the heavy lifting. I dig past the unreliable 5-star reviews and shiny spec sheets to test how these devices actually hold up in the real world. Whether you’re looking for the best budget earbuds, a reliable power bank, or the latest smart home gear, you’ll find honest, no-nonsense breakdowns here.