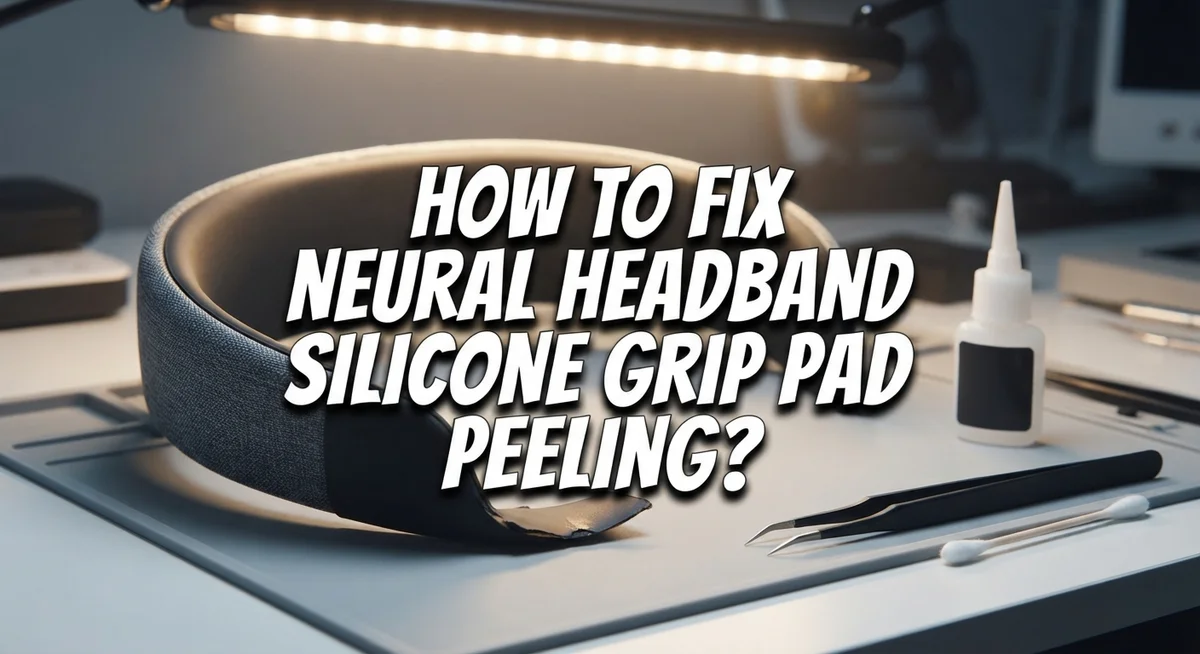
How To Fix Neural Headband Silicone Grip Pad Peeling?
Does your neural headband have a peeling silicone grip pad? You are not alone. This is a common issue that happens over time.
Silicone grip pads naturally wear down with regular use. Sweat, heat, and friction all play a part. The adhesive underneath weakens, and the pad starts to lift at the edges.
The good news is that you can fix this problem yourself. You don’t need to throw away your headband or buy a new one right away.
In a Nutshell
- Peeling happens naturally. Adhesive wears down over time due to sweat, oil, and regular use.
- You can fix it at home. No need to send your headband for professional repair.
- Clean the surface first. Remove dirt and oil before you apply any glue.
- Use the right adhesive. Aquaseal works well for silicone and rubber materials.
- Press firmly and let it dry. Air dry the pad completely without using heat.
- Replacement is an option too. If the repair does not hold, a new pad might work better.
Why Silicone Grip Pads Peel Over Time
Silicone grip pads peel because the adhesive holding them to your headband breaks down over time. This happens to everyone who uses their neural headband regularly.
Sweat and oils from your skin are the main culprits. When you wear your headband, moisture and body oils seep into the edges where the silicone pad meets the plastic or metal band. These substances soften the adhesive and reduce its sticking power.
Heat also plays a role in adhesive degradation. If you store your headband in warm places or expose it to direct sunlight, the glue loses strength faster. Temperature changes cause the silicone and the headband material to expand and contract at different rates, which puts stress on the bond between them.
Friction and bending accelerate peeling too. Every time you put on or take off your headband, the grip pad flexes slightly. Over months of use, this constant movement weakens the adhesive connection. The edges peel first because they experience the most stress.
Regular wear is completely normal. Your grip pad does not peel because you did something wrong. It peels because adhesives have a limited lifespan, especially when exposed to moisture and movement.
The good news is that peeling does not mean your headband is ruined. The silicone material itself stays flexible and functional. Only the adhesive bond has failed. This makes repair straightforward.
Understanding why peeling happens helps you prevent it in the future. Proper drying after workouts, storing your headband in cool dry places, and handling it gently all extend the life of your grip pad. But even with perfect care, some peeling will eventually occur.
Knowing the cause also helps you choose the right repair method. You can reattach the pad with fresh adhesive, or you can replace the pad entirely if reattachment fails.
What You’ll Need Before Starting the Repair
Before you start fixing your peeling silicone grip pad, gather the right materials. Having everything ready makes the repair faster and more successful.
Adhesive is your most important tool. You need a strong glue designed for rubber and silicone materials. The adhesive must bond well to both the silicone pad and the headband surface underneath. Choose a product that dries clear and remains flexible after it sets. Flexibility matters because your headband moves and bends during use.
Cleaning supplies come next. You will need something to remove dirt, sweat, and oils from both the pad and the headband surface. Isopropyl alcohol works well for this job. A soft cloth or paper towel helps you apply the cleaner without scratching anything. Make sure your cloth does not shed fibers onto the surface.
Pressure tools help during reconnection. You do not need anything fancy here. A clamp, heavy book, or even your hand works fine. The goal is to press the pad firmly against the headband while the adhesive sets. Consistent pressure ensures good contact between surfaces.
Protective items keep your workspace clean. Lay down newspaper or use a disposable surface. Adhesive can drip or spread, and you want to protect your table or workspace. Wear gloves if you have sensitive skin, since some adhesives can irritate hands.
Optional but helpful items include a small brush or applicator. This lets you spread adhesive evenly across the surface. A toothpick or small stick also works for applying glue to tight spaces.
Check your workspace lighting. Good light helps you see exactly where the pad is peeling and where you need to apply adhesive. You will work more carefully with proper visibility.
Gather all these items before you begin. Starting organized prevents delays and mistakes during your repair.
Step-by-Step Guide to Fixing Peeling Grip Pads
Start by gathering everything you need for this repair. Having materials ready before you begin makes the process smoother and faster.
Adhesive is your foundation. You need a glue specifically made for silicone and rubber bonding. This type of adhesive creates a lasting connection between the pad and your headband. Regular super glue often fails with silicone materials because it does not bond well to flexible surfaces.
Cleaning supplies matter more than most people realize. Grab a soft cloth, some rubbing alcohol, and warm water. You will use these to remove sweat buildup, oils, and dirt from both the grip pad and the headband surface. A clean surface helps adhesive stick properly.
Pressure tools do not need to be complicated. A clamp, heavy book, or even your hand works fine. You simply need something to hold the pad firmly in place while the glue sets. This pressure ensures full contact between the pad and headband.
Protective items keep your workspace safe. Lay newspaper or cardboard underneath your work area. Adhesive can drip or smear, and you want to avoid damaging your table or floor. Wear old clothes or an apron since some glues stain permanently.
Optional supplies make the job easier. A small brush or foam applicator helps spread adhesive evenly across the surface. This prevents thick globs that take longer to dry. You might also want cotton swabs for cleaning tight corners where the pad meets the headband.
Ventilation matters for safety. Open a window or work in a well-ventilated space. Many adhesives release fumes during drying. Fresh air keeps you comfortable and helps the glue cure properly.
Double check your supplies before starting. This simple step prevents frustration and ensures your repair succeeds on the first try.
Choosing the Right Adhesive for Silicone Repairs
Choosing the right adhesive makes or breaks your repair. Silicone grip pads need a glue that bonds rubber to rubber or rubber to plastic effectively. Regular super glue won’t work here because it hardens too quickly and doesn’t flex with your headband’s movement.
Flexible adhesives are your best option. They allow the grip pad to move naturally without cracking or peeling again. Rigid glues fail because they can’t handle the bending and stretching your headband experiences during daily use. You need something that stays slightly flexible even after drying.
Water resistant adhesives matter too. Your grip pad gets wet from sweat and moisture regularly. An adhesive that breaks down in damp conditions will fail within weeks. Look for formulas designed to cure in humid environments.
Speed of application affects your success rate. Some adhesives set in minutes, while others take hours. Quick setting glues let you use your headband sooner, but they give you less time to position the pad correctly. Slower setting options let you adjust placement, but require longer curing times.
Check whether your chosen adhesive works on both the pad material and your headband’s base. Silicone pads sometimes sit on plastic, metal, or rubber surfaces. Your adhesive must bond to both materials equally well.
Temperature stability matters during and after drying. Some adhesives weaken if exposed to heat too soon. Others require warmth to cure properly. Read the instructions carefully to understand your specific product’s needs.
Waterproofing is non negotiable. Your headband will contact sweat, rain, and humidity. Choose an adhesive that maintains its bond even when wet. This prevents your repair from failing after just one workout.
Test your chosen adhesive on a small, hidden area first if possible. This prevents wasting time and materials on a formula that doesn’t work for your specific headband materials.
Common Mistakes to Avoid During Repair
Using the wrong adhesive type is the biggest error people make. Silicone grip pads need flexible glue that bonds rubber to plastic or metal. Regular super glue or wood adhesive will fail quickly. Your adhesive must stay flexible as the headband moves and bends during use.
Not cleaning the surface before reattachment causes repairs to fail fast. Sweat, dirt, and oils create a barrier between the pad and headband. Wipe both surfaces thoroughly with rubbing alcohol and let them dry completely. A clean surface ensures strong bonding that lasts.
Applying heat too quickly ruins many repairs. Some people use hair dryers or heat guns to speed up drying. This causes the adhesive to set unevenly and creates weak spots. Let your repair air dry naturally at room temperature instead.
Pressing too lightly during reconnection is another common mistake. You need firm, consistent pressure for at least several minutes. Use a clamp, heavy book, or your hand to hold the pad down. Light pressure means weak adhesion that peels again within days.
Ignoring the adhesive’s drying time leads to premature failure. Even after you remove pressure, the bond needs hours to fully cure. Avoid wearing or bending your headband until the glue sets completely. Check your adhesive instructions for exact timing.
Reusing old, dried adhesive wastes your time and effort. Always apply fresh glue to the surface. Old adhesive has lost its bonding strength and flexibility.
Skipping the test fit before applying adhesive creates alignment problems. Position the pad exactly where it should go first. Mark the edges lightly so you know where to press when applying glue.
Finally, avoid excessive moisture immediately after repair. Your headband needs time to cure in a dry environment. Wait at least 24 hours before exposing it to sweat or water.
Troubleshooting: When Reattachment Doesn’t Hold
When your reattachment doesn’t hold the first time, don’t give up. This happens more often than you’d think, and it usually means one of a few specific issues is at play.
The most common reason for failed reattachment is insufficient adhesive coverage. You may have applied glue to only part of the peeling section. The grip pad needs adhesive across the entire contact surface, not just the edges. Lift the pad again carefully and inspect the base. Look for dry spots or areas where the original glue remains. These spots prevent new adhesive from bonding properly.
Surface contamination is another major culprit. Even after cleaning, invisible residue can remain on the headband or pad. Oils from your skin, dust particles, or old adhesive fragments block the new glue from making a strong bond. Clean the area a second time with rubbing alcohol and let it dry completely before reapplying adhesive.
Your pressure application during the initial repair matters more than most people realize. If you didn’t press firmly enough or didn’t maintain pressure long enough, the bond never fully formed. The adhesive needs consistent, solid contact to cure properly. When you reattach, press down hard and hold for the full time recommended by your adhesive’s instructions.
Temperature during curing affects your results significantly. If the area was too cold or experienced temperature fluctuations while drying, the adhesive may not have set correctly. Ensure your headband sits in a stable, room temperature environment during the entire curing period.
If reattachment still fails after a second attempt, the pad material itself may be damaged or the headband’s surface may have deteriorated. In these cases, replacement of the grip pad becomes your better option. This prevents repeated frustration and ensures your headband functions reliably again.
Caring for Your Headband to Prevent Future Peeling
Proper care prevents most grip pad problems before they start. Your headband faces daily stress from sweat, moisture, and repeated use. Small habits make a big difference in keeping your silicone grip pads intact.
Clean your headband regularly with a soft, damp cloth. Sweat and dirt accumulate on the grip pads and weaken the adhesive underneath. Wipe down the pads after each use, especially if you’ve been exercising or wearing the headband in humid conditions.
Allow your headband to air dry completely after cleaning. Never use heat sources like hair dryers or direct sunlight to speed up drying. Excess heat breaks down the adhesive bond and causes the pads to lift prematurely. Let moisture evaporate naturally at room temperature.
Store your headband properly when you’re not wearing it. Keep it in a cool, dry place away from direct sunlight. Extreme temperatures damage the silicone material and weaken the adhesive. Avoid storing it in damp environments like bathrooms or gym bags.
Check your grip pads regularly for early signs of peeling. Catch problems early before they become worse. If you notice a corner starting to lift, press it back down gently while the adhesive is still somewhat flexible.
Avoid excessive bending or folding of your headband. The grip pads experience stress when you roll or crease the band too tightly. Store it flat or loosely coiled rather than compressed.
Limit moisture exposure when possible. While some contact with sweat is unavoidable, try to keep your headband away from pools, showers, and heavy rain. If it gets soaked, dry it thoroughly before storing.
These simple care habits extend the life of your grip pads significantly. Consistent maintenance prevents adhesive degradation and keeps your headband comfortable and secure for longer.
Final Thoughts
Fixing a peeling silicone grip pad is easier than most people expect. You don’t need special training or expensive tools. You just need the right adhesive, a clean surface, and some patience.
Aquaseal glue works well for silicone and rubber materials. It creates a strong bond that holds up against sweat and daily wear. This makes it a smart choice for neural headband repairs.
Remember the core steps. Clean the surface first. Peel back the loose section carefully. Apply adhesive evenly. Press firmly and hold for the recommended time.
Then let everything air dry completely before you use your headband again.
Most repair failures happen for simple reasons. People rush the drying process. They skip cleaning the surface. They use the wrong glue type entirely.
Avoiding these mistakes gives your repair a much better chance of success. Take your time with each step. A rushed repair rarely lasts long.
If your first attempt doesn’t hold, don’t panic. Try again with fresh adhesive and better surface prep. Sometimes a second attempt fixes what the first one missed.
If repairs keep failing, replacement pads are a good backup option. This is especially true when the material itself has worn out or damaged beyond repair.
There’s no shame in choosing replacement over repeated fixes.
Good care habits make a real difference too. Regular cleaning, proper storage, and avoiding excess moisture all help your grip pads last longer.
These small habits prevent bigger problems down the road.
Fixing peeling grip pads is a practical skill worth learning. It saves you money and keeps your headband working properly.
With the right adhesive and careful technique, most peeling issues are fixable at home. Stay patient, follow each step carefully, and your headband will serve you well for a long time.
Frequently Asked Questions
Why does my silicone grip pad keep peeling off?
Silicone grip pads peel because the adhesive underneath breaks down over time. Moisture, heat, and regular wear all speed up this process. The pad itself may also shift slightly with repeated use, which weakens the bond.
Can I repair this myself without professional help?
Yes, you can absolutely fix this at home. The repair process is straightforward and requires only basic materials. Most people successfully reattach their grip pads on the first or second attempt.
What’s the best way to clean the surface before reapplying adhesive?
Use a soft cloth slightly dampened with water to wipe away dirt and debris. Let the area dry completely before you apply any new adhesive. A dry, clean surface gives your adhesive the best chance to bond properly.
How long should I wait before using my headband after repair?
Allow your headband to air dry for at least 24 hours after reattachment. This gives the adhesive time to cure fully. Rushing this step is one of the main reasons repairs fail.
What should I do if the repair doesn’t hold after my second attempt?
If reattachment keeps failing, the pad material itself may be damaged. In this case, replacement pads are worth considering. There’s no harm in choosing a fresh pad over repeated repair attempts.

Welcome to The File Fix. I’m Millie, and I review tech so you don’t have to suffer buyer’s remorse.
Navigating the endless sea of Amazon devices and gadget releases can feel like a full-time job. That’s why I do the heavy lifting. I dig past the unreliable 5-star reviews and shiny spec sheets to test how these devices actually hold up in the real world. Whether you’re looking for the best budget earbuds, a reliable power bank, or the latest smart home gear, you’ll find honest, no-nonsense breakdowns here.