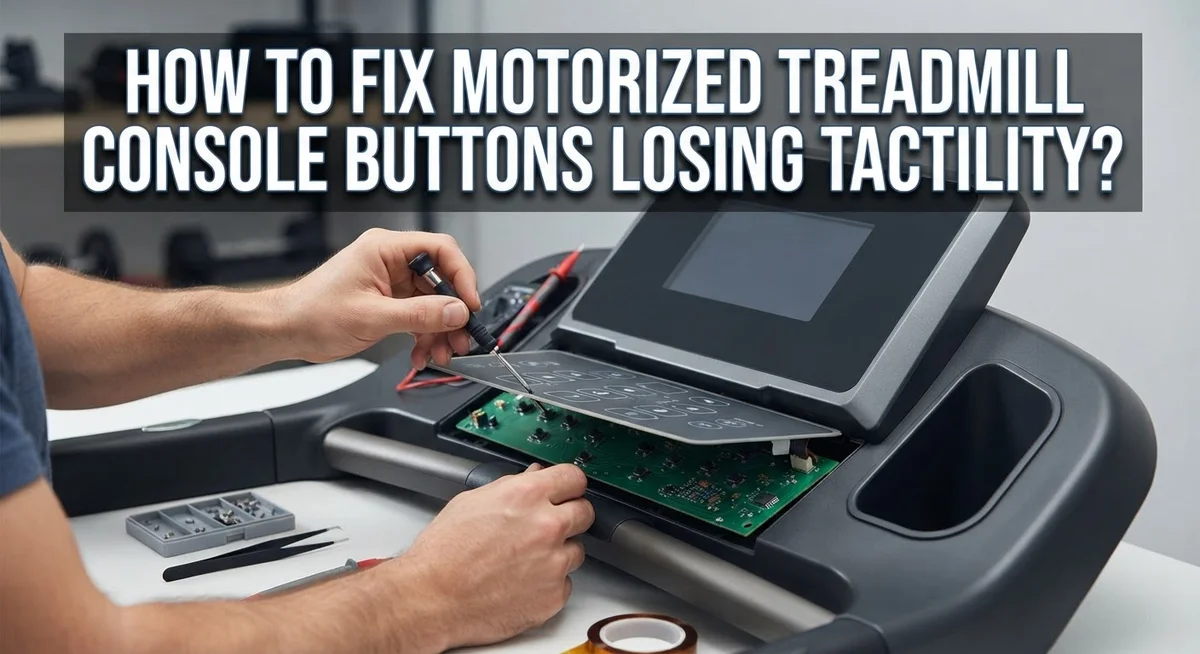
How To Fix Motorized Treadmill Console Buttons Losing Tactility?
Do your treadmill console buttons feel mushy or unresponsive? You press them, but nothing happens right away. This is a common problem, and it does not mean your machine is broken for good.
Tactility loss usually happens for simple reasons. Dust builds up inside the console over time. Cables can loosen from regular use. Sometimes the firmware just needs a refresh.
The good news is that you can often fix this yourself. You do not always need special tools or a repair technician. Many fixes take just a few minutes.
In a Nutshell
- Run a diagnostic test first. This checks signal continuity and tells you exactly what’s wrong before you start any repairs.
- Open the console and clean it out. Remove the top cover, take out the two black clips near the motor, and use a blower to clear dust buildup.
- Reseat the ribbon cable connector. Unplug it, wait a few seconds, then plug it back in. This simple step fixes many stuck or mushy buttons.
- Check the ribbon cable attachment. Make sure it connects securely to the keypad. A loose connection often causes tactility loss.
- Inspect wires in the upright post. Loose wiring here can also affect button response.
- Update or calibrate the firmware. Outdated or corrupted software is a common hidden culprit. Reprogramming your console can solve issues that hardware fixes cannot.
Why Treadmill Console Buttons Lose Tactility
Treadmill console buttons lose tactility for several predictable reasons. Understanding these causes helps you fix the problem faster and avoid unnecessary repairs.
Dust accumulation is the most common culprit. Over time, sweat, lint, and debris settle inside your console. This buildup blocks the electrical contacts that make buttons respond. When dust layers form between the button and its contact point, you get that mushy, unresponsive feeling.
Loose ribbon cable connections frequently cause tactility loss too. The ribbon cable connects your buttons to the console’s main circuit board. If this cable shifts or doesn’t seat properly, signal transmission fails. Your button presses don’t register because the electrical pathway breaks down.
Firmware corruption or outdated software creates another common issue. Your console’s internal programming controls how buttons respond. When this software becomes corrupted or falls behind, buttons feel sluggish or don’t work consistently.
Loose wiring in the upright post can also reduce button responsiveness. Vibration from the motor and regular use cause wires to shift. These loose connections interrupt the electrical signals your buttons need to function properly.
Worn button contacts happen with age and heavy use. The metal contacts inside each button gradually degrade. This wear reduces the electrical connection strength, making buttons feel less responsive.
Single stuck buttons sometimes develop from repeated pressing or debris. A stuck button can affect the entire console’s performance and make other buttons feel less tactile.
The good news is that most tactility problems stem from fixable causes. Dust cleaning, cable reseating, and firmware updates resolve the majority of these issues without requiring component replacement. Diagnostics testing reveals exactly which cause affects your specific console.
Diagnosing the Problem: Electronic Testing Before You Start
Electronic testing is your first step before touching any screwdriver or opening the console. This diagnostic approach saves you time and prevents unnecessary repairs.
Start by plugging in your treadmill and pressing each button slowly. Pay attention to which buttons respond and which ones feel dead. Does the display light up? Do any buttons produce sounds or beeps? Write down exactly what happens with each button you press.
Next, access your treadmill’s built in diagnostic menu. Most motorized treadmills have a service mode you can enter by holding specific button combinations during startup. Check your manual for the exact sequence. The diagnostic menu shows you real time signal readings for each button.
Watch the display as you press buttons during the diagnostic test. You should see numerical values change for each button you touch. If a button produces no value change, that button has a signal continuity problem. If all buttons show values, your issue is likely software related rather than hardware related.
Test the console display itself by navigating through menus. Slow response times suggest firmware issues. Buttons that don’t register at all suggest connection problems or physical damage.
Look at the LED indicators on your console. Are they bright and responsive? Dim or flickering lights indicate power delivery problems. Check whether the console responds to the power button. A responsive power button but unresponsive program buttons points to specific button contact issues.
Record all your diagnostic findings. This information tells you whether you need to clean connections, reseat cables, or update firmware. Electronic testing eliminates guesswork and focuses your repair efforts on the actual problem. You now know exactly what needs fixing before you start disassembling anything.
Accessing the Console: Removing the Top Cover Safely
Removing the top cover safely is your gateway to fixing button tactility issues. Before you start, unplug your treadmill completely from the electrical outlet. This protects you from electrical shock and prevents accidental button presses during your work.
Locate the two black clips positioned near the motor area on the underside of the console top. These clips hold the cover securely in place. Gently squeeze each clip inward while slowly lifting the top cover away from the console body. Move deliberately and avoid sudden jerking motions that could damage internal components.
As you lift, watch for any ribbon cables or wires connecting the cover to the main console. These delicate connections snap easily if you pull too hard. Pause and examine how they attach before fully separating the cover. Take a photo with your phone to remember the exact positioning for reassembly later.
Set the top cover on a clean, soft surface like a towel. This prevents scratches and keeps dust from settling back inside. Never force the cover or apply excessive pressure at any point.
Inside, you’ll see the button membrane and ribbon cable connections. The interior often contains significant dust buildup that reduces button responsiveness. Use a soft brush or compressed air blower to gently remove accumulated debris around the buttons and connections.
Keep the workspace organized and well lit. Poor visibility leads to accidental damage or missed loose connections. Your careful approach during removal directly impacts successful reassembly and proper button function restoration.
Cleaning Dust and Debris From Internal Components
Dust and debris accumulation is the primary reason console buttons lose their responsive feel. Over time, particles settle inside your console and interfere with electrical contacts. Cleaning these internal components restores tactility in most cases.
Start by unplugging your treadmill completely from the wall outlet. This ensures your safety while working inside the console. Wait at least 30 seconds before proceeding to allow any residual power to discharge.
Use a handheld blower or compressed air canister to remove dust from internal components. Direct the airflow gently across the button membrane and circuit board areas. Avoid using a vacuum cleaner, as static electricity can damage sensitive electronics. Work slowly and methodically to dislodge particles without forcing them deeper into crevices.
Pay special attention to the ribbon cable connector and the area surrounding button contacts. Dust buildup here directly affects how buttons register your presses. Blow air around the edges where the ribbon cable connects to the main circuit board.
Inspect the button contacts themselves while you have access. Look for any visible dust, discoloration, or corrosion on the contact points. Gently wipe contact areas using a clean, dry cotton swab if you spot debris. Never use liquids or solvents on electronics.
After cleaning, reseat the ribbon cable by disconnecting and reconnecting it firmly. This removes any dust particles trapped between connector pins. Wait a few seconds between disconnection and reconnection to ensure proper reset.
Plug your treadmill back in and test each button slowly. Press them multiple times to verify responsiveness has improved. Most tactility problems resolve after thorough internal cleaning. If buttons still feel unresponsive, the issue likely involves firmware or deeper component problems requiring further diagnosis.
Reseating the Ribbon Cable and Checking Connections
The ribbon cable is the communication highway between your console buttons and the main circuit board. When buttons lose tactility, this cable often sits loose or has poor contact at its connector points.
Start by ensuring your treadmill is unplugged from the wall. This protects you from electrical hazards while you work inside the console. Locate the ribbon cable connector where it plugs into the circuit board near the button panel.
Gently grasp the connector and pull it straight out. Do not twist or angle it sideways, as this can damage the delicate pins inside. Look at both the connector and the port it came from. Check for any bent pins, corrosion, or visible damage.
Clean the connector gently with a dry cotton swab. Remove any dust or residue that might prevent a solid connection. Inspect the ribbon cable itself along its entire length for tears, creases, or separation from the keypad.
Now reseat the connector firmly back into its port. Push straight in until you hear or feel a click. Wait about 10 seconds before plugging your treadmill back in. This brief pause allows capacitors inside the console to discharge safely.
Test each button slowly after reconnecting power. Press them several times to confirm the tactile response has returned.
If buttons still feel unresponsive, check the wires running through your treadmill’s upright post. These wires sometimes loosen from vibration during use. Gently trace them and ensure they connect securely at both ends.
Most tactility problems resolve after reseating the ribbon cable properly. The connection was likely loose from normal wear and vibration over time.
Inspecting Upright Post Wiring for Loose Connections
The upright post of your treadmill houses critical wiring that connects your console to the motor and control systems. When button tactility fades, loose connections in this area are often the culprit.
Start by unplugging your treadmill from the wall outlet. Safety comes first when inspecting electrical components. Look at the upright post carefully and trace where wires enter and exit this vertical support structure.
Gently follow each wire from the console down through the post. You’re looking for any cables that appear loose, frayed, or disconnected at their endpoints. Pay close attention to connection points where wires meet terminals or connectors. These areas experience vibration from regular treadmill use.
Use your fingers to check if any connectors can be wiggled or moved easily. They should feel snug and secure. If you find a loose connection, don’t force it. Instead, gently push the connector straight in until you hear or feel a click.
Inspect the wiring itself for visible damage. Cracks in insulation or bent connectors need attention. Look for any wires that appear pinched or compressed where they pass through the post.
Pay special attention to the area where wires exit the upright post near the console. This transition zone experiences stress from repeated console movements and vibration.
Once you’ve inspected all visible connections, plug your treadmill back in and test your buttons. Press each one slowly and deliberately. Notice if tactility has improved. Many button responsiveness issues resolve simply by reseating loose connections in the upright post.
If buttons still feel unresponsive after checking all wiring connections, the issue likely involves the ribbon cable or console firmware rather than post wiring.
Reprogramming and Calibrating Console Firmware
When your console buttons lose their responsive feel, firmware corruption or outdated software may be the culprit. Your treadmill’s console runs on programmed instructions that control how buttons communicate with the main circuit board. Over time, these programs can become corrupted or need updates.
Start by performing a comprehensive electronic diagnostic test. Most treadmills have a built in diagnostic mode accessible through specific button sequences. Check your user manual for the exact steps to enter this mode. This test checks signal continuity and tells you if buttons are sending proper electrical signals to the circuit board.
If the diagnostic reveals firmware issues, you’ll need to reprogram or calibrate your console. Unplug your treadmill completely before starting this process. Locate your console’s reset button, usually found on the back of the display panel or inside the battery compartment. Press and hold this button for 10 to 15 seconds until the screen goes blank.
After the reset, plug your treadmill back in and allow the console to restart. This fresh start often resolves software glitches causing button unresponsiveness. Test each button slowly and deliberately to check if tactility has returned.
If your treadmill has a firmware update feature, check the manual for instructions. Some models allow updates through a USB port or by visiting the manufacturer’s website. Updating your console software can fix compatibility issues and improve button responsiveness.
If buttons still feel unresponsive after resetting and updating, the problem likely involves hardware rather than software. Document which buttons feel affected and contact technical support with this information. They can determine if component replacement is necessary.
Avoiding Common Mistakes During the Repair Process
Many people rush into repairs without understanding what caused the button problem. Skipping diagnostic testing is the biggest mistake you can make. You need to know whether the issue stems from dust, loose connections, or firmware problems before you start taking things apart.
Don’t force ribbon cable connectors when reseating them. Push gently and straight. If you twist or angle the connector, you risk damaging the port permanently. The connection should slide in smoothly without resistance. When you feel resistance, stop and check the alignment.
Avoid using harsh cleaning materials on button contacts. Cotton swabs work well, but avoid liquids that could seep into the console. Water and electronics don’t mix. Stick to dry cleaning methods whenever possible.
Don’t overlook firmware updates as a potential fix. Many people assume buttons need physical replacement when a simple software update would solve the problem. Check your treadmill manual for update instructions before replacing any hardware.
Never skip the unplugging step. Working on a powered treadmill is dangerous. Always disconnect your machine from the wall outlet before opening the console or touching internal components.
Don’t assume all unresponsive buttons mean the same problem. Sometimes a single stuck button requires different treatment than multiple buttons losing tactility. Test each button individually to understand the specific issue.
Avoid opening the console multiple times unnecessarily. Each time you open it, you expose internal components to dust and risk damaging connectors. Plan your repair steps carefully so you complete everything in one session when possible.
Finally, don’t ignore visible damage to wires or connectors. If you see fraying, corrosion, or bent pins, address these issues immediately. Small problems worsen quickly without treatment.
Final Thoughts
Fixing treadmill console buttons does not need to be hard. Most tactility problems come from simple causes. Dust, loose cables, or outdated firmware are usually the culprits.
You do not always need a repair technician. Many fixes require no tools at all. A little patience solves most button problems.
Start with the easiest solutions first. Unplug your treadmill and check the wiring. Reseat the ribbon cable connector carefully.
Cleaning dust from the console often restores button response. A blower works well for this task. It removes buildup without damaging parts.
Firmware issues are just as common as physical problems. Corrupted or outdated software can make buttons feel unresponsive. A simple reset or update often fixes this.
Always test your buttons after each step. This helps you find what actually worked. It also prevents unnecessary disassembly later.
Diagnostic testing plays a key role here. It tells you whether the problem is hardware or software. This saves time and avoids guesswork.
Skipping this step is a common mistake. Many people jump straight to replacing parts. This often costs more time and money.
Remember that safety comes first. Always unplug your treadmill before opening the console. Working on powered equipment is risky and unnecessary.
If buttons still feel stuck after basic fixes, do not panic. A single stuck button is often fixable without tools. Larger issues may need component replacement.
In most cases, patience and careful inspection solve the problem. Clean connections and updated firmware fix a majority of tactility issues. Only a small number of cases need professional repair.
Following these steps in order gives the best results. You save money and extend your treadmill’s life. A responsive console makes every workout better.
Frequently Asked Questions
Why did my treadmill buttons suddenly lose their responsive feel?
Button tactility fades for three main reasons. Dust buildup inside the console reduces electrical contact between buttons and their sensors. Loose ribbon cable connections prevent signals from reaching the control board. Firmware corruption or outdated software can also make buttons feel unresponsive even when hardware works fine.
The good news? Most causes are fixable without tools or technician visits.
Can I fix stuck buttons myself without opening the console?
Yes, try the simplest solution first. Unplug your treadmill completely and wait 30 seconds. Plug it back in and test the buttons. This power cycle often clears temporary software glitches that cause sticking.
If buttons remain stuck, check your manual for a firmware update option. Many consoles have built in reset features accessible through the display menu. Only open the console if these basic steps don’t work.
What should I do if buttons feel mushy or don’t click anymore?
Mushy buttons usually indicate dust accumulation or loose internal connections. After unplugging, you can remove the console’s top cover by gently releasing two black clips near the motor area. Use a blower (not compressed air) to remove dust from inside.
Locate the ribbon cable connector and gently reseat it by disconnecting and reconnecting. Wait a few seconds between steps. This often restores button click and response.
When should I replace buttons instead of repairing them?
Perform a diagnostic test first. Most consoles have a built in test mode that checks button signal continuity. If the diagnostic passes but buttons still feel dead, firmware reprogramming is your answer.
If diagnostics fail or you see visible damage to wires and connectors, component replacement becomes necessary. Visible cracks, fraying cables, or burnt spots mean repair won’t help.