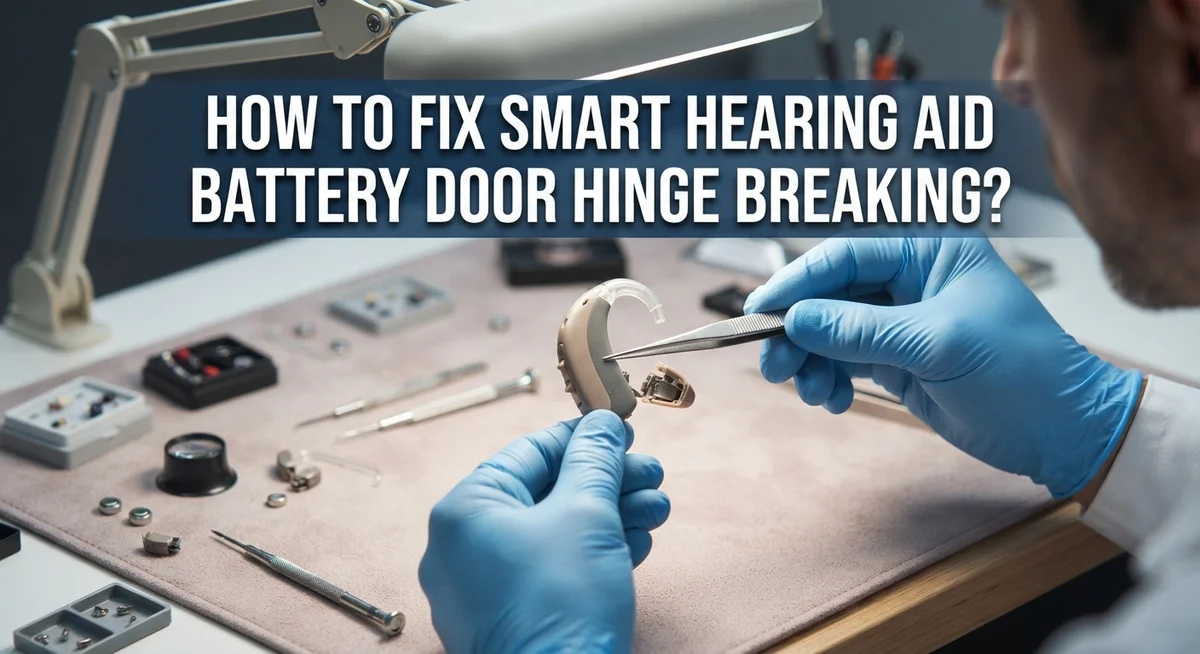
How To Fix a Smart Hearing Aid Battery Door Hinge Breaking?
A broken battery door hinge can turn your smart hearing aid into a frustrating problem overnight. This tiny part carries a big responsibility. It keeps your battery secure and your device working properly.
The good news? This issue is common and fixable. Many hearing aid users face this exact problem at some point.
You don’t have to panic or rush out to buy a new device. In this guide, we will walk you through simple ways to handle a broken hinge.
In a Nutshell
- A broken hinge is a small problem. You can often fix it at home with simple tools like tweezers and a tiny substitute pin.
- Krazy glue works well for temporary repairs. It holds the pin firmly in place until you get proper help.
- Try to reuse the original hinge pin if you still have it. This gives you the best fit and keeps the door working smoothly.
- DIY fixes are best for older or simple hearing aids. Newer smart hearing aids often need a professional touch instead.
- Calling your audiologist is always a smart move. Most battery doors are in stock and ready to ship fast.
- Replacement doors usually arrive within one to two days. Once it arrives, installation takes just minutes.
- Avoid waiting too long on critical repairs. A quick fix now saves you bigger headaches later.
Why Battery Door Hinges Break on Smart Hearing Aids
Battery door hinges break for several practical reasons. The hinge experiences constant stress from daily use. You open and close your hearing aid door multiple times every single day. This repetitive motion weakens the tiny metal components over time.
Moisture and humidity damage the hinge mechanism. Sweat from your ear and bathroom steam create corrosion. Metal parts rust and become brittle. The hinge loses its strength and snaps during normal opening.
Age plays a significant role in hinge failure. Older hearing aids have hinges made from materials that degrade naturally. Plastic components become fragile after years of use. Metal hinges oxidize and lose flexibility. Even well maintained devices eventually show wear.
Impact and pressure cause sudden breaks. Dropping your hearing aid, even from a short distance, can crack the hinge. Sitting on the device or applying too much force while opening the door damages the joint. Accidents happen quickly and break what took years to weaken.
Material fatigue is another common culprit. The hinge pin itself wears down from constant friction. Tiny metal particles break off. The pin becomes thinner and eventually snaps completely.
Smart hearing aids often have more delicate hinges than older models. The smaller size means thinner metal components. These compact designs prioritize miniaturization over durability. The battery door hinge bears significant responsibility in a tiny space.
Environmental factors accelerate breakdown. Temperature changes cause metal to expand and contract. This stress eventually causes failure. Salt air and pollution corrode the metal faster in coastal areas.
Understanding why your hinge broke helps you prevent future problems. Regular cleaning and careful handling extend the life of your battery door. Gentle opening and closing protects the mechanism. Keeping your device dry prevents moisture damage that weakens the hinge over time.
Signs Your Battery Door Hinge Is Damaged
Your smart hearing aid will show clear warning signs before the battery door hinge completely fails. Pay close attention to these signals so you can act fast.
The most obvious sign is a loose or wobbly battery door. When you open and close it, the door feels floppy instead of snapping shut with a firm click. This wobbling means the hinge pin is already damaged or partially broken.
You may notice the door won’t stay closed on its own. It pops open randomly during the day, especially when you move your head or touch the device. This happens because the hinge can no longer hold tension properly.
Look for visible cracks or bending around the hinge area. Sometimes you can see the damage with your eyes. Other times, the damage is so small that you only notice it by how the door behaves.
Listen for strange sounds when you operate the battery door. A clicking, cracking, or grinding noise means the hinge is struggling. These noises tell you the mechanism is wearing out fast.
The battery door may become difficult to open or close. It sticks, resists movement, or requires extra force. This friction indicates the hinge is misaligned or partially broken inside.
You might also notice the door sits at an odd angle. Instead of sitting flush against the device, it tilts or gaps appear around the edges. This misalignment shows the hinge is no longer supporting the door correctly.
Don’t ignore these warning signs. A damaged hinge gets worse quickly. Catching the problem early gives you more repair options and prevents your battery from falling out unexpectedly.
DIY Temporary Fix: Materials and Preparation
Before you start any repair work, gather the right materials. This preparation step makes the process smooth and prevents frustration.
You will need a substitute hinge pin. A shortened staple works well for this purpose. A quilting pin also serves as an effective replacement. Some people use a toothpick if the hinge opening is large enough. The key is finding something small and sturdy that fits into the hinge space.
Krazy glue is essential for holding everything together. This adhesive bonds quickly and creates a strong hold. Make sure your glue bottle has a fine applicator tip. Old or dried out glue won’t work properly, so check your supply before starting.
Get your tweezers ready. You need stout tweezers with a firm grip. Thin or flimsy tweezers will bend under pressure and won’t help you position the pin correctly. Good tweezers give you the control you need for this delicate work.
Optional materials can improve your results. Acrylic powder matches the color of your hearing aid if you want the repair to look less visible. This step isn’t necessary for function, but it helps with appearance.
Clear your work space completely. Find a clean, flat surface with good lighting. Remove any clutter that might cause you to lose small parts. A white towel or paper works well as a background. It helps you see tiny pieces clearly.
Wash your hands before handling your hearing aid. Clean hands prevent dirt and oils from entering the hinge area. Dirt can interfere with the repair and damage your device further.
Take your time during preparation. Rushing this stage leads to mistakes and wasted materials.
Step-by-Step Guide to Repairing the Hinge Yourself
Now that you have your materials ready, it’s time to perform the actual repair. The process is straightforward and takes about 10 to 15 minutes.
Start by examining the hinge closely with good lighting. You need to see exactly where the pin sits. Use your tweezers to carefully position your substitute pin (shortened staple or quilting pin) into the hinge opening. Work slowly and deliberately to avoid dropping small pieces.
Insert the pin from the top of the hinge first. Push it down gently until it seats properly. The pin should slide into the channel where the original pin lived. If resistance occurs, wiggle the pin slightly side to side. Don’t force it, as this can damage the hinge further.
Once the pin is partially in place, use your tweezers to push each corner of the pin firmly into the hinge. This ensures the pin sits evenly on both sides. The battery door should feel stable when you test it gently.
Now apply your adhesive carefully. Use just a small amount of Krazy glue around the pin area. The glue bonds quickly, so work fast but precisely. Avoid getting adhesive on the door itself or the hearing aid body.
Hold the battery door closed for about 30 seconds while the glue sets. Let it cure for a full five minutes before opening and closing the door repeatedly. Test the door several times to confirm it operates smoothly.
If the door still feels loose or unstable after the glue dries, the repair may not hold long term. This is when you should contact your audiologist for a professional replacement. Temporary fixes work best as short term solutions while you arrange permanent repairs.
When to Choose Professional Replacement Instead
Your smart hearing aid battery door hinge may need professional replacement instead of a DIY fix. Knowing when to make this choice saves you time and frustration.
Choose professional replacement if your hearing aid is newer or has advanced features. Smart hearing aids contain sensitive electronics. DIY repairs risk damaging internal components. Professional technicians have the right tools and training to work safely around these delicate systems.
Contact your audiologist immediately if the hinge damage affects how your battery door seals. A poor seal lets moisture inside. This damages the electronics and reduces battery life. Professionals ensure the replacement door creates a perfect seal every time.
Professional replacement is faster than you might think. Most hearing aid brands keep battery doors in stock. Your audiologist can typically install a new door in minutes. You get your hearing aid back the same day in many cases.
Professional replacement guarantees reliability. A new door from your manufacturer fits perfectly. It matches your hearing aid exactly. DIY fixes are temporary solutions that may fail again soon.
Consider professional replacement if your hearing aid is under warranty. DIY repairs might void your coverage. Your audiologist can replace the door without affecting your warranty protection.
If you have an older hearing aid model, professional help becomes even more important. Replacement parts for older models are harder to find. Specialty suppliers work with audiologists to locate these parts quickly.
Professional replacement costs less than hearing aid damage from moisture or improper repairs. Schedule an appointment with your audiologist today. Bring your hearing aid and describe the hinge problem. They will recommend the best solution for your specific device and situation.
What to Expect During Professional Battery Door Replacement
When you contact your audiologist about a broken battery door hinge, expect a smooth and quick process. Most audiologists keep replacement doors in stock, so you won’t face long delays. Your hearing care professional will examine your specific hearing aid model and order the correct replacement part if needed.
The actual replacement appointment takes only a few minutes to an hour. Your audiologist removes the old battery door carefully and installs the new one. They test the door to ensure it opens and closes smoothly. The entire visit moves fast because this is a routine repair.
If your audiologist doesn’t have the part immediately available, replacement doors typically arrive within one to two days. You can continue wearing your hearing aid during this short wait. Some manufacturers ship parts directly to the clinic for faster service.
During your appointment, your audiologist will also check the battery compartment for any damage. They inspect the sealing mechanism to confirm everything works properly. This inspection prevents future moisture problems that could harm your device.
Your audiologist may discuss what caused the hinge to break. Common causes include dropping the hearing aid, forcing the door open too hard, or normal wear over time. They can offer tips to prevent future damage.
Professional replacement guarantees that your hearing aid battery door functions like new. The part fits perfectly and comes with proper sealing. You get peace of mind knowing a trained professional completed the work correctly.
Most insurance plans cover professional hearing aid repairs. Ask your audiologist about coverage before your appointment. This ensures you understand any costs involved.
Mistakes to Avoid When Repairing a Battery Door Hinge
Repairing a smart hearing aid battery door hinge requires careful attention. Several common mistakes can make your situation worse or damage your device permanently.
Forcing the hinge pin without proper tools is a major error. Many people try to insert a replacement pin using their fingers or random objects. This approach strips the hinge socket and makes future repairs impossible. Always use stout tweezers for precise placement.
Applying too much adhesive ruins the repair. Excess glue seeps into the hinge mechanism and hardens the moving parts. Your battery door becomes stuck or immobile. Use only a small amount of adhesive on the pin itself, not inside the hinge socket.
Rushing the curing time causes immediate failure. Some people close their battery door before the glue sets completely. The pin shifts out of position while the adhesive is still wet. Wait at least 30 seconds after glue application before using your hearing aid.
Ignoring seal damage is another critical mistake. If the battery door doesn’t seal properly after repair, moisture enters the device. This destroys internal components and voids your warranty. Check that your door closes completely and sits flush against the hearing aid body.
Attempting complex fixes on newer smart models often backfires. Advanced hearing aids contain sensitive electronics near the battery compartment. DIY repairs risk damaging these components. Newer devices deserve professional attention from your audiologist.
Delaying professional help when DIY fails wastes time. If your temporary fix doesn’t hold after one week, stop trying repairs yourself. Contact your audiologist immediately. Professional replacement takes just minutes and guarantees your hearing aid works correctly.
Caring for Your Hearing Aid to Prevent Future Hinge Damage
Your smart hearing aid works best when you treat it with care every single day. Small habits now prevent big problems later.
Keep your battery door clean and dry. Moisture and debris create stress on the hinge. Wipe the battery compartment with a soft, lint-free cloth each morning. Never use water or cleaning solutions near the hinge area. Moisture causes rust and weakens the metal connection.
Handle the battery door gently when you open and close it. Avoid forcing it or slamming it shut. Your fingers should move slowly and deliberately. Quick, rough movements put pressure on the hinge that builds up over time.
Store your hearing aid in a dry case when you’re not wearing it. High humidity environments damage hinges faster. Use a dehumidifier in your bedroom if you live in a damp climate. Keep your case away from bathrooms and kitchens.
Check your battery door hinge weekly for signs of wear. Look for loose parts, cracks, or unusual sounds. Catching problems early stops major damage. If you notice the door feels stiff or doesn’t close smoothly, mention it to your audiologist right away.
Avoid dropping your hearing aid or bumping it against hard surfaces. Even small impacts can crack the hinge. Use a protective case designed for your specific model. Keep your hearing aid away from children and pets who might handle it roughly.
Replace your batteries using the correct technique your audiologist showed you. Improper insertion strains the hinge. If you’re unsure about the right method, ask your audiologist to demonstrate again.
These simple steps keep your battery door functioning smoothly for years.
Final Thoughts
A broken battery door hinge feels stressful at first. But now you know it’s a common problem with simple solutions.
You have two clear paths forward. Try a quick DIY fix with a pin and adhesive. Or call your audiologist for a permanent replacement.
DIY fixes work well as temporary solutions. They keep your hearing aid working until you get professional help. A shortened staple or quilting pin can bridge the gap in a pinch.
Professional replacement remains the best long term choice. Audiologists have the right tools and parts. They also check your hearing aid for other damage you might miss.
Remember that timelines are quick with professional help. Most repairs take minutes to an hour. Replacement doors usually arrive within one to two days if not in stock.
Don’t let a broken hinge stop you from wearing your hearing aid. Address it quickly so you don’t miss important sounds in your daily life.
Take action as soon as you notice the problem. A cracked or loose hinge only gets worse with time. Small issues become bigger repairs when ignored.
Prevention matters just as much as repair. Handle your battery door gently every day. Keep it clean, dry, and free from unnecessary pressure.
Your hearing aid is a valuable tool. It deserves careful handling and quick attention when something breaks.
Whether you choose a temporary fix or professional repair, you now have the knowledge to act. Trust your judgment about which option fits your situation best.
With the right care and timely repairs, your hearing aid will serve you well for years to come. Don’t hesitate to reach out for help when you need it.
Frequently Asked Questions
Can I fix a broken battery door hinge myself?
Yes, you can attempt a temporary fix at home. You’ll need a thin substitute pin like a shortened staple or quilting pin. Use tweezers to insert it carefully into the damaged hinge area. Push each corner firmly into place. Then secure it with adhesive. This works as a quick solution while you arrange professional help.
How long does professional battery door replacement take?
Professional replacement happens fast. Your audiologist can install a new door in minutes to a few hours. The replacement part typically arrives within 1 to 2 days. Most hearing aid models have doors available in stock at audiology offices. This makes getting back to normal hearing quick and easy.
What should I avoid when attempting a DIY repair?
Don’t force the hinge pin without proper tools. Avoid applying too much adhesive, as it ruins the repair. Never rush the curing time after gluing. Skip attempting complex fixes on newer smart hearing aid models, as they need professional care. If your DIY attempt fails, contact your audiologist right away instead of trying again.
Is my hearing aid still usable with a broken hinge?
Absolutely. A broken hinge doesn’t mean your hearing aid stops working. You can still wear it and hear clearly. The issue is keeping the battery door secure and protecting the internal components from moisture and debris. Address the hinge problem soon to prevent further damage. Your audiologist can help you stay connected to sound while repairs happen.