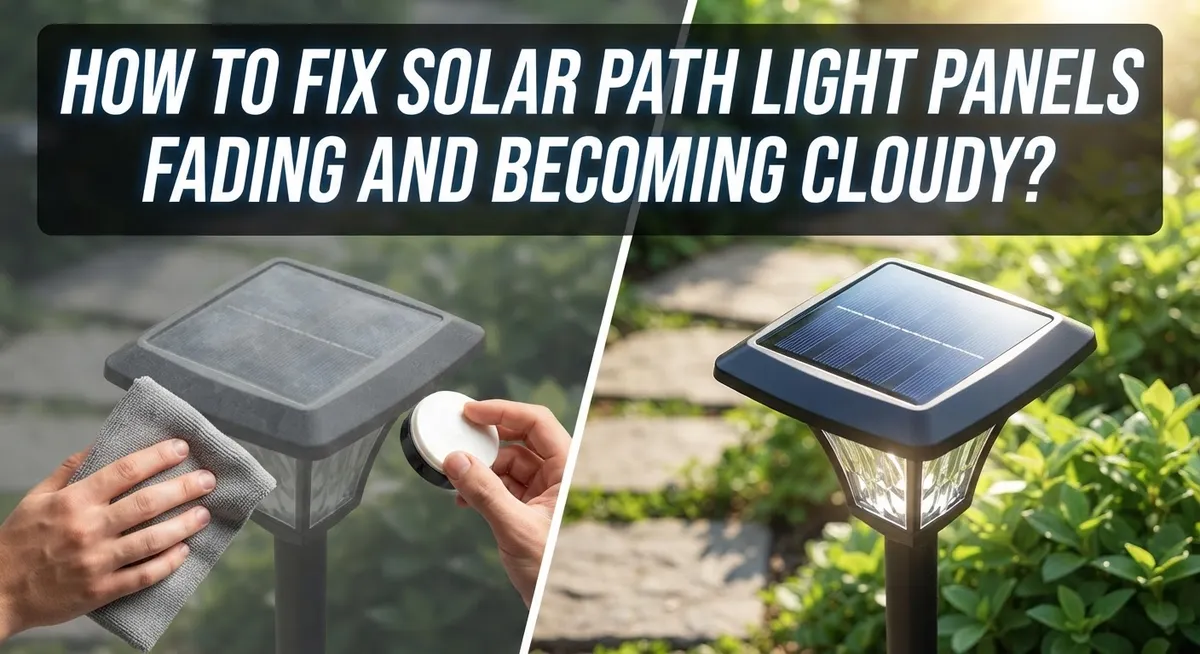
How To Fix Solar Path Light Panels Fading And Becoming Cloudy?
Solar path lights add charm to any garden. But over time, you might notice something odd. The panels turn cloudy or foggy, and the light output fades.
This happens to almost every solar light owner eventually. The good news is that you can often fix it yourself. You don’t need to buy new lights right away.
Cloudiness usually means water got trapped between the solar cell and the cover panel. This is not just surface dirt. It is an internal moisture problem that blocks sunlight from reaching the cell.
In a Nutshell
- Cloudiness comes from trapped moisture. Water sneaks between the solar cell and the cover panel. This creates that foggy look you see over time.
- Fading is a battery problem, not a panel problem. Most dim lights just need a fresh rechargeable battery. This simple swap often solves the issue fast.
- Cleaning helps with yellowed panels. Use a soft cloth with white vinegar to scrub gently. This works well for lighter discoloration.
- Polishing compound tackles heavy cloudiness. Automotive polishing compound restores clarity to foggy panels. Even toothpaste can work as an alternative for tough spots.
- Skip these common mistakes. Wet sanding with sandpaper rarely helps and can damage panels further. Applying clear coat afterward is also unnecessary.
- Replacement is sometimes the best fix. Panels typically last a few years before clouding returns. Knowing when to replace saves you time and frustration.
Why Solar Panels Fade and Turn Cloudy
Water infiltration causes the main problem you see with cloudy solar panels. The seal between your solar cell and the protective cover panel fails over time. Once that seal breaks, moisture sneaks inside and gets trapped between the two layers.
This trapped water sits inside your light permanently. You cannot simply wipe it away because it is not on the surface. The water creates that foggy, cloudy appearance you notice when you look at the panel.
Temperature changes make this worse. When your solar light heats up during the day, air inside expands. When it cools at night, air contracts. This constant expansion and contraction weakens the seal year after year.
Humidity in your climate speeds up the process. Areas with high moisture in the air experience cloudiness faster. Coastal regions and rainy climates see this problem more often than dry locations.
Fading is actually different from cloudiness. When your light gets dimmer but the panel stays clear, your battery is likely dying. Solar panels can fade slightly over years of sun exposure, but this is rare. Most dim lights have dead or failing rechargeable batteries inside, not cloudy panels.
The good news is understanding the difference helps you fix the right problem. A cloudy panel needs cleaning or polishing. A fading light needs a new battery. Some lights have both issues at once, so check carefully before you start repairs.
This natural degradation happens because solar lights are outdoor devices. They face constant weather exposure. The seal simply cannot last forever under these harsh conditions.
Fading vs. Clouding: Identifying the Real Problem
The difference between fading and clouding matters because each problem needs a different solution. You need to know which one you actually have before you start fixing anything.
Clouding looks obvious. Your solar panel develops a white, milky, or hazy appearance. The cloudiness sits inside the panel itself, not on the surface. You cannot wipe it away with a cloth because water is trapped between the solar cell and the cover panel. This internal moisture creates that foggy look that makes the light dimmer overall.
Fading appears different. Your panel stays clear and transparent, but your light output drops significantly. The panel itself looks fine. You can see through it perfectly. This happens because your rechargeable battery loses its ability to hold a charge over time. A faded panel with a dead battery means your light will barely glow at night, even on a sunny day.
Here’s a simple test to tell them apart. Look directly at your solar panel in bright light. If you see cloudiness, haziness, or white spots trapped inside the panel, you have a clouding problem. If the panel looks crystal clear but your light is dim, your battery is the culprit.
Why this matters for fixing. Replacing the battery solves fading issues quickly. Clouding requires cleaning, polishing, or panel replacement because the problem is structural. Confusing the two means you might replace a perfectly good battery when you really need to clean the panel.
Take a moment to identify which problem you face. This simple step saves you time and frustration later.
Tools and Supplies You’ll Need
You need several basic items to clean and restore your solar path light panels. Most supplies you probably have at home already, so this fix won’t cost much.
Start with soft cloths or microfiber towels. These are essential because rough materials scratch the panel surface. Regular cotton cloths work fine too. Avoid paper towels since they can be abrasive.
White vinegar is your first cleaning solution. This mild acid cuts through yellowing and light cloudiness without damaging the panel. You can also use distilled water if vinegar isn’t available. Never use harsh chemicals or bleach.
For heavier cloudiness, you’ll want automotive polishing compound. This product removes the hazy layer that forms when moisture gets trapped inside. You can find this at auto supply shops. A small container lasts through many light repairs.
Painter’s tape protects the surrounding areas during cleaning. This keeps polish and vinegar off the light housing and metal parts. Masking prevents accidental damage to other components.
A soft brush or old toothbrush helps scrub stubborn spots gently. This works especially well for yellowed panels. Soft bristles won’t scratch like stiff ones do.
Safety glasses protect your eyes from splashing vinegar or polish fumes. This is optional but recommended for your comfort.
A clean workspace helps you stay organized. You won’t lose small parts or accidentally drop panels.
Finally, keep a dry cloth nearby to wipe away excess moisture. This prevents water spots and speeds up the drying process.
These simple tools handle most cloudiness and fading problems. You don’t need expensive equipment or professional gear to restore your solar lights.
Step-by-Step: Cleaning and Restoring Cloudy Panels
Start by masking your work area with painter’s tape. This protects the light’s base and any surrounding components from cleaning solutions. Apply the tape around the edges of the solar panel carefully.
Next, wipe the panel with a dry soft cloth first. This removes loose dust and debris without pushing dirt into crevices. Gentle circular motions work best here.
For light cloudiness, mix white vinegar with water in equal parts. Dip your soft cloth into the solution and scrub the panel gently. Let the vinegar sit for a few minutes on stubborn spots. The acidity helps break down mineral deposits and light haze.
Rinse thoroughly with clean water and dry completely with a fresh cloth. Moisture left behind can cause more cloudiness to form.
For heavier cloudiness, use automotive polishing compound from auto supply shops. Apply a small amount to your cloth and work it across the panel in gentle circular motions. This removes oxidation and restores clarity better than vinegar alone.
Toothpaste also works effectively for heavily clouded panels. Use a soft toothbrush to apply it gently, then rinse well. The mild abrasive in toothpaste removes buildup without scratching.
After polishing, buff the panel with a clean, dry cloth until it shines. Check your work under direct sunlight to see the improvement clearly.
Remove the painter’s tape carefully once everything dries completely. Your panel should now look noticeably clearer and brighter.
Remember that cloudiness often returns eventually because water sits trapped inside the panel layers. This is normal wear for outdoor solar lights. Regular cleaning extends clarity between replacements.
Fixing Dim Lights by Replacing the Battery
Your solar path light dims over time for one main reason: the rechargeable battery inside loses its ability to hold a charge. This is the most common cause of fading lights, and the good news is that replacing the battery fixes the problem quickly.
Batteries in solar lights typically last between two to three years. After that period, they stop storing enough energy from sunlight to power your light at night. Your panel may look perfectly clear and clean, but the light still appears weak or barely glows.
Start by opening your solar light carefully. Most path lights have a top section that twists or slides off. Some models use a small screw you’ll need to remove with a screwdriver. Take a photo before disassembling so you remember how it goes back together.
Once open, locate the rechargeable battery inside. It usually sits in a small compartment near the light bulb or LED. Note the battery size and type before removing it. Common sizes include AAA or AA rechargeable batteries, though some lights use button cell batteries.
Purchase a replacement battery of the same type and size. Install it with the correct polarity, matching the positive and negative ends as shown in your light’s compartment. Reassemble your solar light carefully.
Place your light in direct sunlight for a full day to charge the new battery completely. You should notice a significant brightness improvement that night. If your light still seems dim after replacing the battery, the problem may be cloudiness inside the panel rather than battery failure. In that case, you’ll need to focus on cleaning and restoring the solar panel itself.
Tips for Long-Lasting Results
Getting long-lasting results from your solar path lights requires understanding what causes problems in the first place. Cloudiness and fading are two different issues that need different solutions.
Cloudiness happens because water gets trapped between the solar cell and the cover panel. This internal moisture creates a foggy appearance that cleaning alone cannot fix permanently. The bond between these layers eventually fails, allowing moisture to seep in. Accepting that this is a natural part of the light’s lifecycle helps you plan for replacements.
Fading and dimming usually point to battery problems instead. Your rechargeable battery loses its charging ability over time. This is why your light grows dimmer even after cleaning the panel. Replacing the battery often restores brightness completely.
To extend the life of your solar path lights, focus on these key practices: Keep panels clean and dry whenever possible. Wipe them regularly with a soft cloth to prevent dirt buildup. Store your lights indoors during harsh winter months or heavy rain seasons. This reduces water exposure and slows moisture infiltration.
Check your lights monthly to catch problems early. Dim lights mean battery replacement time. Cloudy panels that won’t clear with cleaning need replacement soon. Plan your budget for new lights every few years since this is expected wear.
Position your lights in areas with maximum sunlight exposure. More direct sun means better daily charging and longer battery performance. Avoid shaded spots or locations under trees where water drips frequently.
Prevention has limits with solar path lights. Moisture will eventually find its way inside most panels. Rather than fighting this natural process, stay prepared with replacement batteries and new lights on hand. This practical approach keeps your outdoor spaces well lit without frustration.
Common Mistakes to Avoid
Many people make mistakes when trying to fix cloudy solar panels. These errors can make your lights worse instead of better.
Wet sanding with sandpaper is the biggest mistake. Many people think rough sanding will remove cloudiness. This doesn’t work because the problem sits inside the panel, not on the surface. Sanding just scratches the plastic and wastes your time.
Applying clear coat is another common error. Some people think a protective layer will seal the panel and stop moisture. This is unnecessary and won’t help. Clear coat doesn’t address the water already trapped between the layers.
Don’t use harsh scrubbing motions when cleaning. Aggressive rubbing can damage the panel surface. Use gentle, circular motions instead with a soft cloth.
Skipping the painter’s tape step causes problems too. Masking your work area protects the light fixture and surrounding surfaces. Without it, cleaning solutions and polishing compounds can damage paint or plastic around the panel.
Forgetting to dry your panels completely leads to new cloudiness. Water left on the surface can seep back inside. Always finish with a dry cloth and let everything air dry completely.
Don’t expect permanent results from cleaning alone. Cloudiness often returns because water remains trapped inside. This is normal and expected. Your panel will cloud up again eventually.
Ignoring dim lights is a mistake many people make. They assume the panel is broken when the real problem is the battery. Replace the battery first before trying any panel restoration.
Finally, don’t use the wrong polishing compound. Automotive polishing compounds work best. Other products may leave residue or cause damage. Always start with gentle methods before moving to stronger solutions.
Troubleshooting Persistent Issues
When your solar path light panels stay cloudy or keep fading even after cleaning, you’re dealing with a persistent issue that needs a different approach. The problem usually falls into two categories: internal moisture that won’t go away, or a battery that continues to lose power.
Internal cloudiness returns because water sits trapped between the solar cell layers. This moisture creates a seal that regular cleaning can’t fix. Once water gets inside, it stays there. You can polish the outside surface, but the cloudiness will come back within weeks or months. This tells you the panel bond has failed permanently.
For persistent dimming, the battery is almost always your culprit. Even after replacing it once, some lights dim again quickly. This happens when the charging circuit inside your light isn’t working properly. The new battery charges during the day but can’t hold that energy well. Check if your light sits in partial shade. Solar lights need direct sunlight for several hours to charge fully.
Test your light’s location first. Move it to a sunnier spot for one week. If brightness improves, you’ve found your answer. If dimming continues, your charging system needs replacement.
For persistent cloudiness, accept that the panel won’t clear permanently. Your options are limited: keep polishing temporarily for appearance, or replace the entire light unit. Most solar path lights have a lifespan of two to three years before internal failures become common.
Don’t waste time on repeated fixes for the same problem. Sometimes replacement is more practical than endless troubleshooting. Track when issues start to know when replacement makes sense for your outdoor lighting setup.
Final Thoughts
Fixing cloudy or fading solar path lights comes down to two simple fixes. Replace the battery if your light looks dim. Polish the panel if it looks foggy or yellowed.
These are separate problems with separate solutions. Mixing them up wastes your time and effort.
Battery replacement takes just a few minutes. You unscrew the light, swap the old battery for a new one, and put everything back together. This fix works most of the time for dimming issues.
Panel polishing takes more patience. You clean the surface, apply a polishing compound, and buff gently until the cloudiness reduces. Results vary depending on how much moisture sits trapped inside.
Your expectations matter here. Polishing improves clarity, but it rarely restores panels to their original clear state. Water damage that sits deep between layers stays there permanently.
Think of these fixes as maintenance steps, not permanent cures. Solar lights face constant sun, rain, and temperature swings. This exposure wears down parts over time.
Regular care extends how long your lights last. Simple habits like wiping panels and checking batteries help you catch problems before they get worse.
When a panel becomes too cloudy to fix, replacement becomes your best option. Trying the same cleaning method over and over on a badly damaged panel won’t give you new results.
Smart maintenance means knowing when to fix and when to replace. Battery issues get fixed easily. Panel damage sometimes needs acceptance instead of endless troubleshooting.
Your solar path lights can serve you well for years with the right care. Stay consistent with cleaning, watch for early signs of trouble, and act quickly when something changes. This approach keeps your outdoor lighting working reliably season after season.
Frequently Asked Questions
Why do solar path light panels become cloudy?
Cloudiness happens when water gets trapped between the solar cell and the cover panel. The bond between these two layers fails over time. This trapped moisture creates that foggy appearance you see.
It’s not surface dirt or discoloration. The problem lives inside the panel itself. This is why simple wiping doesn’t permanently fix the issue.
Can I restore cloudy panels to look brand new?
Polishing can improve clarity, but it won’t restore panels to their original clear state. Think of cleaning as a maintenance step, not a permanent cure.
For light cloudiness, gentle polishing with automotive polishing compound works well. For heavy cloudiness, toothpaste can help. However, your results will be better clarity, not perfect transparency.
Why are my solar path lights getting dimmer?
Dimming usually means your rechargeable battery is dying, not that the panel is failing. Battery degradation is the most common cause of fading lights.
Replace the battery first before you spend time on panel cleaning. This simple fix takes just a few minutes and often solves your dimming problem completely.
How often should I replace solar path light batteries?
Most rechargeable batteries last a few years before they need replacement. The exact lifespan depends on your climate and how much sun exposure the light gets.
If your light dims even after cleaning the panel, battery replacement is your next step. It’s a quick, affordable fix that restores brightness.
When should I replace the entire light instead of fixing it?
When a panel becomes too cloudy to fix through polishing, replacement makes sense. Repeated cleaning efforts on severely damaged panels waste your time and energy.
Smart maintenance means knowing when to fix and when to replace. Your lights serve you better with fresh panels than with endless repair attempts.