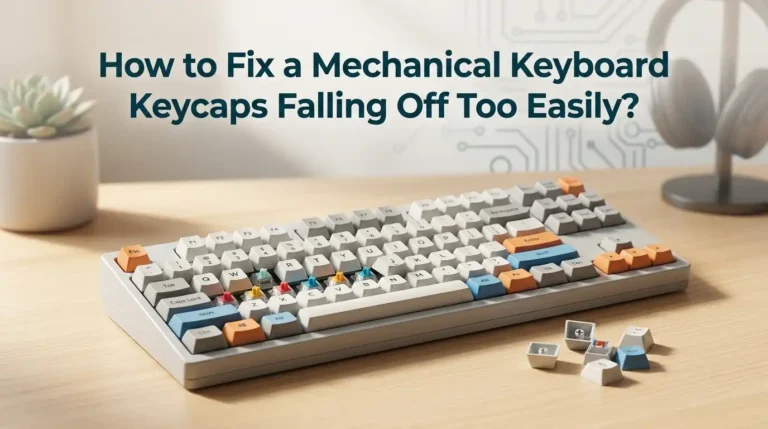
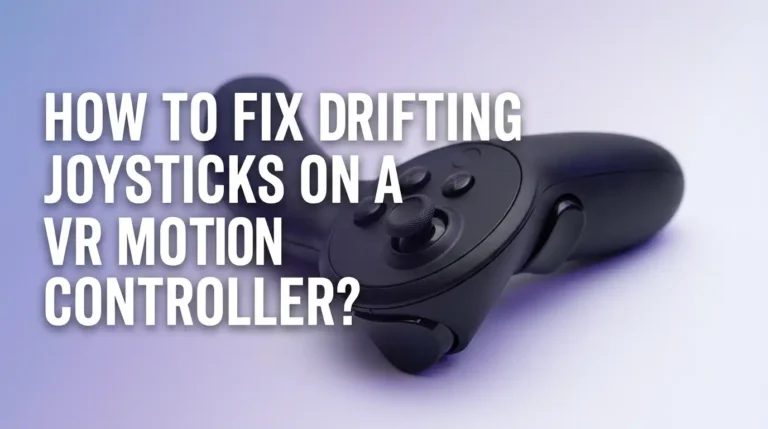
Why Is My Gaming Console Controller Suffering From Stick Drift?
You press your controller down to stand still, but your character keeps walking. Your aim slides to the left during a firefight. Your menu cursor scrolls on its own.
This frustrating problem has a name, and it is called stick drift. It affects PlayStation, Xbox, Nintendo Switch, and PC controllers alike. The good news is that stick drift is often fixable at home. You do not always need to buy a new controller.
This guide walks you through every cause and every solution in plain steps. By the end, you will know exactly what to try first, what to try next, and how to stop drift from coming back.
In a Nutshell:
- Stick drift means your controller registers movement when the analog stick sits still. Your character or cursor moves without any input from you.
- Dust, debris, and worn internal parts cause most drift. The tiny sensor inside the stick gets dirty or wears down over time, sending wrong signals to your console.
- Cleaning with isopropyl alcohol is the cheapest and fastest fix. A few drops around the stick base solve a large number of cases within minutes.
- Recalibration and deadzone adjustment help when cleaning is not enough. Software tweaks tell your console to ignore tiny unwanted movements.
- Hall effect sticks are the only true long term cure. They use magnets instead of physical contact, so they almost never drift.
- Good habits prevent future drift. Store your controller in a clean place, keep your hands clean, and avoid resting heavy objects on the sticks.
What Is Stick Drift and How Do You Spot It?
Stick drift is a hardware fault where your analog stick sends movement signals even when you are not touching it. The controller thinks you are pushing the stick, but you are not. This creates ghost movement on your screen.
You can spot drift with a simple test. Open your console settings or a calibration tool. Let go of both sticks completely. Watch the on screen indicator.
If the dot or crosshair moves on its own, you have drift. You may also notice your character walking slowly in one direction during gameplay, or your camera spinning without input.
Drift can be mild or severe. Mild drift shows up only in sensitive games. Severe drift makes the controller almost unusable. Knowing the severity helps you pick the right fix from the steps below.
Why Does Stick Drift Happen in the First Place?
Stick drift comes from how analog sticks are built. Most controllers use a part called a potentiometer. This part measures the position of your stick using physical contact between tiny metal pieces. Every time you move the stick, those pieces rub against each other.
Over months and years, this rubbing wears down the contact surfaces. Worn surfaces send slightly wrong voltage readings to your console. Your console reads that wrong signal as movement, even at rest.
Three main culprits drive this problem. First, dust and dirt slip inside the stick housing and block clean contact. Second, normal wear thins the metal over time. Third, manufacturing tolerances mean some controllers drift sooner than others. Heavy gaming speeds up all three. Knowing the cause helps you understand why each fix works the way it does.
First Step: Recalibrate Your Controller
Recalibration is the easiest fix to try first. It costs nothing and takes only a few minutes. Calibration tells your console where the true center of the stick sits. Sometimes the console just needs a reminder.
On PC, you can use the Windows calibration tool. Search for “calibrate game controller” in the Start menu, then follow the on screen steps. On Steam, open Settings, then Controller, then enable configuration support and calibrate from there. PlayStation and Xbox have limited built in calibration, but Steam works for any connected pad.
Pros: This method is free, fast, and risk free. You do not open anything or use any tools.
Cons: Recalibration only fixes minor drift. It will not repair a worn or dirty potentiometer. If the hardware is damaged, calibration buys you a short break, but the drift often returns.
Clean the Stick With Isopropyl Alcohol
This is the single most effective at home fix, and many players swear by it. Dirt and grime build up around the stick base and cause false signals. Isopropyl alcohol dissolves that grime and helps the sensor read correctly again.
Start with high strength isopropyl alcohol, ideally 90 percent or higher. Dip a cotton swab in the alcohol. Push the analog stick to one side to expose the base. Gently wipe around the rim. Then rotate the stick in full circles while it is still damp. This spreads the alcohol into the housing.
Some players apply a few drops directly into the base and rotate. Let everything dry fully before powering on.
Pros: Cheap, quick, and often works within minutes. No disassembly needed.
Cons: The effect can be temporary if the part is badly worn. Too much liquid can risk damage if you do not let it dry completely.
Adjust the Deadzone Settings
A deadzone is the small area around the stick center that your console ignores. Anything inside the deadzone does not register as movement. Increasing the deadzone tells your console to ignore the tiny drift signals.
Many games include a deadzone slider in their control settings. Look under controls or sensitivity options. On Steam, open the controller configuration, select the stick, choose additional settings, and raise the deadzone value. Increase it slowly until the drift stops.
This method does not repair the hardware. Instead, it works around the problem in software. It is a great patch when you want to keep playing right away.
Pros: Easy to do, no tools required, and effective for mild to moderate drift. You can apply it per game.
Cons: A larger deadzone reduces stick precision. Your fine aiming and slow movements feel less responsive. Not every game offers this setting.
Try the Reset Method on Your Controller
A controller reset clears stored settings and connection data. Sometimes a software glitch causes movement that feels like drift. A reset rules this out before you try harder fixes.
On a PlayStation DualSense, find the small reset button on the back near the top screw. Use a thin pin to press and hold it for around five seconds. Then reconnect the controller with a cable. On Xbox controllers, remove the batteries, hold the pair button, and reinsert power. For Switch Joy Con, recalibrate through the system settings menu.
Pros: Free, fast, and clears software related issues. It is a smart early step.
Cons: A reset does nothing for physical wear or dirt. If your drift comes from a damaged potentiometer, the reset changes nothing. Treat it as a quick check, not a guaranteed cure.
Open the Controller and Clean Inside
When surface cleaning fails, a deeper clean often works. This means opening the controller to reach the potentiometer directly. This fix tackles dirt that outside cleaning cannot reach.
You need a small screwdriver set and electrical contact cleaner. Remove the screws on the back. Carefully separate the shell. Locate the small box shaped potentiometer at the base of each stick. Spray a short burst of contact cleaner into the tiny gaps. Rotate the stick to work the cleaner inside. Let it dry, then reassemble.
Work slowly and keep track of every screw and ribbon cable.
Pros: Reaches the real source of dirt. More lasting than a surface wipe.
Cons: Opening the controller voids most warranties. You risk damaging fragile ribbon cables if you rush. This step needs patience and a steady hand.
Replace the Analog Stick Module
If cleaning does not work, the stick module itself may be worn out. Replacing it gives you a fresh potentiometer with clean contacts. This is a real repair, not a temporary patch.
Replacement modules are sold widely and are inexpensive. You will need a soldering iron, solder, and a desoldering tool. Open the controller, desolder the old module, remove it, then solder the new one in place. Many video guides show the exact pin layout for each controller model.
This step takes skill, so practice soldering on scrap first if you are new.
Pros: Restores like new performance. Far cheaper than buying a new controller. The drift truly goes away for that stick.
Cons: Soldering has a learning curve. A mistake can permanently damage the board. It also takes time and the right tools.
Upgrade to Hall Effect Sticks
Hall effect sticks are the only fix that prevents drift at the source. Standard sticks rely on physical contact that wears down. Hall effect sticks use magnetic fields instead, so nothing rubs together.
Because there is no friction, these sticks almost never drift. You can buy replacement Hall effect modules and install them just like a normal stick replacement. Some newer controllers ship with Hall effect sticks already inside, which is worth knowing before your next purchase.
The install process matches the standard module swap, with soldering required for most models.
Pros: This is the closest thing to a permanent cure. Magnetic sensing resists wear for years. The sticks stay accurate over heavy use.
Cons: Installation needs soldering skill. Hall effect modules cost a bit more than standard parts. A small number still report rare drift from other internal faults, so they are not fully bulletproof.
Check Your Warranty Before You Repair
Before you open anything, check if your controller is still under warranty. Repairs you do yourself usually void coverage. A free official repair beats a risky home fix.
Nintendo offers free Joy Con drift repair in many regions, and in some places this covers the controller for life. PlayStation and Xbox both provide warranty service for a limited period after purchase, often one year. Visit the official support site for your console and enter your serial number to check status.
Pros: Free or low cost, and the repair is done by trained staff. Your warranty stays intact.
Cons: You must ship the controller away and wait, sometimes for weeks. You lose access to that controller during the repair. Out of warranty units may face a repair fee.
How to Prevent Stick Drift From Returning
Prevention saves you time, money, and frustration. Small habits make a real difference to how long your sticks last. Clean controllers drift far less often.
Wash your hands before you play, because oil and grime feed the dirt buildup inside the stick. Store your controller in a clean, dry spot. Many players keep their controller in a sealed plastic bag to block dust. Never rest heavy objects on the sticks, and avoid leaving the controller face down with pressure on the analog sticks.
Wipe the outside down now and then with a dry cloth. Keep food and drinks away from your gaming area.
Pros: Free, simple, and extends controller life. Good habits delay drift for years.
Cons: Prevention reduces risk but cannot stop wear forever. Every standard stick will eventually age. Habits help, yet hardware still has a lifespan.
When Should You Just Buy a New Controller?
Sometimes repair is not worth it. If you have tried cleaning, calibration, and module swaps with no luck, a new controller may be the smart move. Severe internal damage is not always fixable.
Weigh the cost of repair against the cost of replacement. If your controller is old and a repair needs new parts plus your time, a fresh unit might cost about the same. Consider buying a model with Hall effect sticks built in to avoid future drift.
Also factor in your skill level. If soldering scares you, paying for a controller is reasonable.
Pros: A new controller works right away with no risk. You get full warranty coverage again.
Cons: It costs the most of any option. Throwing away a fixable controller adds to electronic waste. Repair is often the greener and cheaper choice.
Quick Comparison of All the Fixes
Here is a simple way to choose your path. Start with the free and easy steps, then move up only if needed. Most people solve drift within the first three methods.
Try recalibration first, since it costs nothing. Next, clean with isopropyl alcohol, which fixes a large share of cases. Then adjust the deadzone if you want an instant software patch. If those fail, open the controller for a deep clean. For a lasting cure, replace the module or upgrade to Hall effect sticks.
Always check your warranty before opening anything. A free official repair is the best deal when it is available. Match the fix to your comfort level and your tools.
This order keeps your risk low and your cost low. Work down the list until the drift disappears.
Frequently Asked Questions
Can stick drift fix itself over time?
No, stick drift does not heal on its own. The problem comes from dirt or physical wear inside the stick. These causes only get worse with more use. You must take action, whether that means cleaning, recalibrating, or replacing the part. Ignoring drift usually leads to worse performance over time.
Is isopropyl alcohol safe to use on my controller?
Yes, isopropyl alcohol is safe when used correctly. Use a high strength version, around 90 percent, because it dries fast and leaves no residue. Always let the controller dry fully before turning it on. Avoid soaking the controller. A damp swab or a few small drops around the stick base is enough.
Does stick drift mean my controller is broken for good?
Not at all. Most drift is fixable at home with cleaning, calibration, or a module swap. Only severe internal damage may be beyond repair. Even then, replacing the analog stick or upgrading to Hall effect sticks often brings the controller back to life. Drift rarely means a total loss.
How long do controller analog sticks usually last?
This depends on how much you play and how clean you keep the controller. Standard sticks often last one to three years of regular gaming before drift may appear. Heavy daily use shortens that span. Good storage habits and clean hands extend it. Hall effect sticks last much longer because they avoid physical contact.
Will a Hall effect controller ever get stick drift?
Hall effect sticks resist drift very well because they use magnets instead of rubbing parts. They are far less likely to drift than standard sticks. Still, no controller is fully immune, since drift can rarely come from other internal faults. For most players, Hall effect sticks offer the closest thing to a permanent solution.
Does adjusting the deadzone harm my gameplay?
A larger deadzone hides drift but reduces stick precision. Your slow movements and fine aiming feel slightly less responsive. For mild drift, the trade off is small and worth it. For competitive play, you may prefer to fix the hardware instead. Adjust the deadzone only as much as needed to stop the unwanted movement.