How To Fix Smart Bathroom Scale Rubber Foot Falling Off?
Your smart bathroom scale suddenly feels wobbly. You check the bottom and notice a rubber foot has fallen off.
This is a common problem. Rubber feet wear out or lose their grip over time.
The good news? You don’t need to throw out your scale. A missing or loose rubber foot is fixable with a few simple steps.
This article shows you exactly how to fix the issue. We will cover why rubber feet fall off in the first place.
You will learn how uneven feet cause inaccurate readings. A scale that wobbles cannot give you correct weight measurements.
We will walk through practical repair steps. This includes placing your scale correctly and checking all feet for even contact.
You will also learn how to calibrate your scale after fixing the foot. This step matters just as much as the repair itself.
By the end, you will know how to spot common mistakes. You will also learn quick fixes to get your scale working like new again.
Let’s get your scale steady and accurate again.
In a Nutshell
-
A missing or worn rubber foot makes your scale wobble. This leads to uneven leveling and wrong readings.
-
Always place your scale on a hard, flat floor. Avoid carpets or uneven tiles. This helps all feet touch the ground evenly.
-
After fixing the foot, calibrate your scale. Wait for the 0.0 display, then step on and off once to reset it.
-
Clean your scale with a damp cloth. Let it dry fully before you use it again. This keeps sensors working well.
-
Check for stuck buttons or jammed sensors. These can also cause instability, even with new feet.
-
Avoid common mistakes like skipping calibration or using the scale on a slanted surface. Both can cause inaccurate results.
-
If your scale still acts strange, try a factory reset. Check the batteries too, since low power can affect readings.
-
With these simple checks, your scale should feel stable and give accurate results every time you step on it.
Why Rubber Feet Fall Off and Why It Matters
Rubber feet on your smart bathroom scale wear down over time. Dirt, moisture, and constant pressure break down the material. Eventually, one or more feet fall off completely.
When rubber feet go missing, your scale sits unevenly on the floor. Even tiny gaps between the scale and surface cause big problems. The weight distribution becomes unbalanced.
Uneven placement leads to inaccurate readings. Your scale cannot measure your weight correctly when it tilts or rocks. The internal sensors need a level, stable foundation to work properly. A wobbly scale gives you different numbers each time you step on it, even if your actual weight hasn’t changed.
This matters because you rely on your smart scale for health tracking. Inaccurate readings mess up your fitness goals and health records. You might think you’re making progress when you’re actually not, or vice versa.
Missing feet also cause another issue: the scale may not power on properly or respond to your touch. Worn feet can shift the internal components slightly, which sometimes jams buttons or blocks sensors from working right.
Your scale needs all four feet making solid contact with a hard, flat floor. Without complete foot contact, the scale cannot function as designed. The longer you use a scale with missing feet, the more wear happens inside.
The good news? This problem is fixable. Replacing rubber feet restores stability immediately. Your scale will sit flat again and give you accurate readings.
Taking care of this issue quickly prevents further damage to your scale’s internal parts. A stable, level scale means reliable health data every single time.
Signs Your Scale’s Feet Are Causing Inaccurate Readings
When your smart bathroom scale gives you wildly different weight readings each time you step on it, the culprit is often those rubber feet. A missing or damaged foot throws off your scale’s balance and sensor accuracy.
Here’s what to watch for: Your scale rocks or wobbles when you stand on it. This motion shifts the internal sensors, causing them to read incorrectly. Even tiny movements matter because smart scales rely on stable, level placement to function properly.
Another sign is inconsistent readings between weigh ins. You step on the scale twice in a row and see different numbers. This happens because the uneven feet prevent all sensors from contacting the floor evenly. Some sensors press harder than others, skewing the measurement.
Pay attention to how your scale sits on the floor. Get down and look at it from the side. Do all four corners touch the ground? If one or more feet are missing or worn down, you’ll see gaps between the scale and floor.
You might also notice your scale takes longer to power on or displays unstable numbers before settling. This hesitation happens because sensors struggle to calibrate when the scale isn’t level.
Check your floor too. Even a perfectly functioning scale gives bad readings on carpet, tile with grout lines, or slanted surfaces. The floor must be hard and completely flat.
If your scale shows these signs, the rubber feet are likely your problem. The good news? Once you replace or repair those feet and recalibrate your scale, accuracy returns and your readings become trustworthy again.
Tools and Materials You’ll Need for Repair
Before you start fixing your smart bathroom scale, gather the right supplies. You don’t need many items, and most people have them at home already.
First, you’ll want cleaning materials. A soft cloth works best for wiping down your scale. You should also have a damp cloth ready to remove dust and debris from the rubber foot area. Make sure you have a dry towel nearby since moisture can damage electronic components.
Next, get your replacement rubber feet. These come in different shapes and sizes depending on your scale model. Check your scale’s manual or the manufacturer’s website to find the correct foot type. You might find these feet sold as adhesive pads, screw on feet, or push fit replacements.
You’ll need basic tools for the job. A small flathead screwdriver helps if your feet screw on. For adhesive feet, you may not need tools at all. Keep a clean surface nearby where you can work comfortably.
Have a level or measuring tool available. A simple level tells you if your floor is flat. You can also use your phone’s built in level app to check if your scale sits evenly.
Finally, gather a damp cloth and dry towel for final cleaning. After you replace the feet, you should wipe down your scale completely. This removes any dust or adhesive residue.
Keep your scale’s manual handy throughout the repair. It contains important information about your specific model. You’ll reference it when installing new feet and calibrating afterward. With these materials ready, you’re prepared to fix your scale properly.
Step-by-Step Guide to Reattaching or Replacing Rubber Feet
Start by placing your smart bathroom scale on a hard, flat floor. This is your foundation for success. Soft surfaces like carpet or tile with grout lines will cause problems, so choose smooth concrete or hardwood instead.
Next, examine all four rubber feet closely. Look for missing pieces, cracks, or visible wear. If one foot is damaged, all feet need attention because they work together to keep your scale level. Even one bad foot throws off the entire balance.
Clean the bottom of your scale with a damp cloth and dry it completely. Dirt and debris prevent feet from sitting flush against the floor. This simple step often solves half your leveling issues.
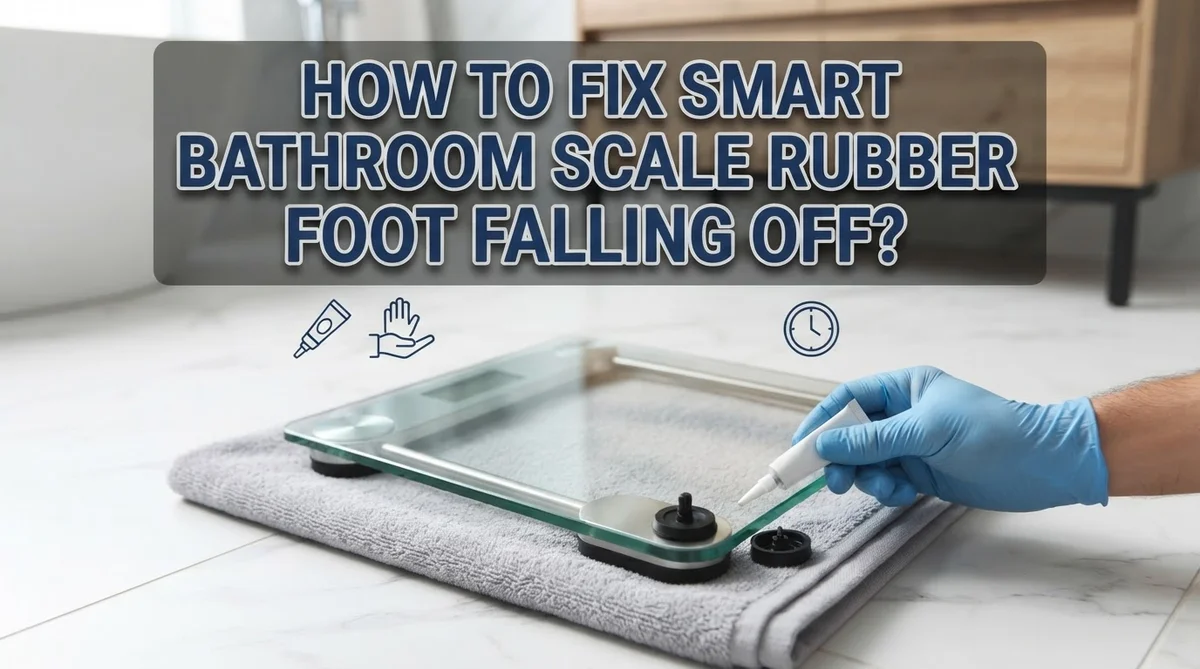
Now check if your feet are removable or glued on. Most smart scales have feet you can peel off and replace. Gently lift the old rubber foot away from the scale’s base. If it resists, use a plastic scraper to help separate it without damaging the scale itself.
Position your replacement feet in the exact same spots where the old ones were. Press each one firmly into place. Make sure all four feet touch the ground evenly by checking with a level tool.
After replacing the feet, calibrate your scale immediately. Wait for the display to show 0.0, then step on and off the scale to reset it. This recalibration process tells your scale to recognize its new level position.
Finally, test your scale with several weight readings. You should see consistent numbers each time. If readings still jump around, double check that your floor is truly flat and all feet make solid contact with the ground.
How to Calibrate Your Scale After Repair
Calibrating your scale after repair is essential. This step ensures your smart scale gives accurate readings again. The calibration process resets the scale’s sensors and helps it adjust to your specific bathroom environment.
Start by placing your repaired scale on a hard, flat floor. Make sure all four feet now contact the surface evenly. An uneven placement will cause calibration to fail, and you’ll get bad readings again.
Turn on your scale and wait for it to display 0.0. This shows the scale is ready. Some scales take 10 to 15 seconds to reach this point. Don’t rush this step.
Step onto the scale slowly and stand still for a few seconds. Then step off carefully. Your scale should now recognize your weight properly. Repeat this process two or three times to lock in the calibration.
If your scale still shows inconsistent numbers after calibration, try a factory reset. Most smart scales have a reset button on the bottom or back. Hold it for 5 to 10 seconds until you see the display change. This clears old data and gives the scale a fresh start.
After reset, repeat the calibration steps again. Place the scale on a level surface and follow the startup routine once more.
Test your scale with several weight readings over the next few days. You should notice consistent results now. If readings still jump around, your floor might be uneven, or another part of the scale needs attention. Check that your bathroom floor is truly level using a simple level tool if possible.
Tips for Maintaining Level Placement and Long-Term Stability
Keeping your smart bathroom scale level and stable matters more than most people realize. Uneven placement directly affects accuracy, so your first step is finding the right location. Choose a hard, flat floor surface like tile or wood. Avoid carpet, rugs, or any cushioned material that shifts under weight.
Before you place your scale down, check the floor itself. Use a level tool to confirm the surface is truly even. Slopes or dips in the floor will cause your scale to rock, even with new rubber feet installed. If your floor is uneven, consider placing a thin, rigid mat underneath to create a level base.
Once you’ve found the perfect spot, make sure all four feet contact the surface evenly. Press down gently on each corner of your scale. You should feel consistent contact across all feet. If one foot sits higher than the others, your scale will wobble and give false readings.
After replacing or reattaching rubber feet, recalibrate your scale immediately. This resets the internal sensors to account for the new foot configuration. Place your scale on the level surface, turn it on, and wait for the display to show 0.0 before stepping on.
Clean your scale’s bottom regularly to prevent dust buildup around the feet. Use a damp cloth and dry it thoroughly. Dust can prevent feet from making proper contact with the floor.
Check your scale’s placement every few months. Over time, floors can settle or shift slightly. A quick verification keeps your readings accurate and your scale stable for years to come.
Common Mistakes to Avoid During Repair
Many people make simple mistakes during rubber foot repair that cause bigger problems later. Understanding these errors helps you avoid frustration and get accurate readings again.
Skipping the leveling step is the most common mistake. You must place your scale on a completely flat, hard surface before you start any repair work. Tile, wood, or concrete floors work best. Carpet, rugs, and uneven tiles prevent proper foot contact and ruin your accuracy.
Another frequent error is not calibrating after replacement. People fix the feet and assume the scale works fine. This is wrong. Your scale needs recalibration to reset its sensors. Wait for the 0.0 display, step on slowly, and let it stabilize. Skip this step and you’ll get false weight readings.
Replacing only some feet causes major problems. If one or two feet are missing, replace all four. Partial replacement leaves your scale tilted and unstable. Uneven contact means uneven weight distribution and incorrect measurements.
Failing to clean the scale’s bottom before repair is another mistake. Dust and debris prevent new feet from making good contact with the floor. Use a damp cloth and dry it completely before installing replacement feet.
Ignoring factory reset options wastes your time. If your scale still shows wrong numbers after repair and recalibration, perform a factory reset. This clears old sensor data and lets your scale start fresh.
Finally, don’t rush the process. Take time to examine all four feet carefully. Check your floor for levelness. Ensure each foot sits flat. These small actions prevent repeat repairs and keep your scale working accurately for years.
Troubleshooting Persistent Issues After Fixing the Feet
Sometimes your scale keeps giving wrong readings even after you fix the rubber feet. This happens more often than you’d think. The good news is that most problems have simple solutions.
Battery issues rank high on the troubleshooting list. Weak batteries drain slowly and cause the scale to behave oddly. Replace them with fresh ones and test again. Your scale needs consistent power to maintain accuracy.
If your scale still displays unstable numbers, the surface underneath matters greatly. A wobbly floor, carpet, or tilted tile creates problems no foot replacement can fix. Move your scale to a different hard, flat location and test it there. You might find the issue was placement all along.
Sensor problems occur when dust or debris blocks the pressure sensors under the scale. Flip your scale over carefully and inspect the bottom. Use a soft, dry cloth to gently clean around all four feet. Compressed air works well too. This simple step fixes many accuracy issues.
Your scale’s internal calibration might need resetting. Even after replacing feet and recalibrating, some scales benefit from a full factory reset. Check your user manual for the specific reset procedure. Most models require holding a button for several seconds.
If problems continue after trying these steps, consider that internal components may have shifted or broken. Dropping your scale or exposing it to moisture causes hidden damage. At this point, professional repair or replacement becomes necessary.
Document what you’ve tried. Write down which steps worked and which didn’t. This information helps you identify the real culprit and prevents repeating failed attempts.
Final Thoughts
Fixing a smart bathroom scale’s rubber foot takes patience, but it’s not hard. Most problems come from loose feet, uneven placement, or skipped calibration steps.
Getting these basics right solves most issues. Your scale should sit flat, feel stable, and show consistent numbers every time you step on it.
Remember that rubber feet do more than just protect your floor. They keep your scale level and help sensors read your weight correctly.
If one foot falls off, replace it quickly. Waiting too long can throw off your readings and stress the scale’s internal sensors.
Always calibrate after any repair. This step confirms your fix actually worked and your scale reads weights accurately again.
Check the floor surface too. Even a perfectly repaired scale won’t work well on carpet, uneven tile, or soft flooring.
Clean feet and sensors regularly. Dust and grime build up over time, and this buildup can mimic the same symptoms as a missing rubber foot.
If problems continue after your repair, don’t panic. Try a factory reset first, since this fixes many lingering calibration issues.
Test your scale over several days after any fix. One reading isn’t enough proof that your repair worked correctly.
Keep spare rubber feet on hand if your scale is older. This saves time later and prevents you from using tape or glue as a quick fix.
Small maintenance habits go a long way. Checking your scale’s feet occasionally prevents bigger problems down the road.
With the right steps, your smart bathroom scale can give you accurate, reliable readings for years. A little care now saves frustration later.
Frequently Asked Questions
Why does my scale give wrong readings after the rubber foot falls off?
A missing rubber foot prevents your scale from sitting level on the floor. When the scale tilts, the weight distributes unevenly across the remaining feet. This causes the pressure sensors to register incorrect measurements. Level placement is essential for accurate readings.
Your scale needs all four feet to contact the floor evenly. Even a slight tilt throws off the internal sensors. The problem gets worse if you ignore it and keep using the scale.
Do I need to calibrate my scale after replacing the rubber foot?
Yes, you absolutely should calibrate after any repair. Calibration resets the scale’s internal sensors to zero. This ensures accurate readings moving forward.
To calibrate, place your scale on a hard, flat surface. Wait until the display shows 0.0. Step on the scale and then step off. This completes the calibration process. Skip this step and your readings may still be inaccurate.
What happens if I only replace one rubber foot instead of all four?
Replacing just one foot creates an uneven surface again. Your scale will still tilt slightly. The remaining old feet may be worn differently than the new one. This causes the same leveling problems you had before.
Replace all worn feet at the same time. This ensures even contact across the entire bottom surface.
How do I know if my floor is level enough for the scale?
Use a hard, flat surface like tile, wood, or concrete. Avoid carpet, rugs, or uneven surfaces. Carpeting compresses under weight and causes tilting.
Check that your scale sits firmly without rocking. All four feet should touch the floor simultaneously. If you feel any movement, the surface needs adjustment or the feet need replacement.

Welcome to The File Fix. I’m Millie, and I review tech so you don’t have to suffer buyer’s remorse.
Navigating the endless sea of Amazon devices and gadget releases can feel like a full-time job. That’s why I do the heavy lifting. I dig past the unreliable 5-star reviews and shiny spec sheets to test how these devices actually hold up in the real world. Whether you’re looking for the best budget earbuds, a reliable power bank, or the latest smart home gear, you’ll find honest, no-nonsense breakdowns here.