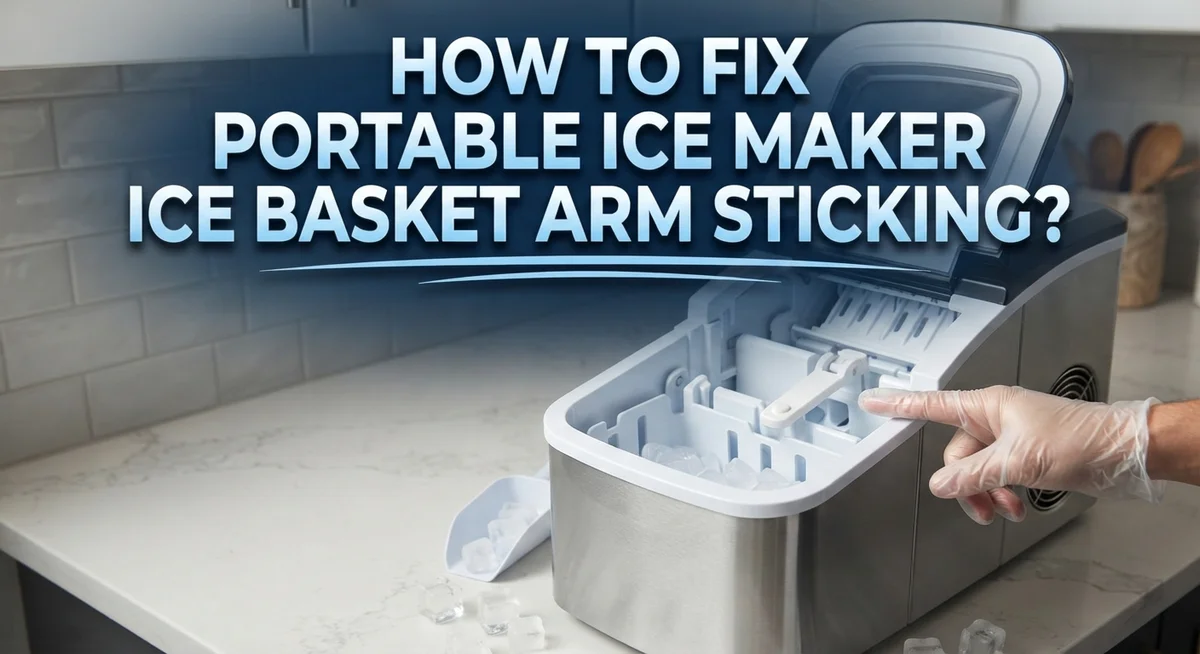
How To Fix Portable Ice Maker Ice Basket Arm Sticking?
Your portable ice maker suddenly stops making ice. You check the bin and notice the little arm inside is stuck. This tiny part controls when your machine makes ice and when it stops.
A stuck ice basket arm is a common problem. It happens to almost every portable ice maker owner at some point. The good news is you can fix it yourself in minutes.
This article walks you through simple steps to get your arm moving again. You will learn why the arm sticks in the first place. Ice jams, frost buildup, and debris are often the culprits.
In a Nutshell
- Empty the bin first. Remove all ice and clumps before you check the arm. A full bin often blocks the arm from moving freely.
- Check the arm position. Make sure the control arm sits fully down in the “on” position. This step alone often solves the problem.
- Look for frost and debris. Frost around the hinge and pivot points can stop the arm from moving. Clear this area gently with a soft cloth.
- Clear any ice jams. Small chunks of ice often get stuck near the arm. Remove these blockages carefully by hand.
- Reset the arm gently. Push the arm down slowly to restart the mechanism. Avoid using force on a stuck arm.
- Power cycle if needed. Turn the unit off and back on if the arm stays up. This simple reset often clears hidden glitches.
- Store ice separately. Move finished ice to another container. This stops cubes from clumping and jamming the arm again.
Understanding the Ice Basket Arm and Its Role
Your ice basket arm is the mechanism that moves up and down inside your portable ice maker. This arm plays a critical role in your machine’s operation. It controls when ice gets ejected from the freezing tray into your collection bin.
When the arm works properly, it rises and falls automatically. This motion pushes finished ice cubes out of the mold. The arm then resets to its starting position so the cycle repeats. Without this movement, ice stays stuck in the tray and production stops completely.
The arm connects to a pivot point or hinge at one end. This hinge allows the arm to rotate smoothly. The other end of the arm sits against a sensor or switch. This contact tells your ice maker when to start and stop freezing water.
Understanding how the arm functions helps you spot problems faster. A stuck arm means the hinge is blocked or the arm cannot move freely. This prevents ice from dropping into your bin. Your machine may keep trying to make ice, but nothing comes out.
The arm position matters too. When your ice maker is “on,” the arm should sit fully down. This signals the machine to begin its freezing cycle. If the arm gets stuck up or in the middle, your machine thinks the bin is full and stops working.
Frost, ice jams, and debris commonly cause sticking. These materials build up around the hinge and pivot points. They create friction that prevents smooth movement. Regular inspection of these areas keeps your arm moving freely and your ice maker producing cubes consistently.
Common Causes of a Sticking Ice Basket Arm
Several factors cause your ice basket arm to stick. Understanding these reasons helps you fix the problem quickly.
Ice jams are the most common culprit. Small pieces of ice get wedged between the arm and the bin walls. These chunks prevent the arm from moving down smoothly. When ice clumps together, it creates a solid barrier that blocks the entire mechanism.
Frost buildup around the hinge and pivot points is another frequent issue. Your ice maker operates at cold temperatures. Water moisture freezes on metal parts over time. This frost layer makes the arm stiff and hard to move. The hinge becomes immobilized when frost accumulates.
Debris at pivot points also causes sticking. Dust, mineral deposits, and small particles collect where the arm connects to the main unit. These materials jam the joint and prevent smooth motion.
Arm position problems can make you think the arm is stuck when it actually isn’t. If the control arm sits in the “up” position, it may appear frozen. The arm should rest fully down when the ice bin is full. An incorrectly positioned arm triggers the ice maker to stop producing.
Water filter issues indirectly cause arm sticking. A clogged filter reduces water flow into the freezing chamber. Less water means thinner ice forms. Thin ice breaks apart easily and creates jam conditions around the arm.
Loose mounting happens when the arm’s fasteners become slack. A loose arm wobbles and catches on the bin edges. This prevents proper up and down movement.
Each cause has a specific fix. Start by identifying which problem affects your unit.
Step-by-Step Guide to Fixing a Stuck Arm
Start by unplugging your ice maker from the power outlet. Safety comes first when you work on any appliance.
Next, open the ice bin and remove all ice cubes. Even small clumps can block the arm’s movement. Use your hands or a plastic scoop to clear everything out completely. Do not leave any ice behind.
Locate the control arm inside the bin. Check if it sits fully down in the “on” position. Push it gently downward to see if it moves freely. If the arm resists, do not force it yet. Something is blocking it.
Inspect the hinge and pivot points where the arm connects. Look for white frost buildup or ice crystals around these areas. Frost is a common culprit that stops movement. Use a soft cloth or plastic brush to wipe away frost gently. Avoid metal tools that might scratch the surface.
Check around the arm for small ice chunks wedged near the mechanism. These pieces jam the arm in place. Remove any debris you find using your fingers or a plastic tool.
Now try moving the arm down slowly. It should slide smoothly without resistance. If it still sticks, power cycle the unit. Turn it off, wait 30 seconds, then plug it back in.
Once the arm moves freely, plug the ice maker back in. Run a test cycle to confirm everything works. The arm should rise and fall automatically during normal operation.
If the arm still sticks after these steps, the pivot point may have internal damage. The hinge itself might need replacement, which requires professional service.
How to Clear Ice Jams and Frost Buildup
Frost buildup and ice jams are the main reasons your portable ice maker’s arm stops moving. These problems happen because water freezes in places it shouldn’t. The good news is that you can fix both issues yourself in just a few minutes.
Start by unplugging your ice maker from the power outlet. Safety comes first when you work on any appliance. Next, open the ice bin and remove every single ice cube inside. An empty bin gives you clear access to the arm and its moving parts.
Look closely at the hinge and pivot points where the arm connects. Use a soft cloth or sponge to wipe away any frost you see. Frost forms when moisture freezes around these joints. Gentle wiping removes the buildup without damaging the mechanism.
Check for ice chunks stuck near the arm’s path. Small pieces of ice wedge into tight spaces and block movement. Remove any ice you find with your fingers or a plastic scraper. Never use metal tools because they can scratch or puncture the arm.
Once you’ve cleared frost and ice jams, test the arm. Push it down slowly and smoothly. It should move without resistance now. If it still sticks, repeat the cleaning process on all pivot points.
After the arm moves freely, plug your ice maker back in. Run a test cycle to make sure everything works. The arm should rise and fall automatically as the machine operates.
Prevention helps avoid future sticking. Transfer finished ice to a separate container instead of letting cubes pile up in the bin. This stops ice from clumping together and pressing against the arm.
Preventive Maintenance Tips for Smooth Arm Movement
Keeping your ice basket arm moving smoothly takes simple, regular care. The best approach is stopping problems before they start.
Check your water filter every month. A clean filter means water flows properly through the system. Poor water flow can cause ice to form unevenly, which leads to jams later. Replace your filter according to the manufacturer’s guidelines to keep everything running well.
Store finished ice in a separate container instead of leaving it in the bin. Ice cubes stick together when they sit in the basket for too long. This clumping can block the arm’s movement. Transfer your ice to a freezer bag or container within a few hours of production.
Wipe down the arm and pivot points once a week with a dry cloth. This simple step removes dust and prevents debris from collecting near the hinge. Moisture can freeze in these spots, so keeping them dry matters.
Run a power cycle every two weeks. Unplug your ice maker for 30 seconds, then plug it back in. This resets the system and helps prevent frost buildup around internal parts.
Keep your ice maker in a cool, dry location. High humidity causes extra frost to form on the arm and hinge. Avoid placing it near heat sources or in direct sunlight.
Check the arm’s position regularly. Make sure it sits fully down when the machine is off. An arm stuck in the up position can cause confusion about whether it’s actually broken.
These preventive steps take just minutes each week. You’ll avoid most sticking problems and keep your ice maker working reliably for years.
Mistakes to Avoid When Troubleshooting
Many people make simple mistakes when trying to fix a stuck ice basket arm. These errors can make the problem worse or prevent you from finding the real cause.
Forcing the arm without inspection is a major mistake. Some people push or pull hard on a stuck arm right away. This can damage the hinge or pivot points inside. Always check what’s blocking the arm first. Look for ice chunks, frost, or debris before you apply any force.
Skipping the power cycle step is another common error. Your ice maker has a reset mechanism that works best when you unplug it for a few minutes. Many people try to fix the arm while the unit stays plugged in. This prevents the internal mechanism from resetting properly. Always disconnect power before you start any troubleshooting.
Ignoring the arm position causes confusion too. The control arm should sit fully down when the ice maker is on. Some people think the arm is stuck when it’s actually just in the up position. Check this simple detail first before you assume something is broken.
Leaving ice in the bin during troubleshooting makes the job harder. You need a clear view of the arm and its pivot points. Clumped ice blocks your view and can hide the real problem. Remove every cube from the bin before you start inspecting.
Not checking pivot points carefully leads to missed frost or debris. People often focus only on the arm itself. The hinges and connection points need equal attention. Frost buildup hides in these small spaces easily.
Take your time and follow each step slowly. Rushing through troubleshooting creates more problems than it solves.
When to Power Cycle or Reset the Unit
A power cycle is one of the most effective ways to reset your ice maker when the arm gets stuck. This simple step restarts the machine’s internal systems and often clears minor mechanical issues without any manual work.
Here’s how to power cycle your unit properly. First, unplug the ice maker from the electrical outlet completely. Wait for at least five minutes before plugging it back in. This waiting period allows all internal components to fully discharge and reset.
When you plug the unit back in, listen for any sounds. You should hear the motor engage and the arm may move into its starting position automatically. This automatic reset often solves sticking problems caused by the arm getting stuck mid cycle.
If the arm remains stuck after one power cycle, wait another five minutes and try again. Sometimes the mechanism needs multiple resets to work correctly. A second power cycle gives the internal systems another chance to reset properly.
Important timing matters here. Never power cycle immediately after unplugging. The five minute wait is crucial for complete system discharge. Skipping this step reduces the effectiveness of the reset.
After power cycling, check if the arm moves freely before using the ice maker again. If it still sticks, the problem likely involves physical obstructions like ice jams or frost that need manual clearing.
Power cycling also helps when the arm gets stuck in the up position. The reset may lower it automatically, restoring normal function. This method costs nothing and requires no tools or special skills.
Use power cycling as your first troubleshooting step whenever the arm sticks. It’s quick, safe, and solves many common issues without further investigation.
Advanced Troubleshooting for Persistent Sticking Issues
When your portable ice maker’s arm refuses to budge despite basic fixes, you need a deeper approach. Persistent sticking often signals multiple problems working together, not just one issue.
Start by examining the arm’s mechanical components more closely. Remove the ice basket and look at where the arm connects to the main body. Use a flashlight to spot ice crystals, mineral deposits, or hardened water residue around this joint. These substances act like cement and lock the arm in place.
Check if the arm has become slightly bent or warped. A bent arm won’t move smoothly through its full range. Gently press down on the arm from different angles to feel if it catches or binds partway through its motion. This tells you whether the problem is mechanical rather than just frozen.
Inspect the pivot points for corrosion or rust. Portable ice makers sit in humid environments, which causes oxidation over time. Oxidized metal parts resist movement more than clean ones. If you spot discoloration or rough texture around hinges, the arm needs cleaning with a soft cloth and mild moisture.
Test the arm’s electrical connection too. A faulty signal from the control board might prevent the arm from receiving power to move. If the arm feels mechanically free but still won’t move, the electrical system needs attention.
Try manual assistance carefully. Gently wiggle the arm side to side while applying downward pressure. This breaks the bond between stuck components without forcing damage. Never jerk or apply sudden force, as this breaks internal parts.
If these steps don’t work, the arm mechanism itself may need professional service or replacement.
Final Thoughts
A stuck ice basket arm feels frustrating. But most fixes are simple and quick.
You don’t need special tools to solve this problem. Just patience and a clear process.
Start with the basics every time. Empty the bin, check the arm position, and look for frost or debris.
These small checks solve most sticking issues. Skipping them leads to bigger headaches later.
If basic steps don’t work, move to power cycling. This resets the unit’s internal system.
Give it enough time between unplugging and plugging back in. Rushing this step often causes it to fail.
For arms that still won’t move, check the mechanical parts. Look for bends, rust, or loose connections.
These issues need closer inspection but are still fixable at home in many cases.
Remember to maintain your ice maker regularly. Clean the arm and hinges every week.
Store ice in a separate container instead of the built in bin. This single habit prevents many sticking problems.
Consistency matters more than perfection here. A few minutes of care each week keeps your unit running well.
If you’ve tried every step and the arm still sticks, professional help may be necessary. Some mechanical failures need expert repair.
Don’t force the arm or ignore warning signs. This only causes more damage over time.
With the right approach, most ice basket arm problems get solved without much stress. Follow the steps in order, stay patient, and check your work at each stage.
Your portable ice maker can keep working smoothly for a long time when you give it proper attention and care.
Frequently Asked Questions
Why does my ice basket arm get stuck in the first place?
Ice basket arms stick for several reasons. Frost buildup around the hinge is the most common culprit. When moisture freezes at the pivot points, the arm loses mobility. Ice jams also cause sticking. Clumped cubes block the arm from moving down fully. Debris like water minerals can collect at the hinge too.
Sometimes the arm simply sits out of position. If it’s not fully down in the “on” position, your ice maker won’t work properly. Loose arms can also appear stuck when they’re just misaligned.
Can I force the arm to move if it’s stuck?
No, don’t force it. Applying pressure to a stuck arm risks breaking the mechanism. You could damage the motor or bend the arm permanently.
Instead, gently wiggle the arm side to side. This helps loosen frost without forcing it. If it won’t budge after gentle movement, stop and try another method. Let the unit sit for a few minutes. Sometimes ice melts slightly on its own, freeing the arm.
What should I check before assuming the arm is broken?
First, check if the arm is actually in the “on” position. Many people think it’s stuck when it’s simply off. Push it down gently to verify it clicks into place.
Next, inspect the ice bin. Remove any clumped cubes blocking movement. Empty the entire bin if needed. Look at the hinge area closely. You might see frost crystals or small debris. Wipe these away with a dry cloth carefully.
Does power cycling really help a stuck arm?
Yes, it often does. Power cycling resets the motor and mechanism. Unplug your ice maker completely. Wait at least five minutes before plugging it back in. This gives any stuck components time to relax.
Listen for sounds when you plug it back in. The arm should move freely now. If it’s still stuck, wait another five minutes and try once more.