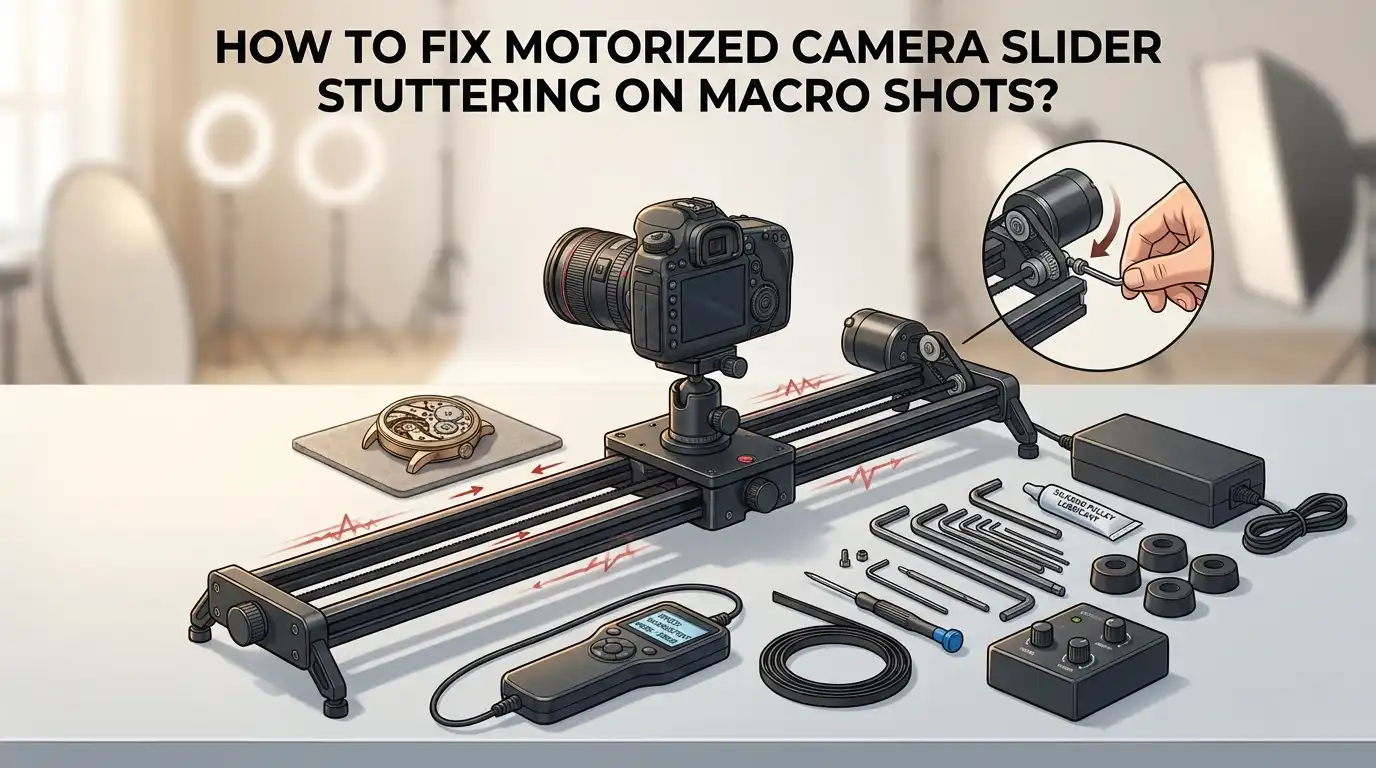
How To Fix Motorized Camera Slider Stuttering On Macro Shots?
Macro shots look amazing until your slider starts stuttering. That smooth, cinematic glide suddenly turns into a jerky mess. It’s frustrating, especially when you’re focused on tiny details that need steady movement.
Motorized camera sliders promise buttery smooth motion. But when you zoom into macro range, small vibrations become huge problems. Every tiny shake shows up on screen.
The good news? This is a fixable issue. Stuttering usually comes from a few common culprits. Camera shake, incorrect shutter speed, and vibration transfer top the list.
In a Nutshell
- Turn off image stabilization on your lens. IS fights against slider motion and creates tiny jitters instead of smoothing them out.
- Match your shutter speed to double your frame rate. This simple ratio keeps motion looking natural and stops that jerky stutter effect.
- Add shims under your camera mount. Wood shims isolate your camera from vibrations traveling through the table or slider base.
- Check your ballscrew coupler. A flexible coupler absorbs small mechanical bumps that cause visible shake in macro footage.
- Increase microsteps on your motor settings. This creates smoother, more gradual movement instead of choppy steps.
- Pick your lighting wisely. Harsh midday sun makes tiny shakes more obvious. Soft light hides small imperfections better.
What Causes Stuttering During Macro Slider Shots
Stuttering happens when your motorized slider moves but your footage looks jerky instead of smooth. Understanding what causes this problem helps you fix it faster.
Camera shake and vibration transfer is the primary culprit. When you mount your camera directly to your slider or workbench, vibrations travel through the metal surface. These vibrations compound when your slider motor moves, creating visible jitter in macro shots where every tiny movement gets magnified.
Shutter speed misalignment causes another type of stutter. Your shutter speed needs to match your frame rate. If you shoot at 24 frames per second, your shutter should stay at 1/48th of a second or slower. When shutter speed doesn’t match this ratio, your footage looks choppy and uneven.
Lens image stabilization fighting your slider creates unexpected problems. Your lens tries to correct motion it thinks is unwanted camera shake. Since your slider is intentionally moving, the lens stabilization works against the smooth motion you want. This creates micro corrections that appear as stuttering.
Mechanical issues in your slider also contribute. A worn ballscrew coupler or misaligned motor creates uneven motion. Insufficient microsteps in your motor settings means the slider moves in visible increments rather than smooth transitions.
Lighting conditions affect how visible stuttering becomes. Harsh shadows and direct sunlight create contrast that makes jitter more noticeable in macro work. Poor lighting also forces you to use slower shutter speeds or higher ISO, which amplifies the stuttering effect.
Operator movement and positioning matter too. If you stand too close to your slider setup, your body weight shifts the table slightly. This introduces unwanted vibration into your shot.
Each cause requires a different solution. The key is identifying which factor affects your specific setup so you can address it directly and restore smooth slider motion for your macro photography.
Isolating Your Camera From Vibration With Shims
Vibration transfer from your workbench to your camera is one of the biggest causes of macro slider stuttering. When your camera mounts directly to a table or slider base, every tiny vibration travels straight into your footage. This creates the jerky, unstable look you’re trying to eliminate.
Shims are your solution here. These are thin wedges or spacers that sit between your camera mount and the slider base. They physically decouple your camera from the surface below it. The gap they create breaks the vibration path.
You can use wooden shims, rubber isolation pads, or even stacked cork sheets. The key is choosing material that absorbs vibration rather than conducting it. Wood works exceptionally well because it has natural damping properties. Stack multiple thin shims if needed to reach your desired height.
Position your shims directly under your camera’s center of gravity. This ensures even weight distribution and maximum isolation. Typically, you’ll place shims at three or four points around your mount. Make sure they’re secure so your camera doesn’t shift during shots.
Test your setup after adding shims. Run a short macro clip and watch for improvement. You should notice less jitter immediately. If stuttering persists, your issue likely stems from shutter speed or lens stabilization instead.
The beauty of shimming is its simplicity and cost effectiveness. You don’t need expensive equipment. Most camera shops stock isolation materials, or you can source them from hardware stores. This fix addresses vibration coupling without requiring mechanical modifications to your slider itself.
Combine shimming with the other fixes mentioned earlier for best results. When you eliminate vibration transfer, disable lens stabilization, and match your shutter speed correctly, your macro slider footage becomes noticeably smoother. These three work together to solve most stuttering problems.
Adjusting Shutter Speed To Match Frame Rate
Your shutter speed directly controls how motion appears in your footage. When it doesn’t match your frame rate, you get stuttering that no mechanical fix will solve.
The 180 degree rule is your foundation here. Set your shutter speed to exactly double your frame rate. If you shoot at 24 frames per second, use a shutter speed of 1/48th of a second. Shooting at 60 frames per second means 1/120th of a second.
This ratio creates natural motion blur that hides micro jitters. Your brain interprets the blur as smooth movement rather than individual frames jumping around. Without this blur, every tiny vibration becomes visible.
Start by checking your camera’s shutter speed menu. Most cameras let you set this manually in video mode. Lock it in place so it doesn’t change automatically. Auto exposure will ruin your consistency during slider movement.
Test your settings on a stationary subject first. Record 10 seconds of a still macro object. Play it back frame by frame. You should see consistent blur between frames, not sharp then blurry alternating patterns.
If you’re still seeing stutter after matching shutter speed to frame rate, your issue comes from somewhere else. This tells you to focus on mechanical problems like vibration isolation or ballscrew coupling.
One common mistake is shooting faster shutter speeds thinking it will improve clarity. It actually makes stutter worse because it removes motion blur. Your slider’s tiny movements become razor sharp and very obvious.
Combine shutter speed adjustment with your other fixes. Don’t rely on this alone. Use it alongside vibration isolation shims and lens stabilization settings. The shutter speed fix handles temporal smoothness while mechanical fixes handle physical vibration.
Your camera settings and slider mechanics work together. Get both right and stuttering disappears.
Turning Off Image Stabilization For Slider Work
Image stabilization is a feature that helps reduce camera shake during handheld filming. However, when you use a motorized slider, this feature actually works against you and creates stuttering.
Here’s why. Your slider moves in a perfectly controlled, mechanical path. The lens stabilization system doesn’t understand this. It thinks your camera is shaking randomly and tries to correct movement that isn’t actually a problem. This creates a conflict between two systems fighting each other.
The result is jerky, stuttering footage that looks worse than if you had no stabilization at all. Your macro shots lose their smooth, professional quality.
Turning off image stabilization is essential for slider work. You need to access your camera’s lens settings or body settings menu. Look for options labeled IS, OIS, or VR depending on your camera brand. Disable this feature completely before you start filming.
Some cameras let you turn stabilization off at the lens level. Others require you to disable it through the body menu. Check your camera’s manual to find the exact location. Don’t guess here, as incorrect settings waste your filming time.
After disabling stabilization, your footage will depend on other factors for smoothness. This is why the 180 degree shutter speed rule becomes so important. Combined with proper isolation shims under your camera, you’ll see dramatic improvement.
Test your setup with a short macro clip right after turning off stabilization. Watch the footage carefully. If stuttering persists, you know the issue comes from mechanical problems, vibration transfer, or shutter speed misalignment instead.
Many filmmakers forget this step and spend hours troubleshooting other areas. Disabling image stabilization should be your first action when setting up any slider work. It’s free, takes seconds, and often solves half your stuttering problems immediately.
Fine-Tuning Motor Settings And Microsteps For Smoother Motion
Your motor’s microstep settings control how smoothly your slider moves across the frame. Higher microstep values create finer motion increments, which reduces visible stuttering during macro work.
Start by checking your motor controller’s documentation. Most controllers offer microstep options ranging from 1/2 to 1/32 steps. Lower values like 1/2 or 1/4 create larger movement jumps between motor pulses. This causes the jerky, stuttering appearance you see in your footage.
Increase your microsteps to at least 1/16 or 1/32 for macro filming. Higher microstep values mean your slider moves in smaller, more consistent increments. The camera captures these tiny movements as smooth, fluid motion rather than discrete steps.
Test your changes on a simple macro subject first. Film a stationary object like a coin or flower petal while your slider moves. Watch the playback carefully to see if stuttering improves.
Keep in mind that higher microsteps require more precise motor timing. Your controller needs to send electrical pulses at faster intervals. Check that your power supply provides enough current for these increased demands.
Balance microstep settings with your slider’s speed. Very high microsteps combined with fast slider speeds can overwhelm your motor controller. Start at 1/16 and gradually increase until you notice improvement or performance issues.
Coupling quality also matters here. A worn or misaligned flexible coupler between your motor and ballscrew creates micro jitters that no microstep setting can fix. Inspect your coupler for damage, rust, or play between components.
Combine microstep adjustments with your other fixes like shim placement and shutter speed settings. No single solution eliminates all stuttering. Multiple small improvements work together to create smooth macro slider footage that looks professional and polished.
Optimizing Lighting And Slider Positioning For Macro Stability
Lighting plays a huge role in macro slider stability. When you use harsh or uneven light, your camera sensor works harder to expose correctly. This extra processing can trigger micro stutters during slider movement.
Position your light source at a 45 degree angle to your macro subject. This angle reduces glare and gives your sensor stable color information throughout the shot. Avoid direct overhead lighting, which creates harsh shadows and forces your camera to compensate constantly.
Soft, diffused light is your best friend for macro work. When light bounces off a diffuser before hitting your subject, it becomes even and predictable. Your camera’s autofocus system also performs better with consistent lighting. Better autofocus means fewer micro adjustments during slider motion, which reduces stuttering.
Distance matters too. Place your light source far enough away that it doesn’t create hot spots on small subjects. Hot spots confuse your camera’s exposure meter and cause it to hunt for the right settings. This hunting translates to visible jitter in your footage.
Slider positioning directly affects stability. If your slider is short enough, position it in the middle of your work surface. This prevents operator movement from transferring vibration into the camera. Longer sliders need stable support along their entire length to prevent sagging.
Check that your slider sits level on your work surface. Even a slight tilt causes uneven friction in the ballscrew mechanism. Use a small level to verify your setup. Adjust shims under the slider feet until it’s perfectly horizontal.
Keep your macro subject stationary and well secured. Moving subjects force your camera to refocus constantly during slider movement. Refocus hunting creates visible stuttering in your final footage. A stable subject with stable lighting equals smooth slider motion every time.
Common Mistakes That Cause Persistent Stuttering
Many filmmakers make simple mistakes that create persistent stuttering in macro slider footage. Understanding these errors helps you fix the problem faster.
Mounting your camera directly to the table is one of the biggest culprits. When you attach your camera straight to your slider, vibrations from the motor transfer directly into your camera body. These vibrations become visible as micro jitters in your macro shots. Use wooden shims or isolation pads to decouple your camera from the slider structure. This small change stops vibration transfer and smooths your footage significantly.
Incorrect shutter speed settings cause stuttering too. Many people ignore the 180 degree rule when using motorized sliders. Your shutter speed should be twice your frame rate. If you shoot at 24 frames per second, use a shutter speed of 1/48 of a second. If you use 1/60 or 1/125, your footage will stutter and look unnatural. Check your camera’s manual to confirm the exact shutter speed your frame rate requires.
Shooting in harsh midday sunlight creates another common problem. Direct sunlight causes extreme contrast and shadows that make micro jitters more visible. Move your macro setup indoors or use diffused lighting instead. Soft light reduces the appearance of camera shake.
Leaving image stabilization enabled is still a frequent mistake. Even after reading about turning off stabilization, many filmmakers forget this step during setup. They spend hours adjusting motors and shims when the real problem sits in their camera settings menu.
Finally, loose mechanical connections cause persistent stuttering. Check your flexible coupler between the motor and ballscrew. A worn or misaligned coupler creates jerky motion that no software fix can solve. Inspect these connections before each shoot to catch problems early.
Final Thoughts
Stuttering on macro shots feels frustrating, but you now know the real causes. Vibration, incorrect shutter speed, and mechanical wear are the main culprits behind jittery footage.
Fixing these issues does not require expensive equipment. Simple changes like adding shims, turning off image stabilization, and adjusting your shutter speed make a huge difference.
Your slider’s mechanical health matters just as much as your camera settings. Check couplers and microstep settings regularly to keep motion smooth.
Remember that macro photography magnifies every flaw. A tiny wobble that goes unnoticed in wide shots becomes obvious when you’re filming close up subjects.
Patience helps too. Test your setup before every important shoot. Run a quick slider pass on a test subject first.
This lets you catch problems early instead of discovering them during your actual shoot.
Good lighting also supports stable footage. Soft, diffused light reduces harsh shadows that make small movements more visible on camera.
Combine all these fixes together for the best results. One change alone might help, but stacking multiple solutions gives you truly smooth macro footage.
Start with the basics first. Decouple your camera from the table and check your shutter speed ratio.
Then move to advanced fixes like microstep adjustments and coupler replacements if stuttering continues. This step by step approach saves time and prevents confusion.
Your slider is a tool, not magic. It needs proper setup and maintenance to perform well, especially for demanding macro work.
Keep your gear clean and check connections before each shoot. Small maintenance habits prevent big stuttering problems later.
With these practical fixes in mind, you can capture smooth, professional looking macro footage every time.
Your motorized slider can handle macro work beautifully once you address vibration, shutter timing, and mechanical wear. Take these steps, test your results, and enjoy stutter free macro shots that showcase your subject clearly and smoothly.
Frequently Asked Questions
What causes micro jitters in motorized slider footage?
Micro jitters happen when three things go wrong at once. Your shutter speed might not match your frame rate. The slider’s mechanical parts could be loose or worn. Vibration also transfers from your work surface straight into the camera.
The most common culprit is shutter speed. If you use the 180 degree rule, set your shutter speed to exactly 2x your frame rate. For 24fps, use 1/48th of a second. For 30fps, use 1/60th.
How do I stop camera shake when my slider sits on a workbench?
Your table transfers vibration directly to the camera. Decouple the camera from the surface using wooden shims. These small wedges create separation between your slider and the table.
Place shims under the slider’s feet or mounting points. This breaks the vibration path. You can also try isolation pads made from rubber or foam. The goal is simple: stop vibrations from reaching your lens.
Why does my panning still stutter after I turned off image stabilization?
Image stabilization helps handheld shots, but it fights motorized sliders. Turning it off is correct. If stuttering continues, check your shutter speed first.
Panning stutter usually means your shutter speed ratio is wrong. Verify you’re using 2x your frame rate. Then inspect the slider’s ballscrew for dirt or damage. A worn ballscrew creates uneven motion that looks like stuttering even with perfect settings.
Can flexible couplers reduce stuttering on macro shots?
Yes. Flexible couplers connect the motor to the ballscrew stage. They absorb small vibrations and misalignments.
Direct rigid connections transfer every motor vibration into the slider. A flexible coupler acts as a shock absorber. This works especially well for macro work where magnification shows every tiny flaw.