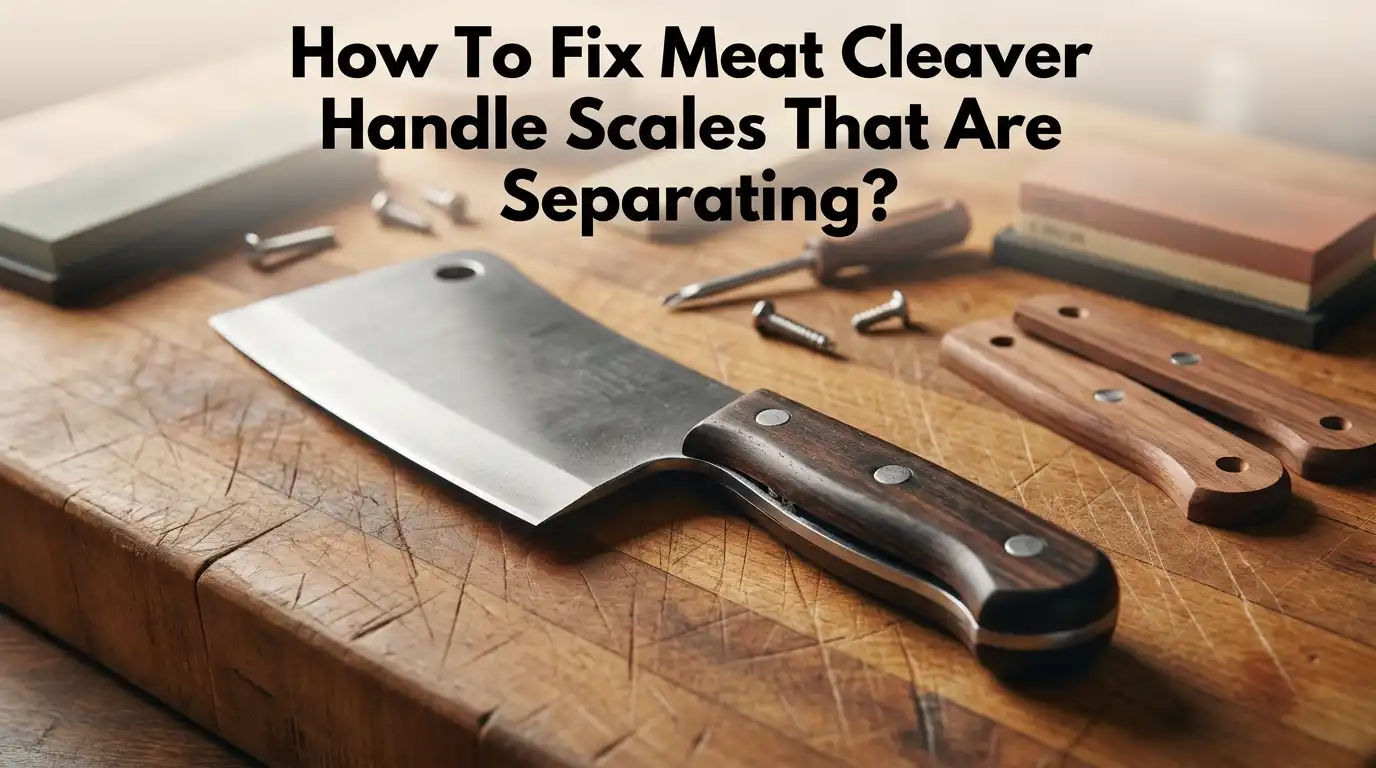
How To Fix Meat Cleaver Handle Scales That Are Separating?
Do your meat cleaver handle scales feel loose or wiggly? This is a common problem. It happens when the epoxy holding the scales to the tang breaks down over time.
You are not alone in this. Many kitchen tools face this exact issue after months of heavy use. The good news is that you can fix this at home.
This guide will show you the exact steps to repair separating handle scales. We will cover drilling out old pins and removing the damaged scales safely.
In a Nutshell
- Loose scales happen when old epoxy breaks down. This is normal wear over time.
- Drill out the old pins first. Then gently pry the scales away from the tang.
- Flatten the tang surface before you do anything else. This step helps new glue stick better.
- Use a strong adhesive this time. Weak glue is often why scales separate again.
- Wedge handles need different care. Trim the shoulder ledge and reseat the handle with firm hammer taps.
- Seal wood handles with boiled linseed oil. This protects your repair from moisture damage.
- This fix takes time, not skill. Patience matters more than speed here.
- Rushing causes most repair failures. Slow down and follow each step in order.
Why Meat Cleaver Handle Scales Separate Over Time
Handle scales separate because the adhesive holding them to the tang degrades over time. Epoxy breaks down when exposed to moisture, temperature swings, and constant use in the kitchen.
Every time you wash your cleaver, water seeps into tiny gaps between the scales and the tang. This moisture weakens the bond. Heat from hot water and steam accelerates this process. The adhesive loses its grip gradually, sometimes taking months or years.
Mechanical stress speeds up separation. When you chop, the blade flexes slightly. This movement puts pressure on the scales from different angles. The adhesive cannot handle repeated flexing, so it cracks and fails. Small cracks allow more water inside, which makes the problem worse faster.
The tang itself plays a role too. If the surface was not perfectly flat when the scales were first attached, they never sat flush. Uneven contact means the adhesive only grips in certain spots. The weak areas give way first, and the scales start to rock.
Wood expands and contracts naturally. Handle scales made from wood absorb and release moisture based on humidity levels. This movement puts additional stress on the adhesive bond. In kitchens with high humidity, this happens even more.
Poor pin installation can also contribute to early separation. Pins hold scales in place, but they are not supposed to do all the work. The adhesive should carry most of the load. If pins are loose or missing, scales shift more during use, and the epoxy fails sooner.
Temperature changes in the dishwasher are particularly damaging. Hot cycles followed by cool air create stress on the bond. Repeated heating and cooling makes adhesive brittle and prone to cracking.
Understanding these causes helps you prevent future problems. When you repair your cleaver, use this knowledge to choose better adhesive and installation methods. Proper care extends the life of your repair significantly.
Tools and Materials You’ll Need
Before you start fixing your meat cleaver handle scales, gather the right supplies. Having everything ready prevents frustration and keeps your work moving smoothly.
You need drill bits that match your existing pin size. Measure the pins currently holding your scales to the tang. Most meat cleavers use pins between 1/16 inch and 1/8 inch in diameter. A drill press works best, but a handheld drill works too if you go slowly.
Sandpaper or a file flattens the tang surface after you remove the old scales. You want the tang completely flat so new adhesive makes full contact. Use medium grit sandpaper first, then finish with fine grit for a smooth surface.
Get a strong epoxy adhesive. The research shows that standard epoxy can fail after 6 months or longer. Two part epoxies designed for metal bonding work better than quick set versions. You need something that creates a permanent bond between metal and handle material.
Pin material matters too. Steel pins work well for reinstallation. Have extras on hand in case one bends during removal.
For wood handle scales, grab boiled linseed oil. This seals the wood after reassembly and prevents future moisture damage.
You also need basic hand tools like a hammer, punch, and drift pin. A dead blow hammer works great for wedge style handles. A small clamp or vise holds the cleaver steady while you work.
Cleaning supplies are essential. Degreaser removes old adhesive residue from the tang. Wire brushes clean away any debris.
Finally, have rags and a work surface ready. Epoxy gets messy. Protect your workspace and keep paper towels nearby for cleanup.
Planning ahead means your repair goes faster and cleaner.
Step-by-Step: Removing Pins and Detaching the Scales
Start by examining your cleaver’s handle carefully. You need to see exactly where the pins sit and how many you have. Most meat cleavers use two or three pins that hold the scales tight against the tang.
Measure your existing pins with calipers or a ruler. Write down the diameter so you can drill them out cleanly. This matters because you want to remove the old pins without enlarging the holes too much.
Secure your cleaver in a vise with soft jaws or cloth padding. The blade should point away from you. Make sure the handle stays still during drilling. Any movement ruins your work.
Select a drill bit that matches your pin size exactly. Start drilling slowly at low speed. Let the bit do the work without forcing it. High speed causes the bit to slip and damage the surrounding wood or metal.
Drill straight through the pin. You may see the pin push out as you go, or it might stay in place. Once the hole goes all the way through, use a punch to tap the pin out from the other side. Tap gently and work it out gradually.
Some pins resist removal because corrosion or rust has locked them in place. If this happens, apply penetrating oil and wait 15 minutes. Then tap again with more force.
After all pins come out, gently pry the scales away from the tang. Use a flat tool like a screwdriver or pry bar. Work slowly around the edges. Rushing this step breaks the scales or damages the tang.
Once the scales separate completely, inspect the tang surface. You’ll likely see old epoxy residue, rust, or discoloration. This needs cleaning before you reattach anything. Take your time here because a clean tang surface ensures strong adhesion later.
Flattening the Tang and Prepping the Surface for Rebonding
The tang is the metal spine running through your cleaver handle. After you remove the old scales, this metal surface often has adhesive residue, corrosion, and uneven spots. Flattening the tang is crucial because a smooth surface helps the new epoxy bond properly.
Start by inspecting the tang closely. Look for old epoxy chunks, rust spots, and discoloration. Run your finger along the length to feel for rough areas or bumps.
Use sandpaper or a file to remove the old adhesive. Work in one direction along the tang’s length. Sand medium grit first, then switch to finer grit for a smoother finish. This removes loose material and creates a clean surface for bonding.
Pay special attention to the edges where scales once sat. These areas often have the most adhesive buildup. Scrape away any stubborn residue with a small tool or scraper. Take your time here because incomplete removal weakens your new bond.
Check for rust or discoloration on the tang surface. Light rust comes off with sandpaper easily. Heavier rust may need a wire brush or steel wool. Clean the entire tang until it looks uniform in color and texture.
After flattening, wipe the tang with a damp cloth to remove all dust and debris. Let it dry completely before moving forward. Any dust left behind creates weak spots in your epoxy layer.
Feel the tang again with your finger. It should feel smooth and flat, not rough or uneven. If you find high spots, sand them down further.
This prep work determines your success. A properly flattened and cleaned tang accepts epoxy evenly. The adhesive penetrates micro textures in the metal, creating a stronger mechanical bond. Skip this step and your scales will separate again within months. Plan to spend 15 to 20 minutes on tang preparation.
Reapplying Epoxy and Reinstalling Pins Correctly
Once your tang is clean and flat, you’re ready to reapply epoxy. This step makes or breaks your repair. Choose a strong epoxy formula designed for metal bonding rather than general purpose adhesives, since weak epoxy fails after months of use.
Mix your epoxy according to package directions. Use the exact ratio the manufacturer specifies. Too much hardener makes the bond brittle. Too little leaves it soft and weak. Stir thoroughly for at least two minutes.
Apply an even layer of epoxy across the entire tang surface. Don’t use too much. A thin, consistent coating works better than a thick glob. Use a small brush or applicator stick to spread it evenly. Make sure every part of the tang gets covered, especially the edges and corners where scales grip.
Press your scales onto the tang firmly. Hold them in place for several minutes. Some epoxy formulas require you to clamp the scales while they cure. Check your epoxy instructions for curing time and whether clamping helps.
Now reinstall your pins. Align each pin hole carefully. Pins must sit flush and straight. Tap pins in slowly with a hammer and punch. Don’t force them or you’ll crack the scales. The pin should slide in smoothly once aligned properly.
Clip the pin ends close to the scale surface using appropriate cutters. File the cut ends smooth so they don’t catch your hand.
Let the epoxy cure fully before using your cleaver. Most formulas need 24 hours. Some need longer. Patience here prevents future separation.
The whole process takes time but it’s straightforward. Rushing leads to weak bonds and repeated failures. Take your time with each step. Your repaired cleaver will serve you well for years if you do this correctly.
Fixing Separation on Wedge-Style Handles
Wedge style handles work differently than pinned scales, so your repair approach changes. These handles use a wedge that drives into the tang to create pressure and hold the scales tight. When separation happens, the wedge has usually loosened or the shoulder ledge under the eye needs trimming.
Start by removing the wedge completely. Tap it out gently with a hammer and punch. Once the wedge is free, check the shoulder ledge. This is the small lip under the handle eye where the wedge sits. If it’s too tall, it prevents the wedge from seating properly and causes scales to lift. Use a file to trim this ledge down slightly. A small reduction makes a big difference.
Next, inspect your scales and tang for damage. Look for cracks, chips, or warping. Clean away any old adhesive or debris with sandpaper or a file. Wipe everything down with a damp cloth and let it dry completely.
Reapply epoxy to the tang surface evenly. Press your scales back onto the tang and hold them straight. The scales should sit flush against the metal spine. Now drive your wedge back in using a dead blow hammer. Tap it firmly until the scales press tight against the tang. You’ll feel resistance as the wedge seats. This pressure is what holds everything together.
After the wedge is tight, seal the joint with boiled linseed oil. This protects the wood and helps prevent future moisture problems. Wipe away excess oil with a clean rag.
Let everything cure for at least 24 hours before using your cleaver. The wedge pressure plus epoxy creates a strong, lasting bond. This method works well for wedge style handles because the wedge provides ongoing clamping force that pinned handles cannot match.
Common Mistakes That Cause Repairs to Fail Again
When you repair separated handle scales, mistakes during reassembly often cause the problem to return. Understanding these errors helps you avoid repeating them.
Using weak adhesive is the biggest culprit. Many people rely on general purpose epoxy that fails after six months or longer. The bond weakens over time, especially with the constant pressure and moisture exposure that meat cleavers face. Stronger adhesives exist and work better for this specific repair. Always choose products formulated for metal bonding rather than generic options.
Improper pin installation creates another common failure point. Pins hold your scales in place while epoxy cures and sets. If you don’t drill straight through the existing pin holes, the pins sit at angles. Angled pins don’t grip the scales tightly. They allow micro movement that stresses the adhesive bond. This movement eventually causes separation again.
Skipping the tang flattening step leads to uneven epoxy coverage. If the tang surface remains rough or corroded, adhesive doesn’t bond evenly across the entire area. Gaps form underneath the scales. These gaps create weak spots where separation starts. The process feels tedious, but flattening truly matters for long term success.
Insufficient wedge tension causes problems on wedge-style handles. When you reinstall the wedge, it must seat tightly against the scales. Loose wedges allow the scales to shift and move. This movement breaks the epoxy bond over months of use. Tap your wedge firmly into place using proper striking technique.
Planning your timeline prevents rushing. Epoxy needs full curing time before you use your cleaver. Using the tool too soon means the adhesive hasn’t hardened completely. Premature use stresses the new bond and causes early failure. Mark your calendar and wait the recommended cure time.
These mistakes are easy to make but completely preventable with careful attention.
Final Thoughts
Fixing separated handle scales is a job you can finish in an afternoon. The steps are simple once you know them.
Success depends on preparation, not speed. Rushing through tang flattening or skipping the cleaning step often causes repairs to fail again.
Take your time with each stage. Drill out pins carefully. Flatten the tang fully. Clean away every trace of dust before you apply epoxy.
Choose your adhesive wisely. Weak epoxy is the top reason repairs fail within months. Pick a strong, long lasting adhesive made for wood and metal bonding.
For wedge style handles, the same patience applies. Seat the handle fully. Drift your wedges tight. Seal everything with boiled linseed oil to protect the wood.
Curing time matters more than most people think. Your epoxy needs a full day or more to set completely. Using your cleaver too soon can undo all your hard work.
A properly repaired handle should feel solid in your grip. There should be no wobble, no gaps, and no movement between the scales and tang.
If you notice any looseness after your repair, stop and check your work. It is better to fix a problem now than to face a bigger repair later.
This process rewards careful hands. Anyone can learn to fix separated scales with basic tools and patience.
Think of this repair as routine maintenance for your cleaver. Handles loosen over time due to heat, moisture, and daily use.
Learning to fix this issue yourself saves money and keeps your favorite cleaver in service for years to come.
With the right adhesive, proper pin work, and enough curing time, your repair should last far longer than the original construction.
Take pride in a job done right. Your cleaver will thank you with every cut.
Frequently Asked Questions
Why do meat cleaver handle scales separate in the first place?
Handle scales separate because the adhesive holding them to the tang fails over time. Epoxy breaks down after months of use, especially when exposed to moisture, heat, or repeated impacts. The tang itself may also develop corrosion or rust, which weakens the bond between the scale and metal.
Can I use any adhesive to reattach my scales?
Not all adhesives work equally well for this repair. General purpose epoxy often fails within six months because it lacks the strength needed for a tool that experiences constant stress. You need a stronger, more durable adhesive designed for metal bonding. Always check that your chosen adhesive can handle the pressure and movement your cleaver experiences during use.
What happens if I skip the tang flattening step?
Skipping tang flattening causes uneven epoxy coverage and weak bonding. If your tang surface is rough, corroded, or has old adhesive residue, the new epoxy cannot make full contact with the metal. This leaves air pockets and weak spots that fail quickly. Spend time preparing the tang properly before you reapply adhesive.
How long should I wait before using my cleaver after repair?
Wait at least 24 hours for the epoxy to cure completely. Some adhesives need longer, so check your specific product instructions. Using your cleaver too soon puts stress on the adhesive before it hardens fully, and you risk the scales separating again immediately.
What’s the difference between pinned scales and wedge handles?
Pinned scales use metal pins drilled through the scales and tang for reinforcement. Wedge handles use a tapered wedge driven under the eye of the handle to create pressure and hold everything tight. Wedge repairs require a dead blow hammer and proper wedge tension, while pinned repairs focus on pin placement and epoxy coverage.