How To Fix Electric Unicycle Trolley Handle Snapping?
Your electric unicycle trolley handle should make life easier. But when it snaps, it can turn a simple ride into a frustrating problem.
This happens more often than you think. A crash can crack the handle. Or lifting the wheel by the handle can cause stress fractures over time.
The good news? You don’t need to be a repair expert to fix this issue. The process is simpler than it looks.
In this guide, we will walk you through the entire repair process. You will learn how to unscrew the handle assembly safely. We will show you how to bend and slide new tubes into place.
In a Nutshell
- Handles usually snap from crashes or misuse. Lifting the wheel by the handle puts stress on parts it wasn’t built for.
- The fix involves swapping out damaged tubes. You unscrew the handle assembly, bend the tubes slightly, and slide them out through the bottom opening.
- New tubes go in the same way. A bit of lubricant helps them slide through smoothly without extra force.
- Screws sometimes won’t tighten properly after repeated use. A hose clamp works well as a temporary fix until you get proper replacements.
- Loose handles need attention right away. Letting a handle flip freely during a crash often makes the damage worse.
- You may need to open the shell sides. This gives you access to internal straps if they’re part of the repair.
- Replacement parts are simple to find. Trolley handle poles are the main part you’ll need for this job.
Why Trolley Handles Snap in the First Place
Trolley handles snap for clear reasons. Impact and crashes cause the most damage. When your unicycle falls or hits something hard, the handle absorbs that force. The tubes bend or crack under pressure.
Misuse creates another major problem. Many riders lift their entire wheel by grabbing the trolley handle. This handle was never built to support your unicycle’s full weight. The stress fractures the tubes from the inside out. Over time, even small lifts add up and weaken the structure.
Repeated flexing damages handles too. If your handle flips freely during crashes without locking in place, it bends back and forth. This constant movement fatigues the material. Eventually, the tubes snap completely.
Poor maintenance speeds up failure. Dirt and debris get stuck in the joints. This prevents the handle from moving smoothly. When you force it anyway, extra stress builds up on weak points.
Loose screws also contribute to snapping. If the assembly isn’t tight, the tubes rattle during rides. This vibration creates micro fractures. These small breaks grow larger with each trip.
Temperature changes matter too. Metal expands and contracts in hot and cold weather. If your handle assembly has gaps or loose parts, this movement causes stress. The tubes eventually give way.
Cheap replacement tubes wear out faster. Some aftermarket parts use lower quality materials. They snap more easily than original equipment. This is why handle failure sometimes happens quickly after repair.
Understanding these causes helps you prevent future problems. Avoid lifting your wheel by the handle. Keep the assembly tight and clean. Secure your unicycle properly during transport. These simple steps extend your trolley handle’s lifespan significantly.
Signs Your Trolley Handle Needs Repair
Your trolley handle sends you clear warning signs before it completely fails. Catching these signals early means you can fix the problem before it gets worse.
Look for visible cracks or splits in the handle tubes. These often appear near the connection points where the handle meets the wheel base. Small fractures grow quickly with each ride, so don’t ignore them.
A loose or wobbly handle is another red flag. When you grab the handle and it moves side to side, the internal connection is already compromised. Gently shake the handle while the unicycle sits still. If you feel movement, repair time has arrived.
Listen for creaking sounds when you lift or push the wheel. This noise means the tubes are bending under stress. The material is starting to separate at the joints.
Check if the handle won’t stay in one position anymore. A handle that flips or swings freely isn’t holding its structural integrity. This happens when internal screws loosen or tubes begin to crack.
Inspect the screws regularly. If you notice screws becoming loose after short rides, the handle assembly is weakening. Repeated tightening means the threads are wearing out.
Look at the handle’s connection points to the wheel base. Gaps or separation between parts signal damage. The handle should sit flush against the wheel without any visible space.
Feel for rough edges or splintering along the tubes. These indicate material fatigue. Sharp edges can also cut your hands during use.
Pay attention to any bending that seems permanent. A handle that doesn’t return to its original shape after flexing needs immediate attention. This means the material has lost its strength and will snap soon.
Tools and Replacement Parts You’ll Need
Before you start fixing your snapped trolley handle, gather the right tools and parts. Having everything ready makes the job faster and smoother.
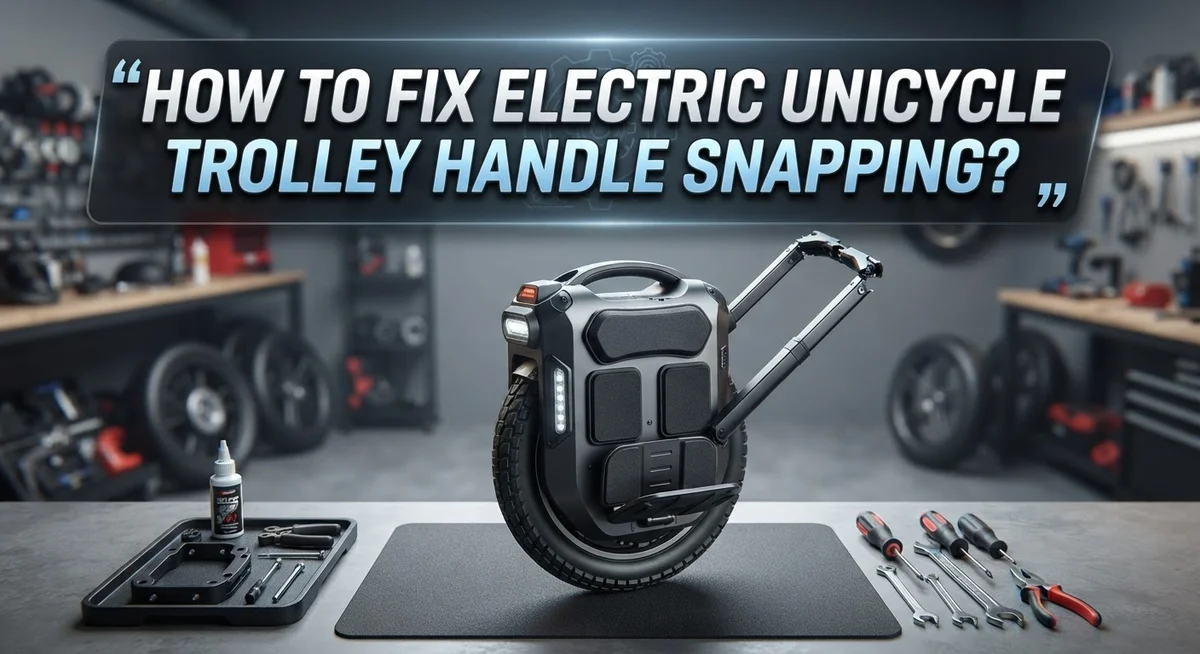
You will need basic hand tools to remove the old handle. A screwdriver set with both Phillips and flat head options works well. Most unicycle handles use standard screws that these tools handle easily. Keep a wrench or adjustable wrench nearby in case you need to loosen bolts around the handle assembly.
Lubricant makes a big difference when sliding tubes in and out. Any general purpose lubricant works fine for this task. It reduces friction and prevents the tubes from getting stuck during removal or installation. Apply it generously to the tubes before you try to slide them through the bottom opening.
The main replacement part you need is the trolley handle poles themselves. These are the metal tubes that form the handle structure. Order the correct size and style that matches your unicycle model. Replacement poles come as a set, so you get both tubes at once.
A hose clamp is worth having on hand as a backup option. If screws won’t tighten properly after reassembly, a hose clamp can hold things temporarily while you source new fasteners. This prevents your handle from moving around while you find permanent solutions.
Clean rags are essential for wiping away dirt and old lubricant. Dirty connections make reassembly harder and can hide damage you need to see. A clean workspace also helps you spot small parts that might fall during the repair.
Finally, keep your old handle parts nearby during the job. Comparing them to new parts helps you install everything correctly and ensures proper alignment.
Step-by-Step Guide to Fixing a Snapped Trolley Handle
Start by removing power from your electric unicycle. This keeps you safe while you work on the handle.
Next, locate all the screws holding the trolley handle assembly together. Most handles have screws at the connection points where the poles meet the wheel base. Remove these screws carefully and set them aside in a small container so you don’t lose them.
Once the screws are out, you can separate the handle top from the poles. Gently bend or flex the handle tubes to slide them through the bottom opening of the wheel shell. This step requires patience because the tubes fit snugly.
Apply lubricant to the tubes before sliding them out completely. This reduces friction and prevents additional damage. Slide the old tubes all the way through until they’re free from the wheel base.
Now insert your replacement trolley handle poles into the bottom opening. Use the same lubricant to help them slide smoothly into position. Make sure both tubes go in straight and align properly with the attachment points.
Reattach the handle top by lining it up with the tubes. Insert all the screws back into their original holes. Tighten each screw firmly, but don’t overtighten them as this can strip the threads.
If you need to access the handle straps, open the shell sides carefully. This lets you inspect the internal connections and ensure everything sits correctly.
Finally, test the handle by gently pushing and pulling it. It should feel solid with no wobbling or movement. If screws still won’t tighten properly, a hose clamp provides a temporary solution until you can replace the fasteners.
Accessing Internal Straps and Shell Components
When your trolley handle snaps, you need to access the internal components to complete a proper repair. The process starts with understanding how the handle assembly connects to your electric unicycle.
Remove the exterior screws first. These fasteners hold the handle top in place. You’ll typically find them on both sides where the handle meets the wheel base. Keep these screws in a safe location since you’ll reuse them later.
Once the screws are out, the handle top separates from the poles. This gives you access to the tubes that run through the interior of your wheel. The tubes slide through a bottom opening in the shell, so you need to bend them slightly to remove them completely.
Open the shell sides if you need to reach the internal straps. These straps support the handle assembly from inside. They may have become loose or damaged along with the snapped handle. Work carefully when opening the shell to avoid breaking other components.
The internal straps connect the handle poles to the wheel’s structural frame. If these straps are torn or detached, your replacement handle won’t function properly. Inspect them closely before reassembling everything.
Apply lubricant to the replacement tubes before sliding them back through the bottom opening. This step prevents friction damage and makes installation much easier. Line up the new tubes with the handle top carefully.
Reattach all screws securely once everything is in position. Tighten them evenly to keep the handle balanced. Test the handle gently by pushing and pulling it to ensure proper alignment and function before using your unicycle again.
Helpful Tips for a Smooth Repair Process
When your trolley handle snaps, avoiding common mistakes during repair makes all the difference. The most critical error people make is lifting or carrying their electric unicycle by the trolley handle. This handle simply isn’t designed to support the wheel’s full weight. The stress from carrying your unicycle this way causes micro fractures long before a complete snap occurs.
Another frequent mistake happens during crashes. If your trolley handle flips freely when you fall, the impact multiplies the damage. Try to protect the handle during any tumble by keeping your wheel upright whenever possible.
Many people rush through the tube insertion step. Skipping lubricant application causes the replacement poles to stick or bind inside the housing. This can crack your new handle before you even finish the repair. Always apply lubricant generously before sliding tubes in and out.
Don’t overtighten screws when reassembling your handle. Excessive force strips the threading and makes future repairs harder. Tighten each screw firmly, then stop. If a screw won’t hold because the threading is damaged, a hose clamp can temporarily secure the handle assembly until you replace the damaged component.
Some people forget to test the handle after repair. Gently push and pull your new handle in all directions before using your unicycle. This catches any loose connections you might have missed.
Finally, avoid reusing old handle poles if they’re bent or cracked. Damaged tubes fail again quickly and create safety hazards. Invest in proper replacement parts to ensure your repair lasts. Taking time with each step prevents frustration and keeps your unicycle safe to ride.
Common Mistakes That Cause Recurring Damage
Many people damage their electric unicycle trolley handle repeatedly because they make the same mistakes over and over. Understanding these errors helps you avoid expensive replacements and keeps your wheel in good condition.
The biggest mistake is lifting or carrying your unicycle by the trolley handle. People think the handle can support the full weight of the wheel, but it simply cannot. The handle poles are designed for steering and balance during riding, not for bearing heavy loads. When you grab the handle and lift, you create stress fractures inside the tubes. These small cracks grow larger each time you repeat this action, eventually causing a complete snap.
Another common error involves how people handle crashes. When your unicycle tips over, the trolley handle often flips freely and smashes into the ground. Many riders don’t brace the handle or try to protect it during falls. This repeated impact weakens the poles gradually until they break. Learning to fall safely and protecting your handle during crashes prevents this damage.
Some people also rush through repairs and skip important steps. They forget to apply lubricant when sliding replacement tubes into position. Dry tubes stick and bind, making installation harder and risking damage to new parts. Others overtighten screws during reassembly, which puts extra pressure on the handle assembly and causes new stress points.
Not testing the handle after repair is another frequent mistake. You should gently push and pull your handle after fixing it to confirm everything works properly. This catches any problems before you ride again.
Finally, people reuse bent or cracked handle poles instead of replacing them. Old damaged poles fail quickly, forcing you to repair the same issue within days or weeks. Always install fresh replacement parts for lasting results.
Troubleshooting Post-Repair Issues
After you repair your electric unicycle trolley handle, new problems can pop up. These issues happen when the repair wasn’t done correctly or when you use the wheel the same way as before.
Your handle might feel loose even after you tighten all the screws. This occurs when the replacement poles don’t sit flush against the handle top. Check that both tubes slide all the way through the bottom opening. If they stop halfway, apply more lubricant and push them through completely. The screws need something solid to grip.
Sometimes the handle still wobbles side to side after repair. This means the internal straps aren’t holding the poles tight enough. Open the shell sides again and inspect where the straps connect to the frame. Make sure the straps are pulled taut and secured properly.
Another issue is the handle cracking at the same spot again. This happens because you’re using the wheel the way that caused the original break. Never lift or carry your unicycle by the trolley handle. The poles can’t support that weight. Always carry the wheel by the rim or use both hands on the frame.
If screws won’t tighten properly, the holes might be stripped. A hose clamp wrapped around the poles can hold them temporarily while you figure out a permanent fix.
Test your handle carefully after repair. Push down gently and pull up slowly. The handle should move smoothly without any cracks appearing. If you notice any movement in the poles themselves, the repair needs adjustment before you ride again.
Final Thoughts
Fixing a snapped trolley handle on your electric unicycle is a manageable task. You don’t need advanced tools or special skills. Patience and careful steps get the job done right.
The whole process comes down to three things: proper disassembly, correct tube replacement, and secure reassembly. Skip any of these steps and problems will return quickly.
Remember that your trolley handle serves one purpose. It helps you roll your unicycle along the ground. It never supports the full weight of your wheel during lifting or carrying.
This single habit change prevents most future breakages. Treat your handle gently and it will last much longer.
Quality parts also matter for long term success. Cheap or mismatched replacement poles often fail again within weeks. Choosing sturdy tubes that match your wheel’s original specs saves you time and frustration later.
Take your time during each repair stage. Rushing leads to stripped screws, loose fittings, and wobbly handles. A slow, careful approach always beats a fast, sloppy one.
After finishing your repair, always test the handle thoroughly. Push it, pull it, and roll your wheel across different surfaces. This simple check confirms your fix actually holds up.
If problems persist after multiple attempts, consider seeking help from a professional repair shop. Some structural damage goes beyond simple pole replacement. A trained technician can spot issues you might miss.
Your electric unicycle deserves proper care beyond just the handle. Regular maintenance checks on screws, straps, and joints prevent many issues before they start.
A well maintained trolley handle makes transporting your unicycle much easier. Follow these steps, avoid common mistakes, and your handle should serve you reliably for a long time ahead.
Frequently Asked Questions
Why does my trolley handle keep breaking at the same spot?
Handles snap repeatedly when you lift or carry your unicycle by the handle itself. The handle poles aren’t designed to support the wheel’s full weight. Each time you use it this way, stress fractures grow deeper. Eventually, the weakened area snaps completely.
Use the handle only for steering and balance during rides. Carry your unicycle by the wheel rim or frame instead. This single change stops most recurring breaks.
Can I temporarily fix a snapped handle with a hose clamp?
Yes. A hose clamp works as a quick temporary solution if screws won’t retighten. Wrap it around the broken area and tighten it securely. This buys you time before you perform a full repair.
However, temporary fixes don’t last long. You should still replace the handle poles soon. Riding with a compromised handle risks another failure during use.
What should I do if the handle feels loose after I reassemble it?
Check all screws and tighten them firmly. Sometimes holes become stripped during removal, preventing screws from holding tight. If a screw spins without tightening, that hole is damaged.
Apply steady pressure when tightening. Don’t overtighten, as this can crack the plastic shell. If the handle still wobbles after tightening all screws, the replacement poles may be bent. Inspect them for damage and replace them if needed.
Do I need special tools to replace the handle poles?
No special tools are required. You need a screwdriver to remove the handle assembly. Lubricant helps the new poles slide through the bottom opening smoothly.
The replacement process is straightforward. Most riders complete it in 20 to 30 minutes.