How To Fix Portable Espresso Maker Portafilter Gasket Blowing Out?
You press the button and hear that hiss. Then coffee sprays everywhere instead of flowing into your cup. Your portafilter gasket just blew out, and it’s messy.
This problem happens to almost every portable espresso maker owner at some point. The good news? It’s usually a quick fix, not a sign your machine is broken.
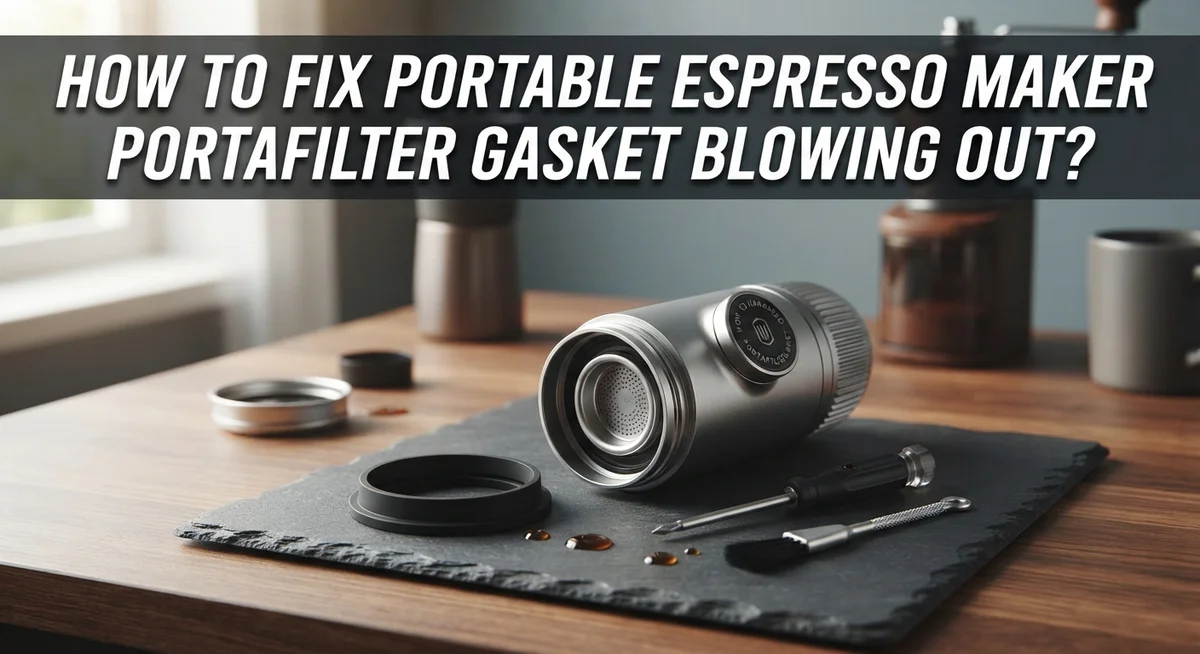
A gasket blowout means the seal between your portafilter and group head failed under pressure. Water and coffee escape instead of brewing properly. This can happen from a loose gasket, worn rubber, trapped coffee grounds, or a portafilter that isn’t locked in right.
In a Nutshell
- The fix is simple. Unscrew the shower screen, remove the gasket fully, then reinsert it correctly before reassembling.
- Most blowouts come from a loose gasket. It sits improperly between the portafilter and group head, so pressure escapes instead of pushing through the coffee.
- Coffee grounds are sneaky culprits. Bits of grounds can wedge into the gasket and break the seal, even if the gasket itself looks fine.
- Always lock your portafilter firmly. A crooked or loose fit is often mistaken for a technique problem when it’s really an alignment issue.
- Worn gaskets need replacing, not cleaning. If the gasket looks cracked or doesn’t sit snug anymore, cleaning won’t help. Swap it out.
- Grind size and dose matter too. Sometimes reducing your coffee dose by half a gram eases pressure buildup and stops future blowouts.
What Causes a Portafilter Gasket to Blow Out
A portafilter gasket blows out when the seal between your portafilter and group head fails under brewing pressure. This happens because the gasket can no longer hold back the water and coffee grounds, so they spray out instead of flowing smoothly into your cup.
Several things cause this problem. Loose gaskets are the most common culprit. If the gasket isn’t seated correctly in the group head, it won’t create a tight seal. Even a small gap lets pressure escape, forcing coffee out sideways.
Worn gaskets also fail frequently. Gaskets degrade over time from heat, pressure, and repeated use. When rubber becomes cracked, flattened, or loses its springiness, it can’t compress properly to form a seal anymore.
Coffee grounds contaminate gaskets surprisingly often. Tiny bits of grounds wedge into the gasket material and create small holes or gaps. These openings let pressurized water escape during brewing.
Improper portafilter alignment causes blowouts too. If your portafilter doesn’t lock firmly into the group head, the gasket won’t sit evenly against the shower screen. Crooked insertion or a loose lock prevents proper contact.
Excessive pressure from too much coffee or tamping too hard can also blow out gaskets. When you pack more grounds than the portafilter holds, or tamp with too much force, the pressure becomes too intense for the gasket to handle.
Understanding these causes helps you fix the problem quickly. Most blowouts result from loose or dirty gaskets, which you can fix in minutes. Others point to wear that requires replacement. Knowing which cause applies to your situation saves time and frustration.
Signs You’re Dealing With a Gasket Seal Problem
When your portable espresso maker shoots coffee everywhere instead of brewing smoothly, you’re likely seeing a gasket seal problem. Let’s look at the actual signs that tell you this is happening.
Watch for sudden pressure release. If you hear a loud hiss and coffee sprays out sideways or upward, your gasket isn’t sealing properly. This happens instantly when you start brewing, not gradually.
Check if coffee leaks from the sides. A working gasket keeps all water pressure directed downward through the coffee grounds. When you see liquid escaping around the portafilter edges, the gasket has lost its grip.
Notice if your portafilter feels loose. Try twisting it gently in the group head before brewing. A gasket problem often means the portafilter doesn’t lock down firmly or sits at an odd angle. It should feel snug and centered.
Look for weak espresso output. If pressure escapes through a failing gasket, less water actually reaches your coffee. Your shot comes out thin and fast instead of rich and steady.
Examine the gasket itself. Remove your portafilter and look at the rubber ring. You might see visible cracks, flat spots, or areas where the rubber looks dried out and hard. Sometimes coffee grounds stick to it or sit wedged inside the groove.
Test by pulling a blank shot. Run water through without coffee in the basket. If water still sprays out the sides, your gasket is definitely the culprit. This simple test confirms whether you’re dealing with a seal issue or a different brewing problem.
These signs point clearly to gasket trouble. Once you spot them, fixing the problem becomes straightforward.
The 5-Minute Quick Fix: Removing and Reseating the Gasket
The 5 minute quick fix works for most gasket blowouts. You need just your hands and maybe a small tool to unscrew the shower screen.
Start by turning off your espresso maker and letting it cool slightly. Safety matters here since you’ll be working with the group head. Wait about 2 to 3 minutes if the machine was recently used.
Locate the shower screen above the gasket. This is the flat metal piece with small holes that distributes water. Unscrew it carefully by turning counterclockwise. Most shower screens twist out by hand, though some need a small wrench. Set it aside on a clean surface.
Now you can see the gasket sitting in the group head. It looks like a rubber ring, usually black or white. Grab it firmly and pull straight out. Don’t worry about being rough here. The gasket is durable and won’t break from normal removal.
Inspect the gasket quickly. Look for visible cracks, hardened spots, or debris stuck to it. Wipe it clean with a dry cloth if you see coffee residue or grounds. This simple cleaning solves many blowouts.
Reinsert the gasket into the group head. Push it down firmly until it sits flush and level. It should fit snugly with no gaps or tilting. The gasket must sit evenly all the way around the circular opening.
Screw the shower screen back on by turning clockwise. Hand tighten it until snug. Don’t over tighten or you’ll damage the threads.
Test your portafilter fit. Insert it and lock it firmly. It should feel solid with no wiggling. Your gasket is now reseated and ready for brewing.
Step-by-Step: Disassembling Your Portable Espresso Maker Safely
Disassembling your portable espresso maker safely starts with one critical step: turn off the machine and let it cool completely. Hot components can burn you, and pressure inside the group head can cause injury.
Once cooled, locate the shower screen. This is the perforated metal piece sitting directly above your gasket. Grip it firmly and turn counterclockwise to unscrew it. Don’t force it. If resistance builds, wait a few more minutes for the machine to cool further.
With the shower screen removed, you now see the gasket clearly. It looks like a rubber ring sitting in the group head. Take a photo before removing anything. This helps you remember the exact position and orientation when reassembling.
Use your fingers or a small plastic tool to gently lift the gasket out. Avoid metal tools that scratch the group head. Place the gasket on a clean cloth.
Inspect the group head cavity where the gasket sits. Look for coffee grounds, mineral deposits, or debris. Wipe this area clean with a damp cloth. This space must be spotless for proper gasket seating.
Examine the gasket itself closely. Check for cracks, tears, flattening, or discoloration. A healthy gasket feels slightly firm and flexible. If it feels hard or brittle, replacement is needed.
Before reassembling, verify that your portafilter basket sits level in the group head. Tilt it gently side to side. It should feel stable without wobbling.
Now you’re ready to reseat the gasket properly. This simple disassembly process takes just a few minutes and reveals whether cleaning or replacement will solve your blowout problem.
Adjusting Grind Size, Dose, and Tamping to Reduce Pressure Buildup
Pressure buildup inside your portable espresso maker forces the gasket out. You can reduce this pressure by adjusting three key factors: grind size, coffee dose, and tamping technique.
Grind size directly affects water flow through coffee. A fine grind creates more resistance. Water builds up pressure as it struggles to pass through. Switch to a slightly coarser grind. This allows water to flow more freely. Less pressure means your gasket stays seated. Start with a medium grind and adjust from there.
Coffee dose means how much ground coffee you pack into the basket. More coffee creates more resistance to water pressure. The research shows reducing your dose by just 0.5 grams can help. Weigh your coffee before brewing. Gradually decrease the amount until pressure feels normal. Your espresso may taste different at first, but you’ll find the right balance.
Tamping pressure is how hard you press down on the coffee. Many people tamp too firmly. Hard tamping compresses the coffee bed. This stops water from flowing through smoothly. Pressure builds up quickly. Use light to medium pressure instead. Your hand should feel comfortable, not straining. Press straight down without twisting.
These three adjustments work together. A coarser grind plus lighter tamping plus reduced dose creates a much gentler pressure environment. Your gasket experiences less force pushing it out.
Start by changing one factor at a time. Brew a shot and observe what happens. If pressure still seems high, adjust the next factor. This step by step approach helps you find the sweet spot. Your gasket will stay in place, and you’ll get better espresso shots too.
Cleaning and Maintaining the Gasket to Prevent Future Blowouts
Regular cleaning keeps your gasket working properly and prevents future blowouts. Coffee grounds and oils build up on the gasket surface over time. This buildup weakens the seal between your portafilter and group head.
After each brewing session, wipe the gasket with a dry cloth. Remove any visible coffee residue from the rubber surface. This simple step takes just 30 seconds and makes a big difference.
Once a week, soak your gasket in hot water for 10 minutes. Use plain water or add a small amount of cleaning powder made for espresso equipment. This removes oils that dry cloth alone cannot lift away. Gently rub the gasket with your fingers under running water. Pat it dry completely before reinstalling.
Check the gasket regularly for cracks or hardening. Press your finger gently against the rubber. It should feel soft and flexible, not stiff or brittle. A gasket that feels hard has likely degraded and needs replacement soon.
Inspect the group head cavity where the gasket sits. Wipe away any coffee grounds or scale buildup inside this space. Use a small brush or cloth to clean the groove thoroughly. A clean cavity helps the gasket seat properly every time.
Store your gasket in a cool, dry place when not using your espresso maker. Extreme heat or direct sunlight damages rubber over time. Keep it away from sharp objects that could puncture or tear the surface.
Proper storage and regular cleaning extend gasket life significantly. You’ll notice fewer blowouts and more consistent espresso shots. These habits take minimal effort but deliver reliable results for months of trouble-free brewing.
Knowing When It’s Time to Replace the Gasket
Your gasket shows clear signs it needs replacement when certain conditions develop. The most obvious indicator is visible wear on the rubber surface. Look for cracks, tears, or hardened sections that don’t bounce back when you press them gently.
A gasket that no longer fits properly in the group head cavity signals replacement time. You’ll notice it sits loose or shifts around when you insert the portafilter. This loose fit prevents a proper seal, which causes coffee to spray out during brewing.
Persistent blowouts after cleaning mean the gasket has reached the end of its life. If you’ve removed coffee grounds, reseated the gasket correctly, and adjusted your grind and tamping, but blowouts continue, replacement is necessary. Cleaning alone won’t restore a degraded gasket.
Test the gasket’s flexibility by pressing your finger against it. A healthy gasket springs back immediately. A worn gasket feels stiff or stays compressed. This loss of elasticity prevents it from creating a tight seal against the group head.
You should also replace the gasket if you’ve had your portable espresso maker for over a year with regular use. Even without visible damage, rubber degrades over time from heat exposure and pressure cycles.
The good news is that replacement gaskets are inexpensive and straightforward to install. You don’t need special tools or technical skills. Once you identify that your gasket needs replacing, the process takes just minutes. Most portable espresso makers use standard gasket sizes, making replacements easy to find and fit.
Common Mistakes to Avoid When Troubleshooting
Many people make critical errors when troubleshooting a portafilter gasket blowout. Understanding these mistakes helps you fix the problem faster and avoid damaging your portable espresso maker.
The biggest mistake is assuming pressure or technique is the culprit first. Most users jump to adjusting their grind, dose, or tamping without checking the gasket itself. A loose or improperly seated gasket causes blowouts instantly, regardless of your technique. Always inspect the gasket before making other changes.
Another common error is ignoring visible gasket damage. People see a worn or cracked gasket but continue brewing anyway. This wastes coffee and creates messy situations. If the gasket looks degraded, replacement is your only real solution.
Don’t skip the cleaning step during troubleshooting. Coffee grounds stuck to the gasket prevent a proper seal. Many users assume the gasket is defective when it simply needs cleaning. Remove the shower screen, take out the gasket completely, and rinse it thoroughly under running water.
Improper gasket reinsertion is another frequent mistake. After cleaning, people rush to reassemble without ensuring the gasket sits evenly in the group head cavity. The gasket must sit flat and centered. Take your time positioning it correctly before reattaching the portafilter.
Finally, avoid over tightening the portafilter when locking it in place. Excessive force doesn’t improve the seal and can actually damage the gasket over time. Lock the portafilter firmly but gently until you feel resistance.
These mistakes compound each other. Start with gasket inspection and cleaning. Only then adjust your brewing technique if blowouts continue.
Final Thoughts
A blown out gasket doesn’t mean your espresso maker is broken. Most times, it just needs a quick reset. Simple steps like removing and reseating the gasket fix the problem fast.
Think of gasket issues as a normal part of owning a portable espresso maker. Rubber parts wear down with regular use. This happens to every machine eventually.
The five minute fix works for most blowouts. Unscrew the shower screen, take out the gasket, and put it back correctly. This solves the issue more often than people expect.
Your gasket needs attention if problems continue after basic troubleshooting. Fresh gaskets seal properly and stop leaks right away. Old gaskets simply can’t hold pressure anymore.
Pay attention to how your portafilter locks into the group head. A firm, snug lock prevents many blowout issues before they start. This small habit saves you frustration during brewing.
Your grind size and tamping pressure also play a role. Small adjustments here often solve pressure problems that seem like gasket issues at first.
Remember that gaskets are small parts with a big job. They keep water flowing correctly through your machine. When they fail, your whole brewing process suffers.
Taking care of this one part keeps your espresso maker working well for a long time. Regular checks and quick fixes mean fewer interruptions to your coffee routine.
Trust the troubleshooting order. Check the gasket first, then look at other factors like grind or dose. This approach saves time and gets you back to enjoying great espresso faster.
With the right approach, gasket blowouts become minor bumps rather than major headaches. Your portable espresso maker can serve you well for years with proper gasket care.
Frequently Asked Questions
Why does my portafilter gasket keep blowing out?
A gasket blowout happens when the seal between your portafilter and group head breaks under pressure. Coffee and water spray out because the gasket isn’t sitting properly. The most common cause is a loose gasket that hasn’t been seated correctly in the group head cavity.
Coffee grounds can also get stuck around the gasket edges. This prevents a tight seal. Worn gaskets that have degraded over time lose their flexibility and fail to hold pressure properly.
Can I fix a gasket blowout myself?
Yes, you can fix most blowouts in about five minutes. First, unscrew the shower screen from your group head. Fully remove the gasket and inspect it for visible damage or debris.
Clean the gasket and the group head cavity with a dry cloth. Reinsert the gasket firmly, making sure it sits evenly in the groove. Reassemble your shower screen and test with your portafilter.
What should I check before replacing the gasket?
Before buying a replacement, verify that your portafilter locks firmly into the group head. A loose connection can mimic a gasket problem.
Check your tamping pressure and grind size too. Over tamping or using too fine a grind creates excessive pressure that forces the gasket out. Try reducing your coffee dose by half a gram to see if that helps.
How do I know when my gasket is truly worn out?
A gasket needs replacement when cleaning doesn’t stop the blowouts. Press your finger against the gasket to test its flexibility. If it feels hard or brittle, it’s time for a new one.
Visible cracks, tears, or permanent deformation mean replacement is necessary. Gaskets used regularly for over a year often need changing.